OneDrive Export
Overview:
Nanonets streamlines the process of exporting files or extracted data directly to your OneDrive. Once a file is processed and data extracted, it is automatically exported to the OneDrive, based on the configured export trigger in the export block. You can add multiple OneDrive Blocks in the export and export to different drives at the same time.
Use Case:
Dynamic File Naming:
- Use the extracted data to dynamically rename files before exporting. This export method is particularly useful for maintaining consistent file naming conventions. For example, files can be renamed using template variables such as {{invoice_id}} and {{buyer_name}}, which are automatically replaced with relevant data extracted from each processed document.
- Upload the extracted data as CSV, XML, or XLSX files to OneDrive. For example, if you are extracting a table from an invoice, you can export this data as CSV, XML, or XLSX files.
Steps to Set Up Export to OneDrive:
- Access Workflow:
- From the Nanonets Extract Data page, navigate to the 'Workflow' section via the left panel.
- Browse Export Options:
- Click on “Browse all export options” to see all supported export methods.
- Select "Export to OneDrive" from the list of options.
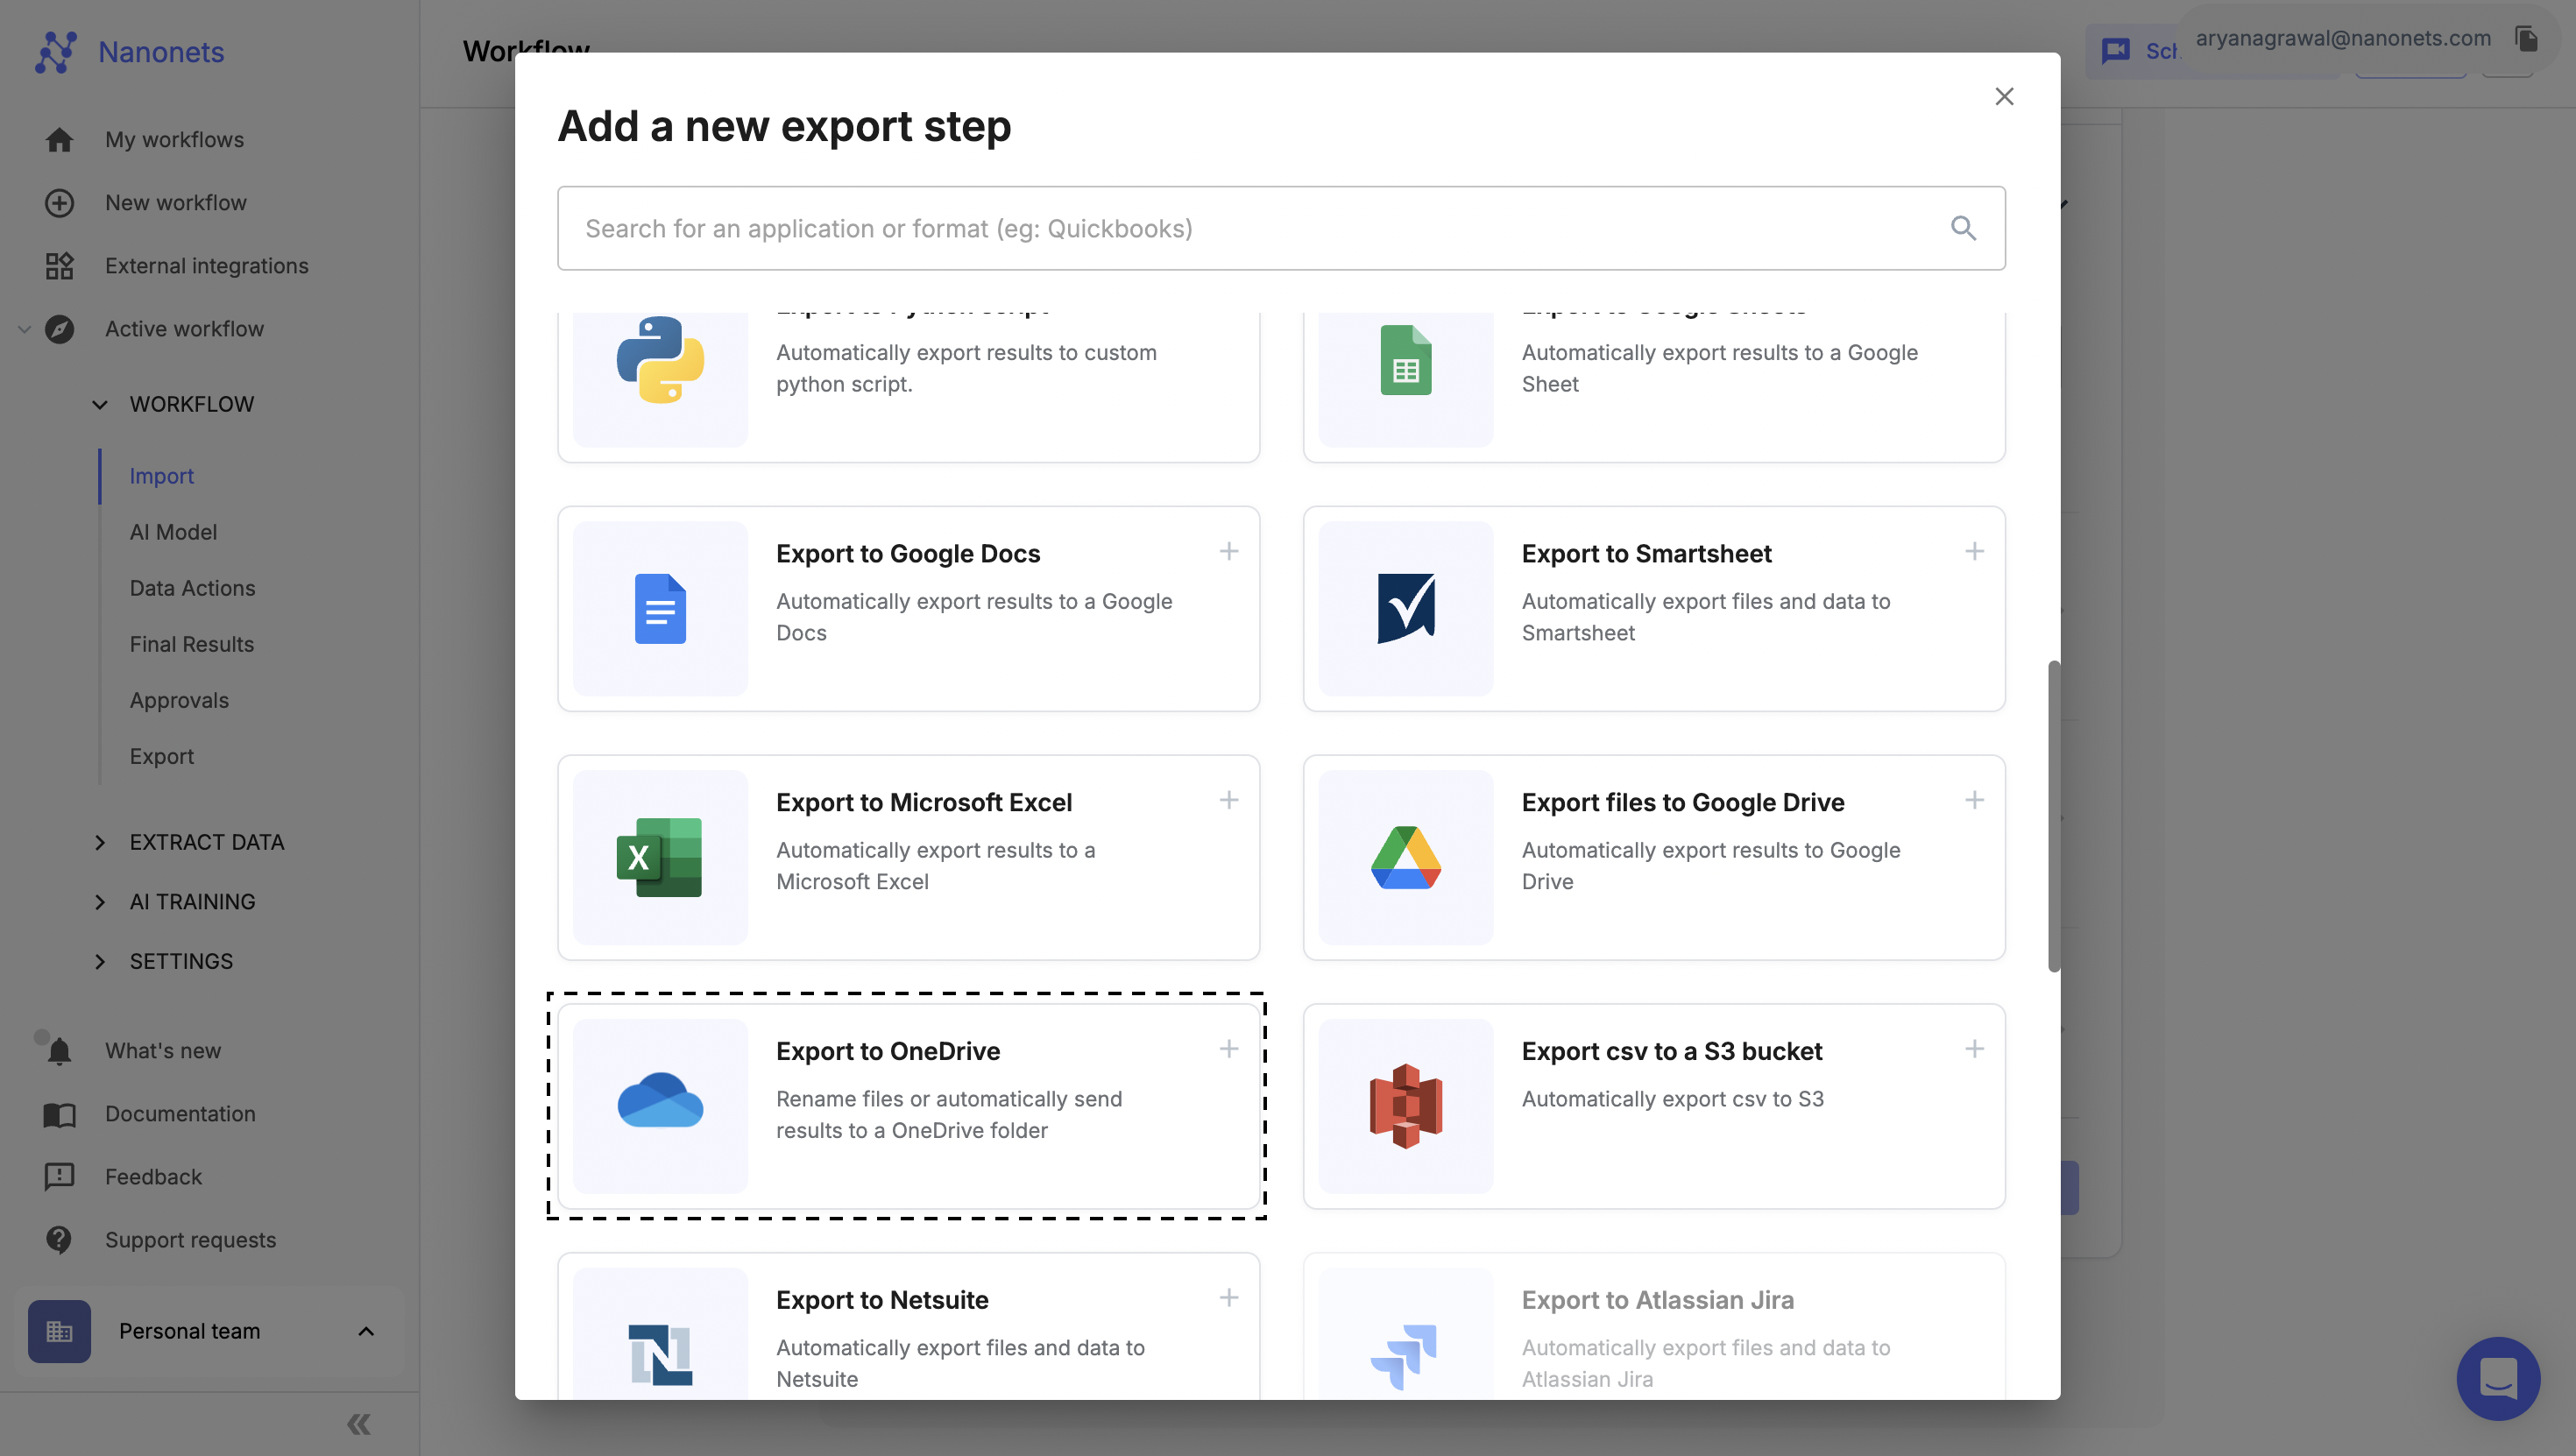
Export Options
- Connect Your OneDrive Account:
- Select “Connect your OneDrive Account” and authorize Nanonets to access your OneDrive.
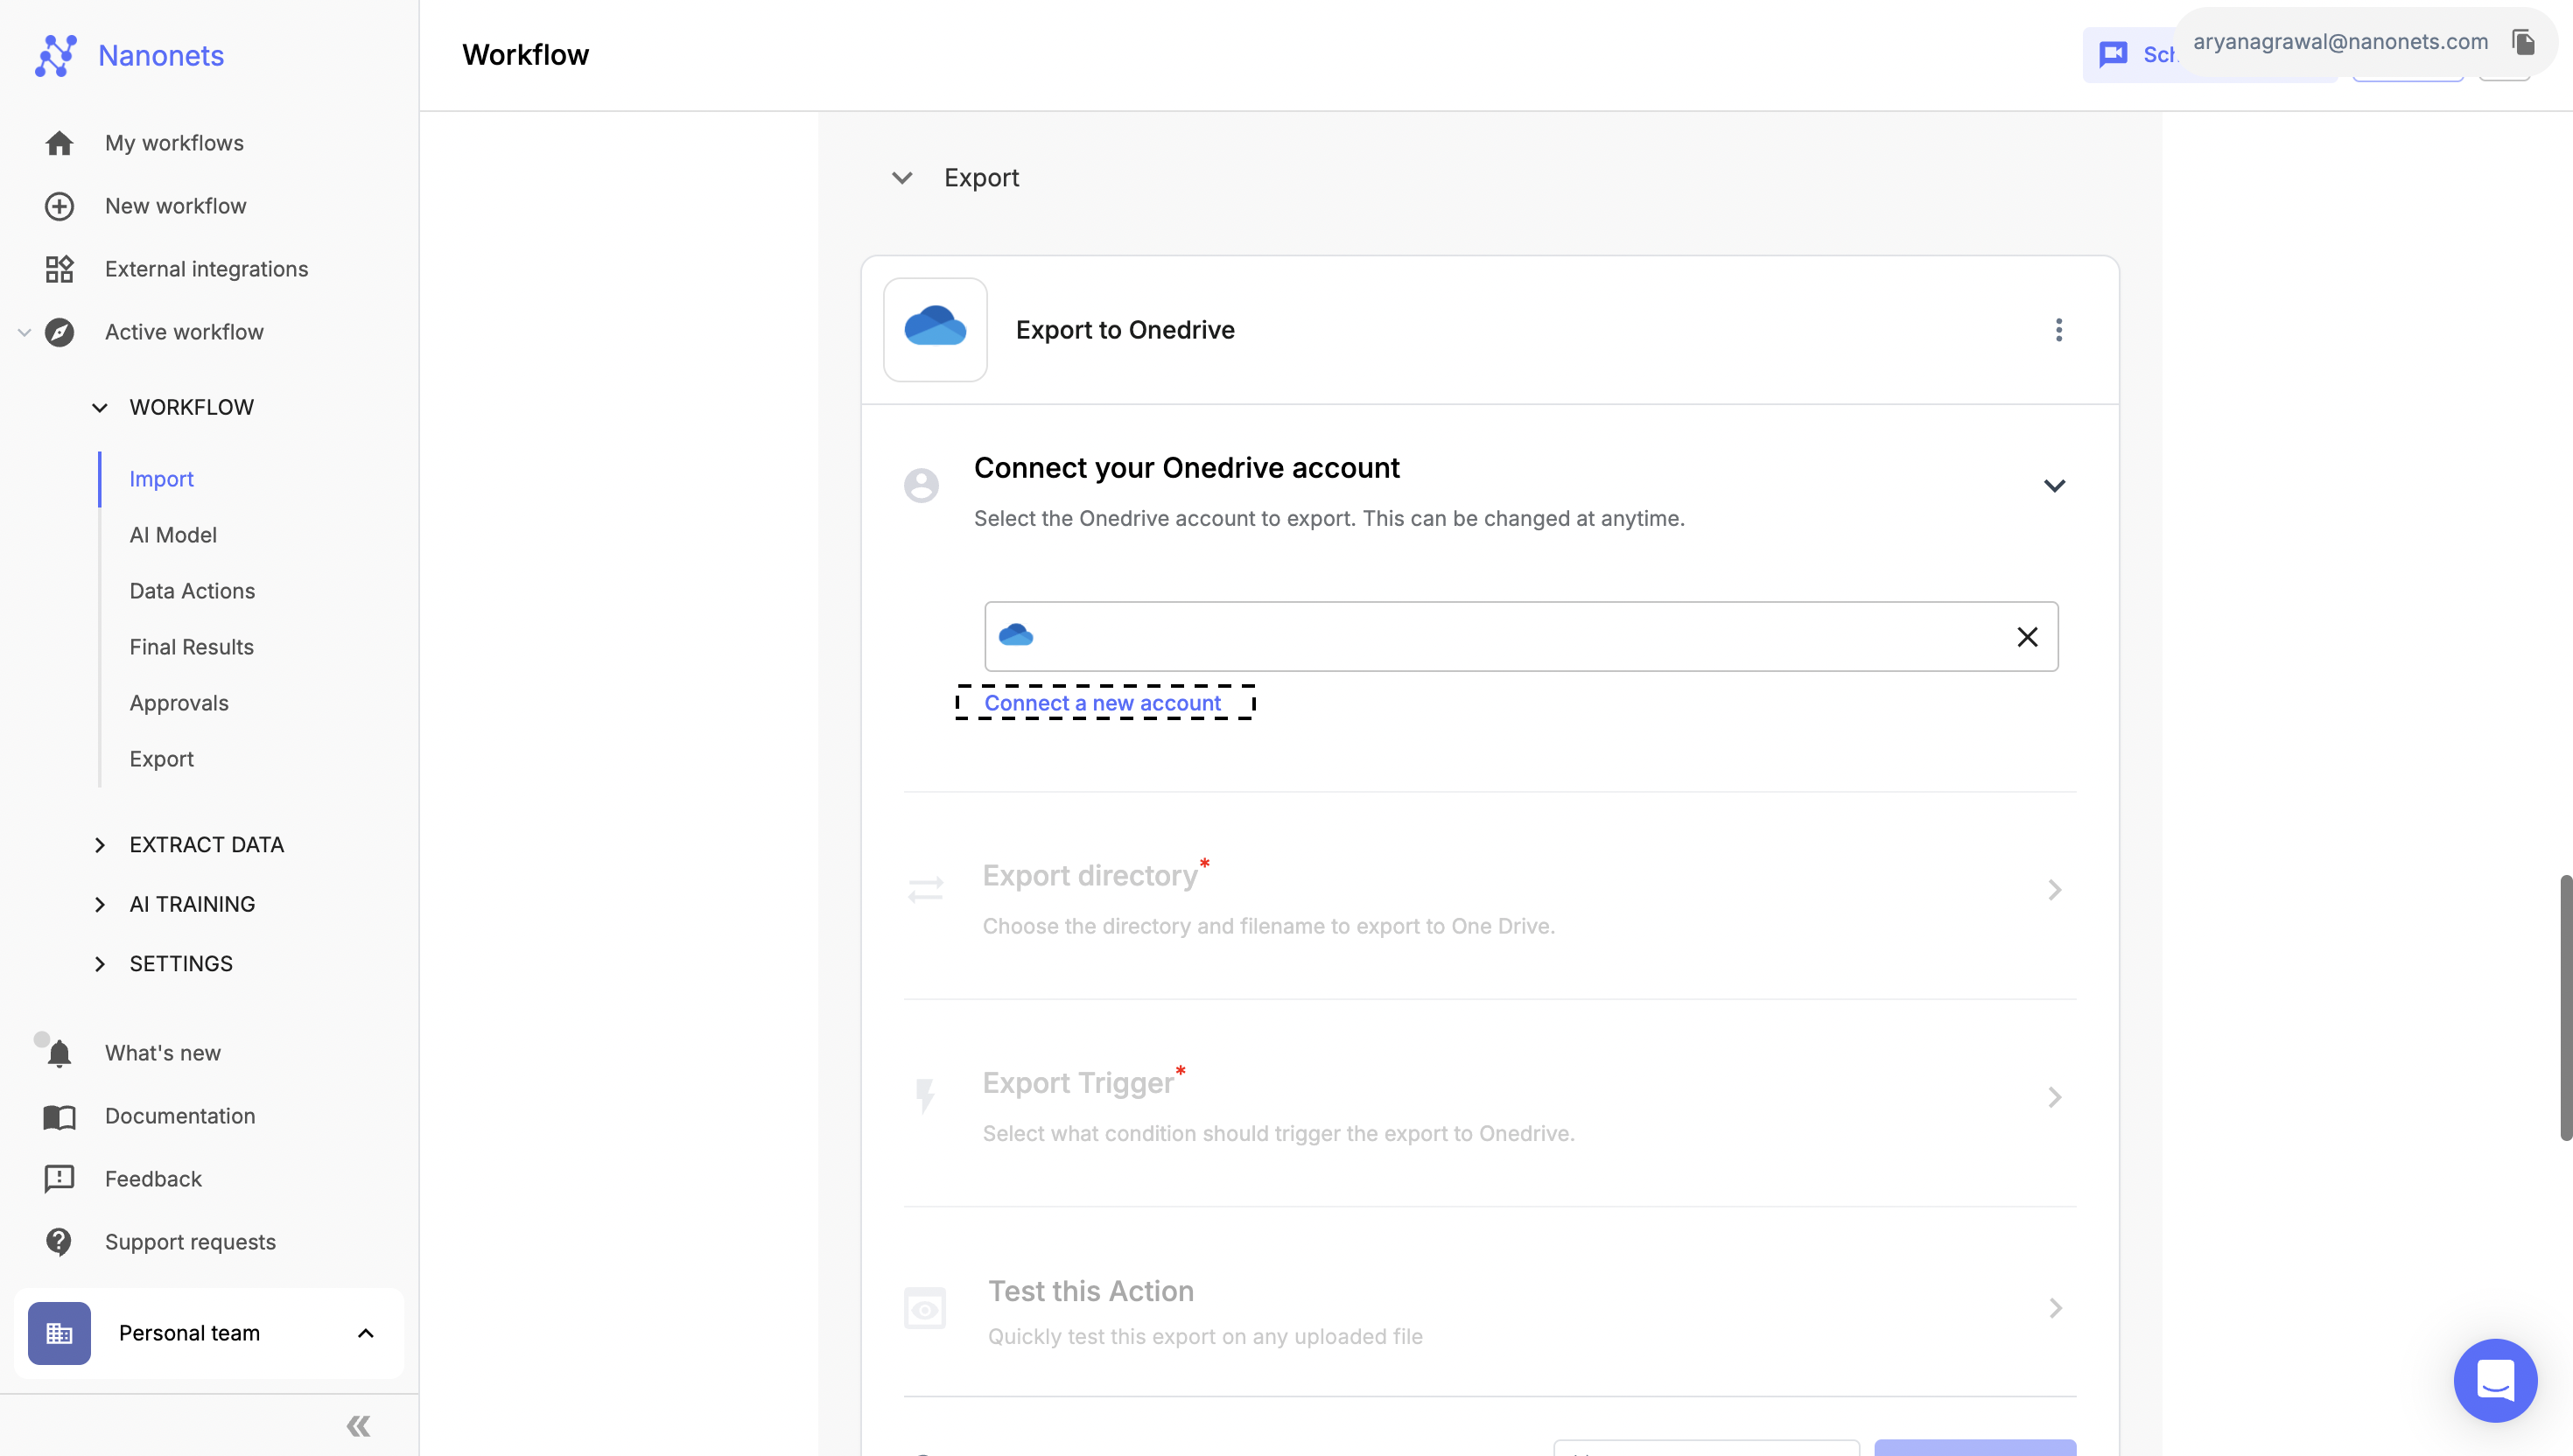
Connect Account
Exporting CSV/XML/XLSX:
If you want to export data to as CSV/XML/XLSX to a OneDrive.
- Type of Action: Select type of action triggered
- Select “Export captured data” option from the dropdown and using this you can export the captured data transform into a CSV/XML/XLSX to a OneDrive.
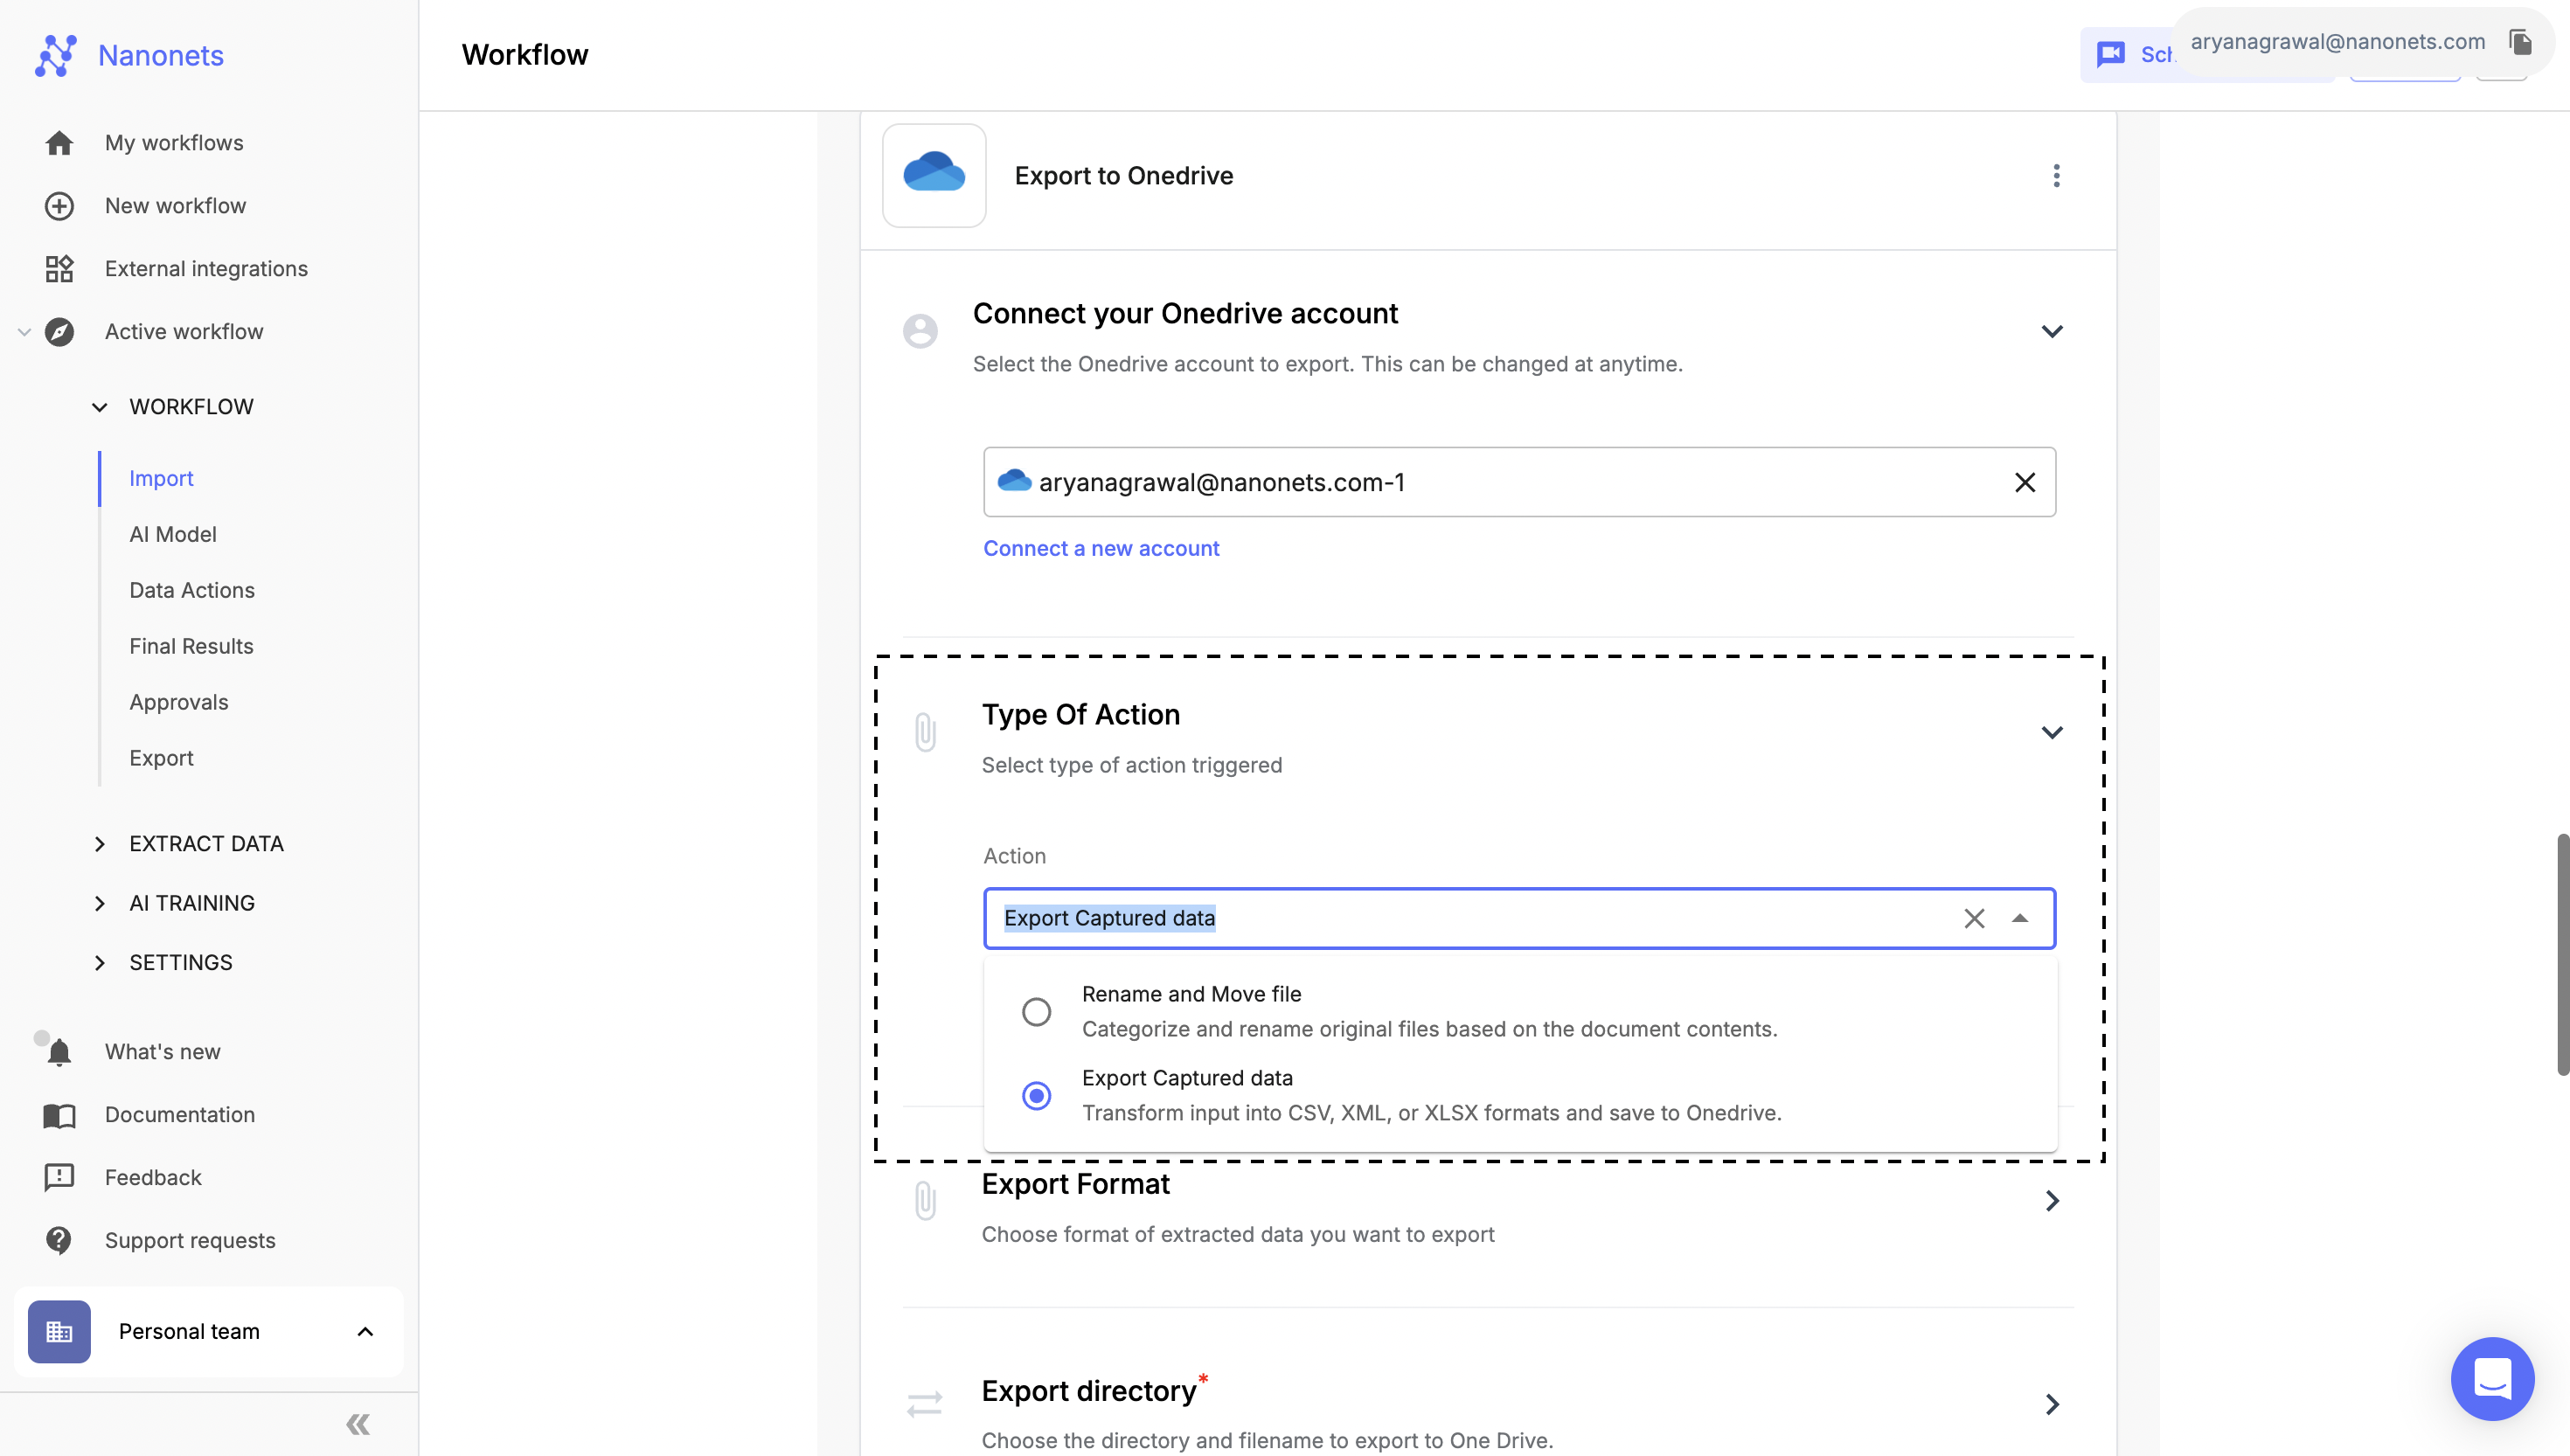
Actions
- Export Format:
- Select Export Type:
- Choose from the following file types: CSV per document, XML per document, MS Excel per document.
- You can create a new CSV/XML/XLSX for each exported file.
- Select Export Type:
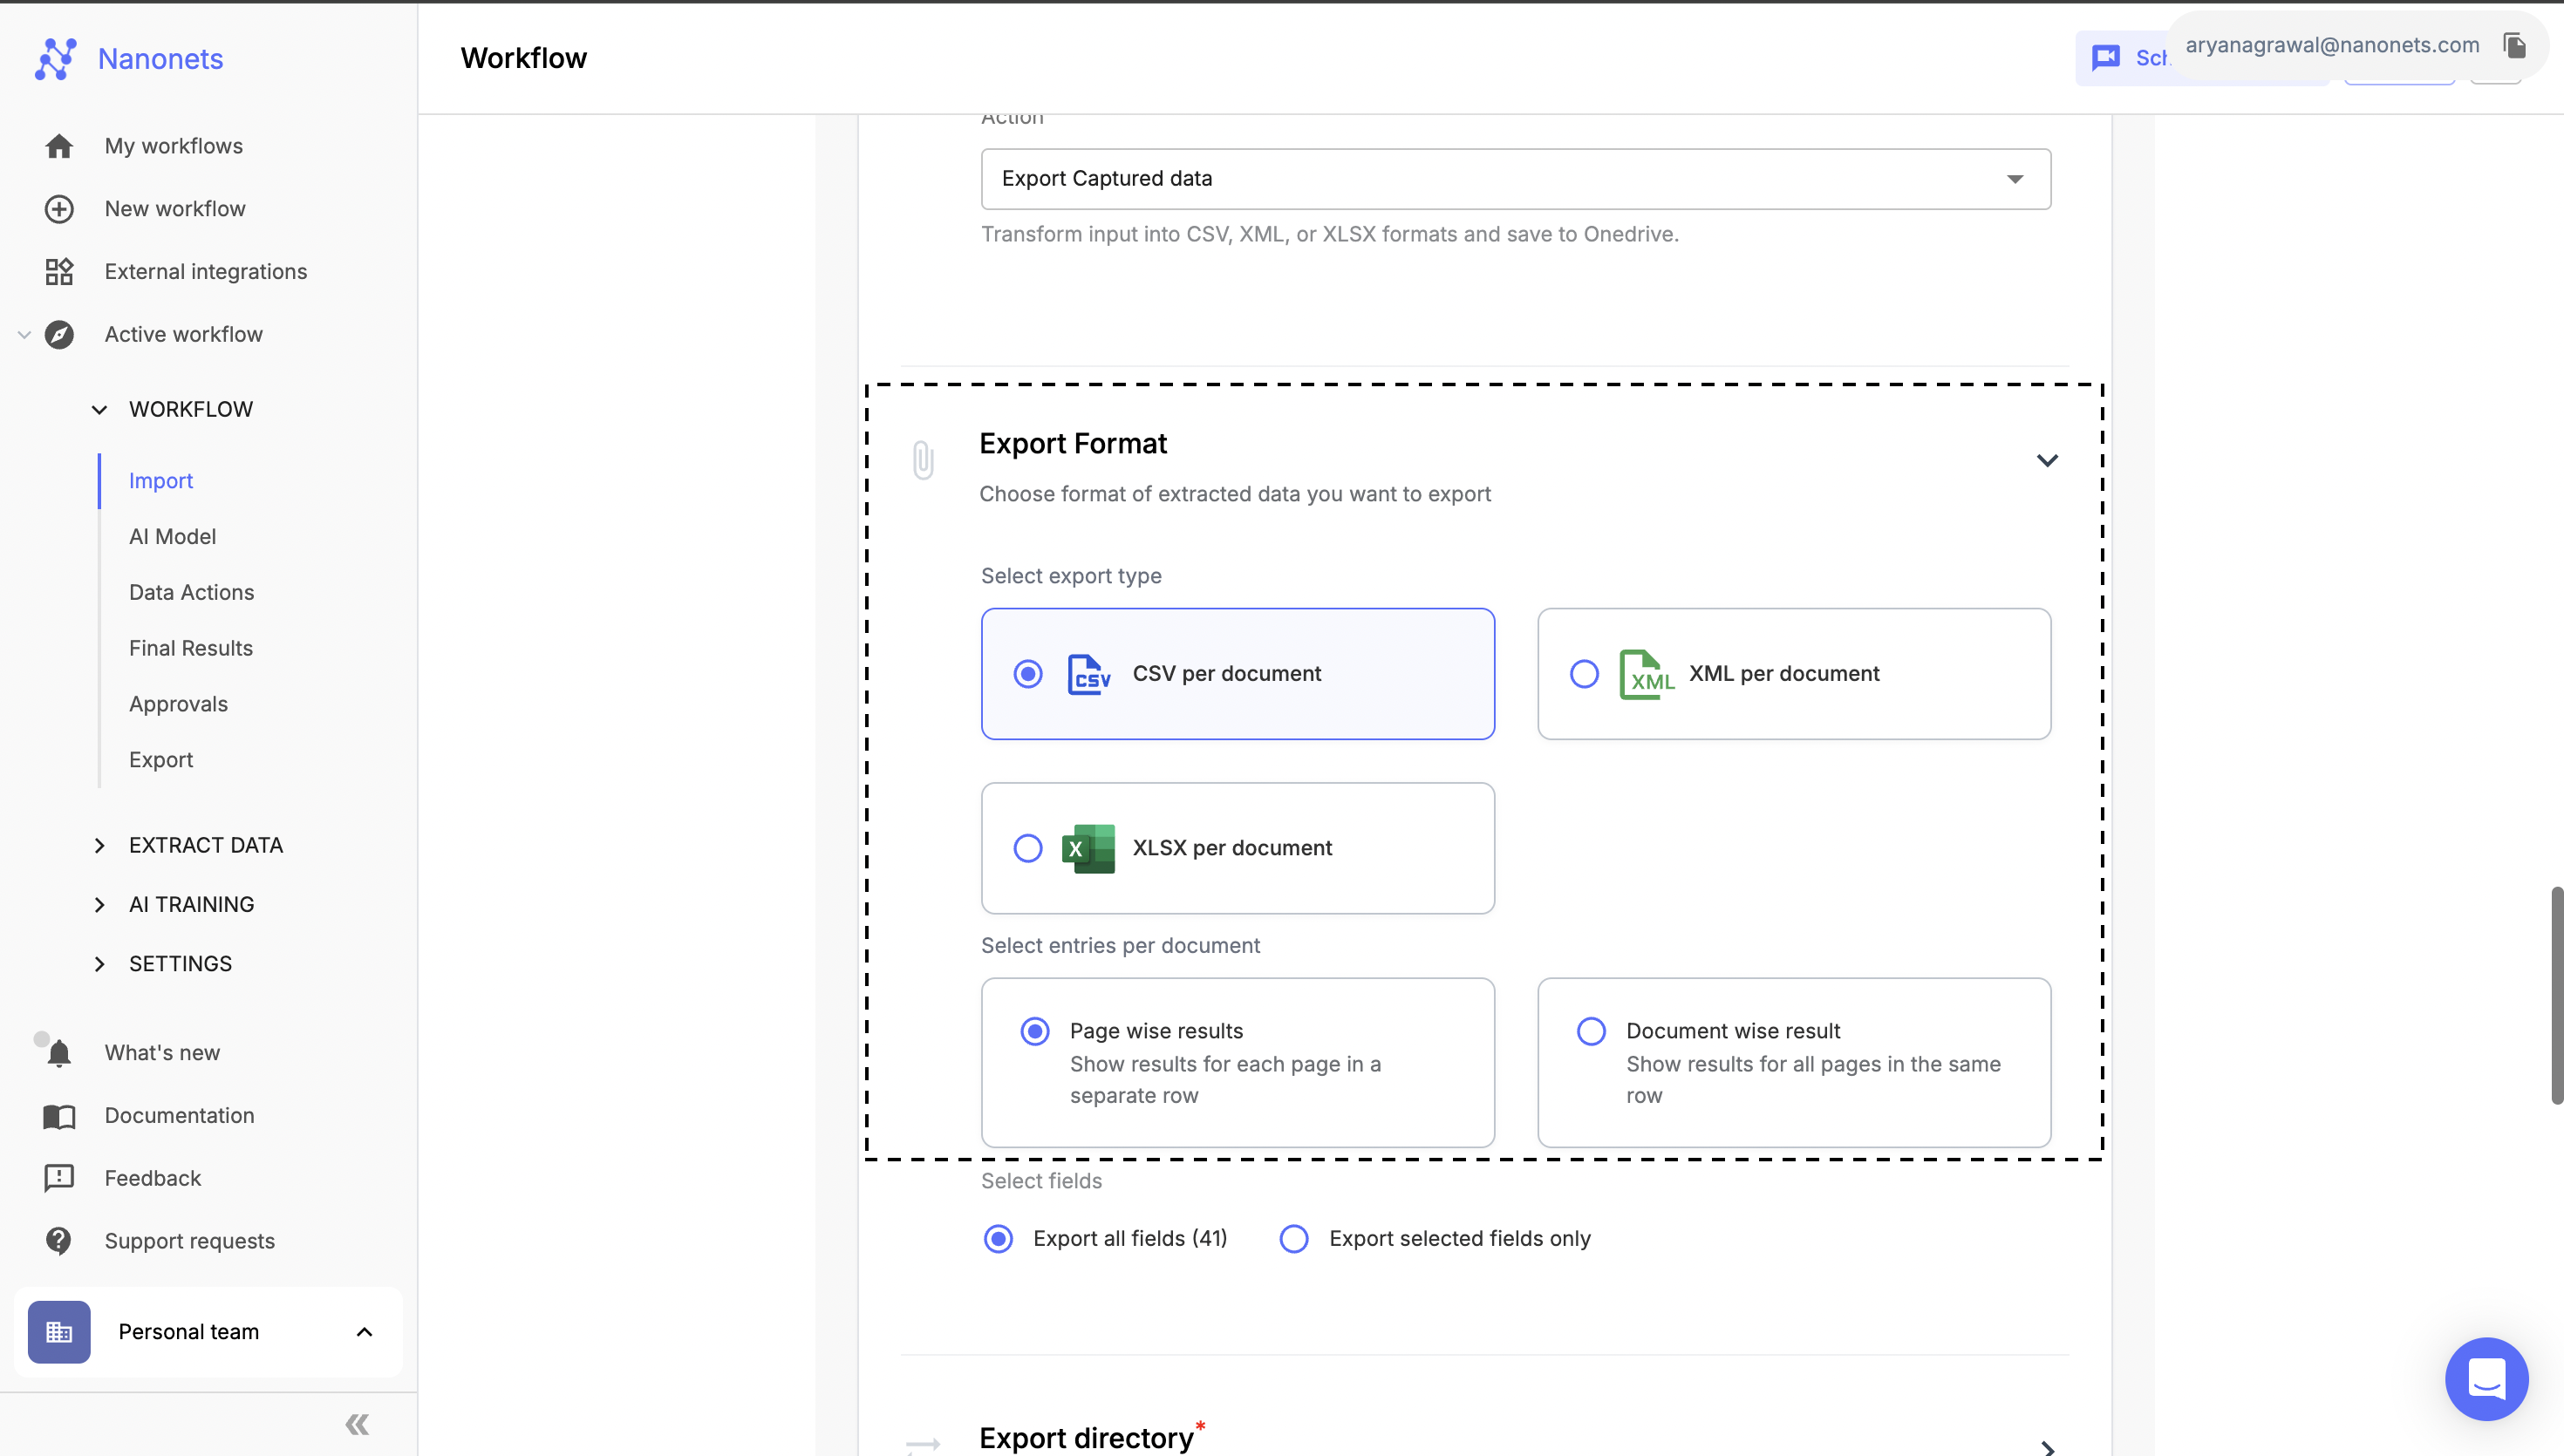
Export Format
- File Content Settings:
- Customize your export by selectively including or excluding fields in the exported data.
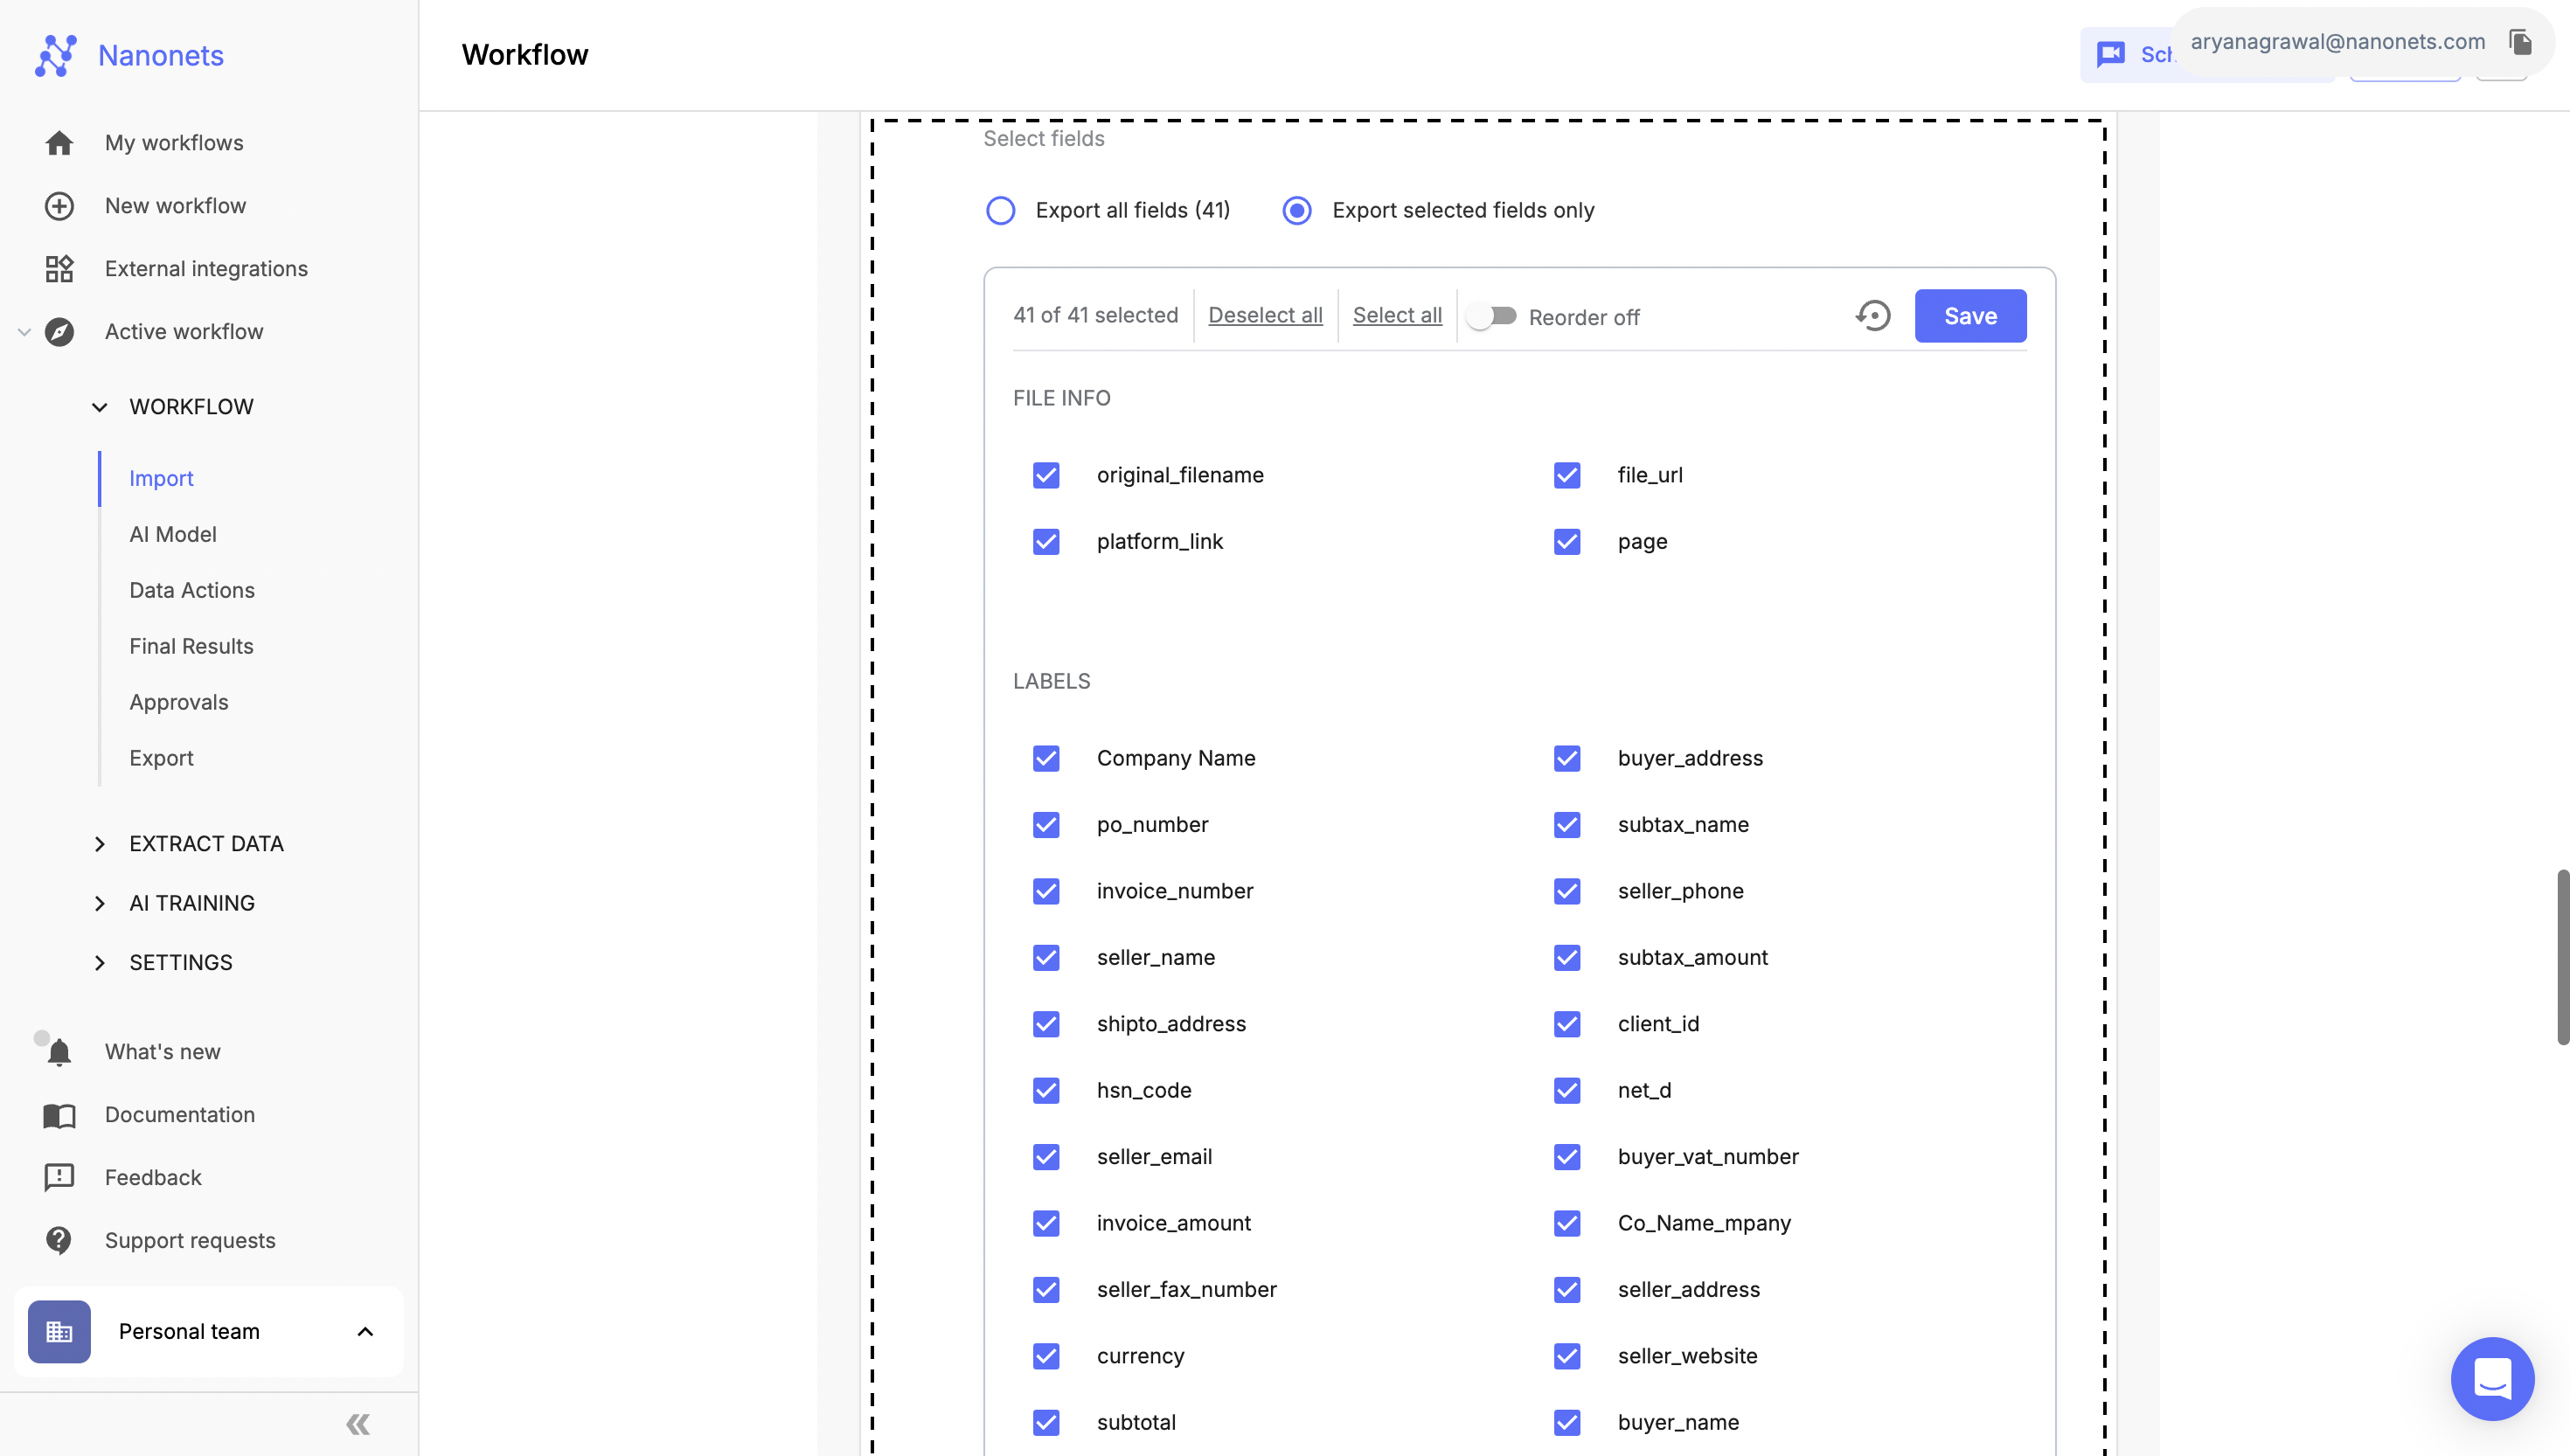
Content Settings
Exporting PDF:
If you want to export uploaded file after renaming it to a OneDrive.
- Type of Action: Select type of action triggered
- Select “Rename and Move file” option from the dropdown and using this you can export the upload the renamed file to a OneDrive.
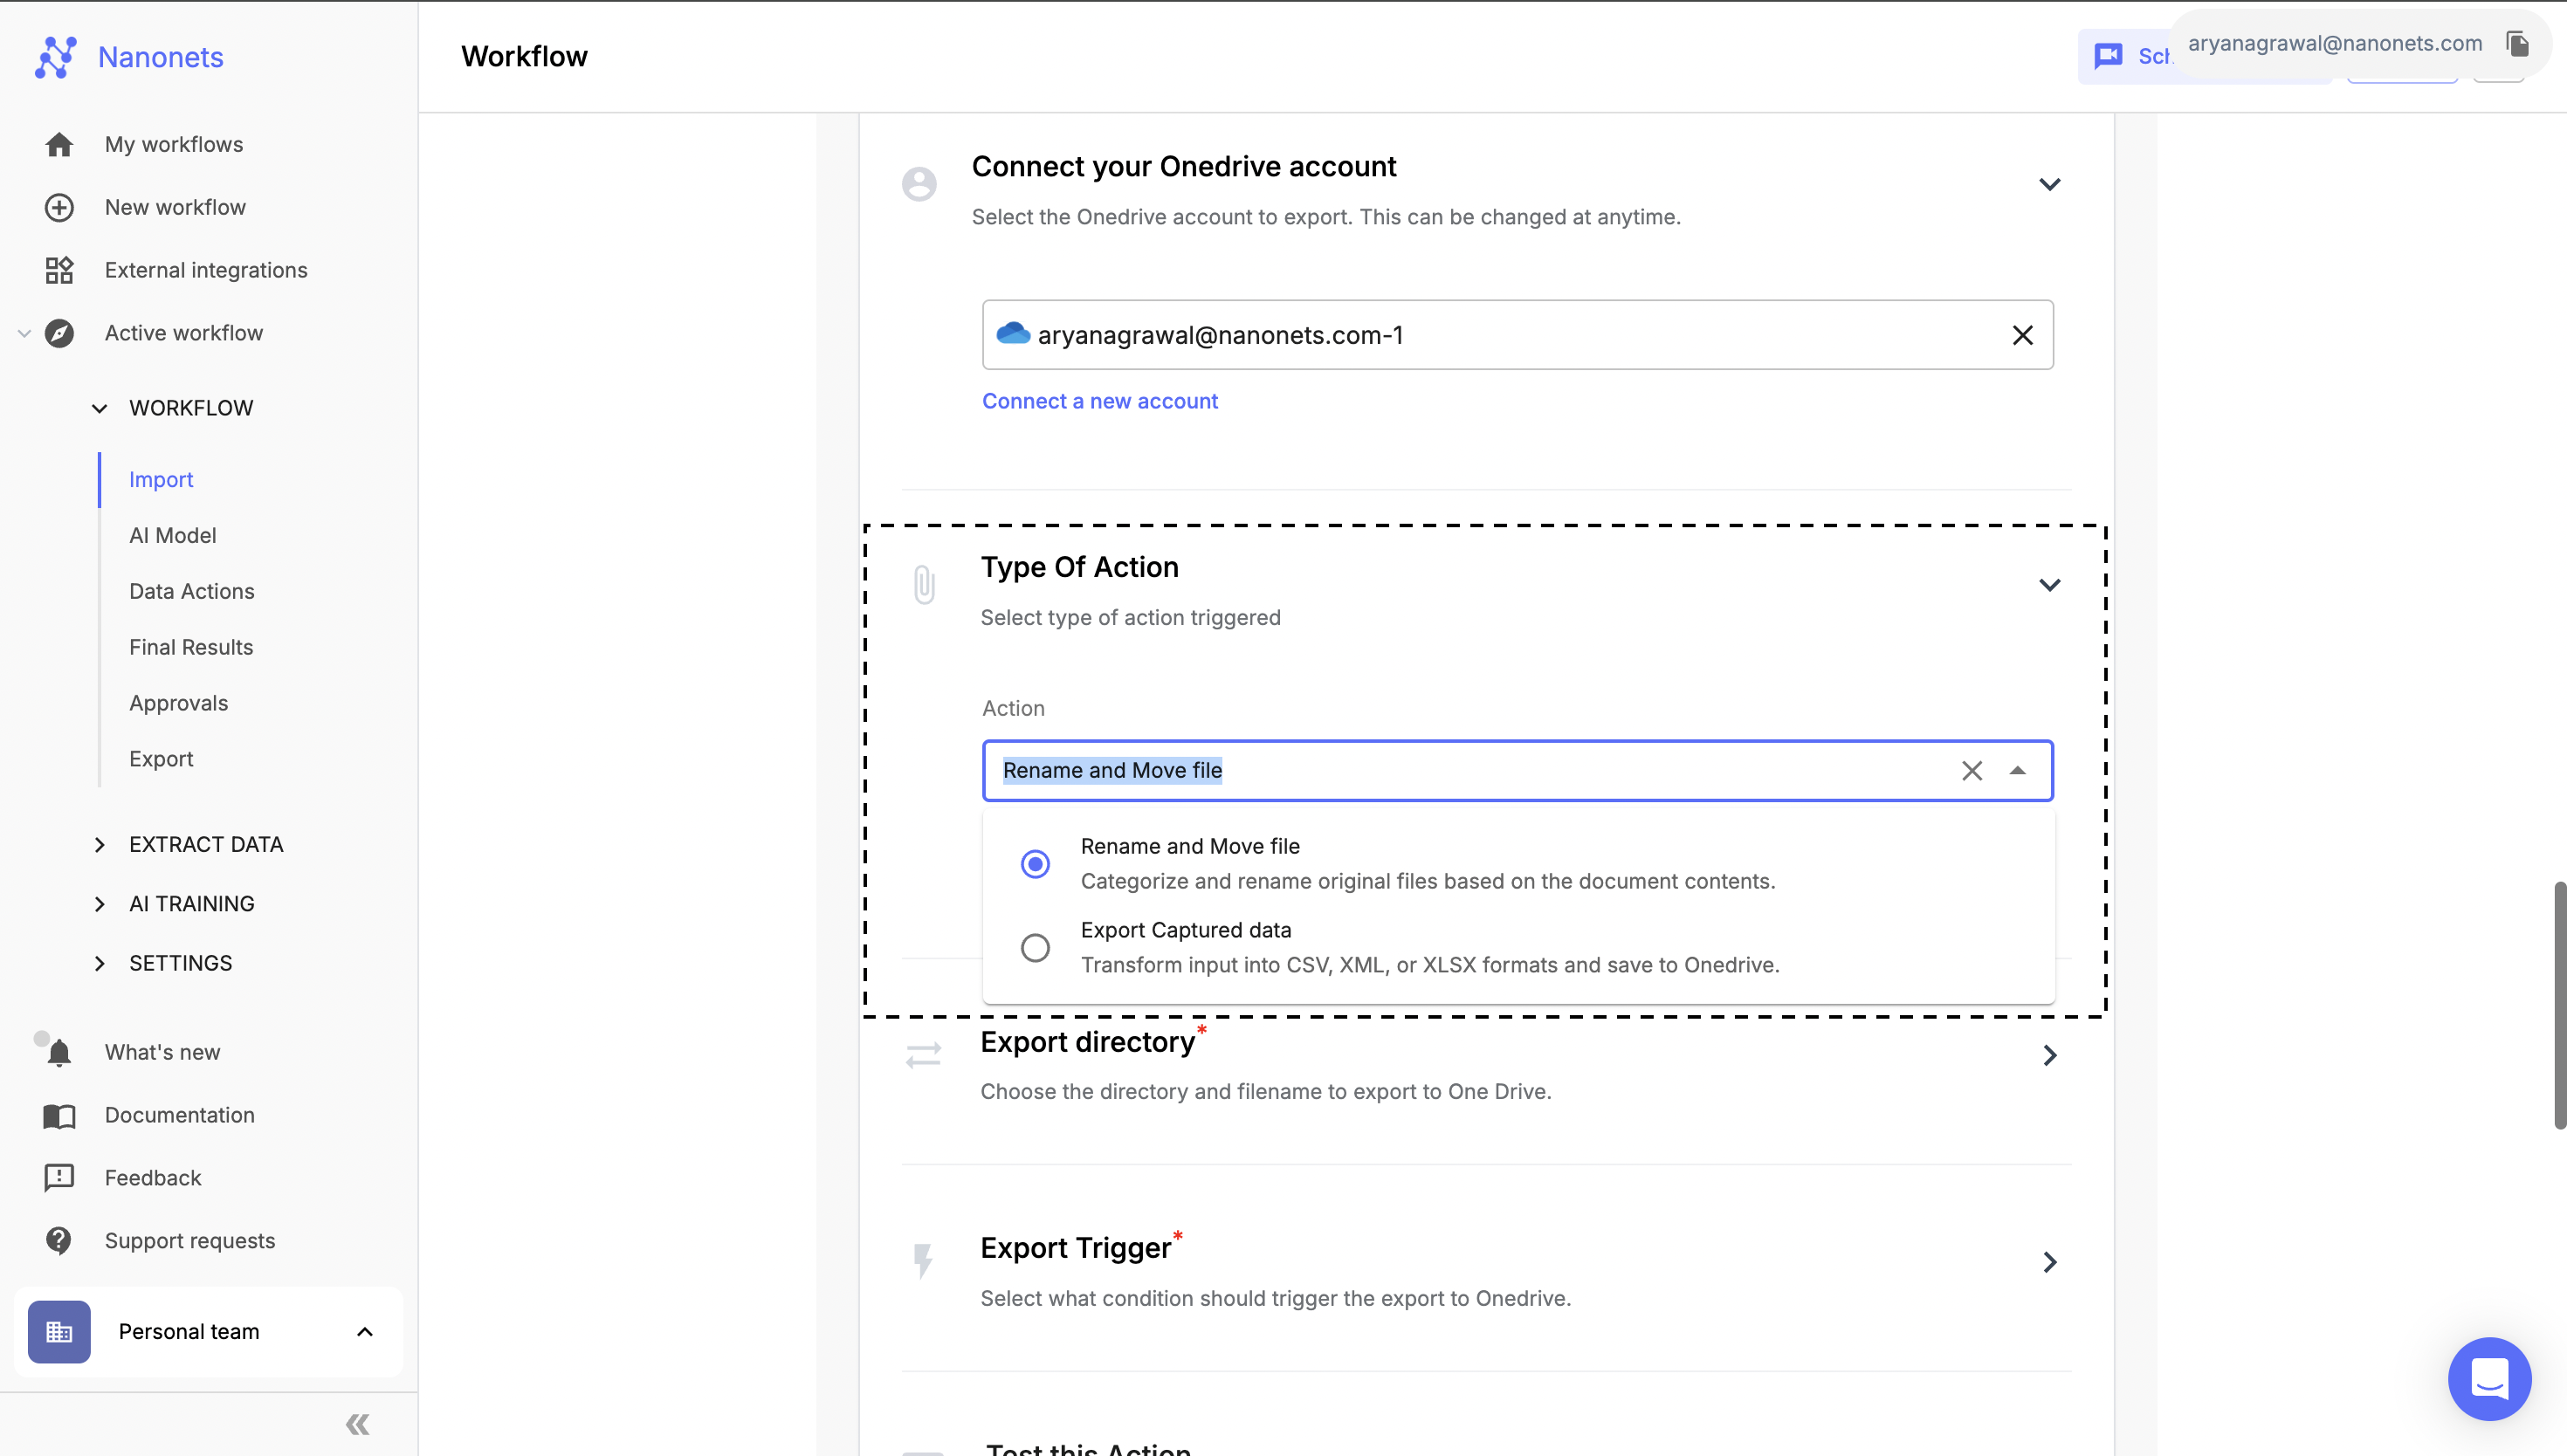
Action
- Export Directory: Choose the directory and filename to export to OneDrive.
- Specify the target directory and filename in OneDrive:
- Choose the folder and any subfolders within the designated parent folder for the uploaded document.
- Rename the file using data extracted from your documents, such as {{CoName_mpany}}{{Companyname}}{{forwarded_form}}, in the "File Name" section. Or you can choose to export the original filename.
- Specify the target directory and filename in OneDrive:
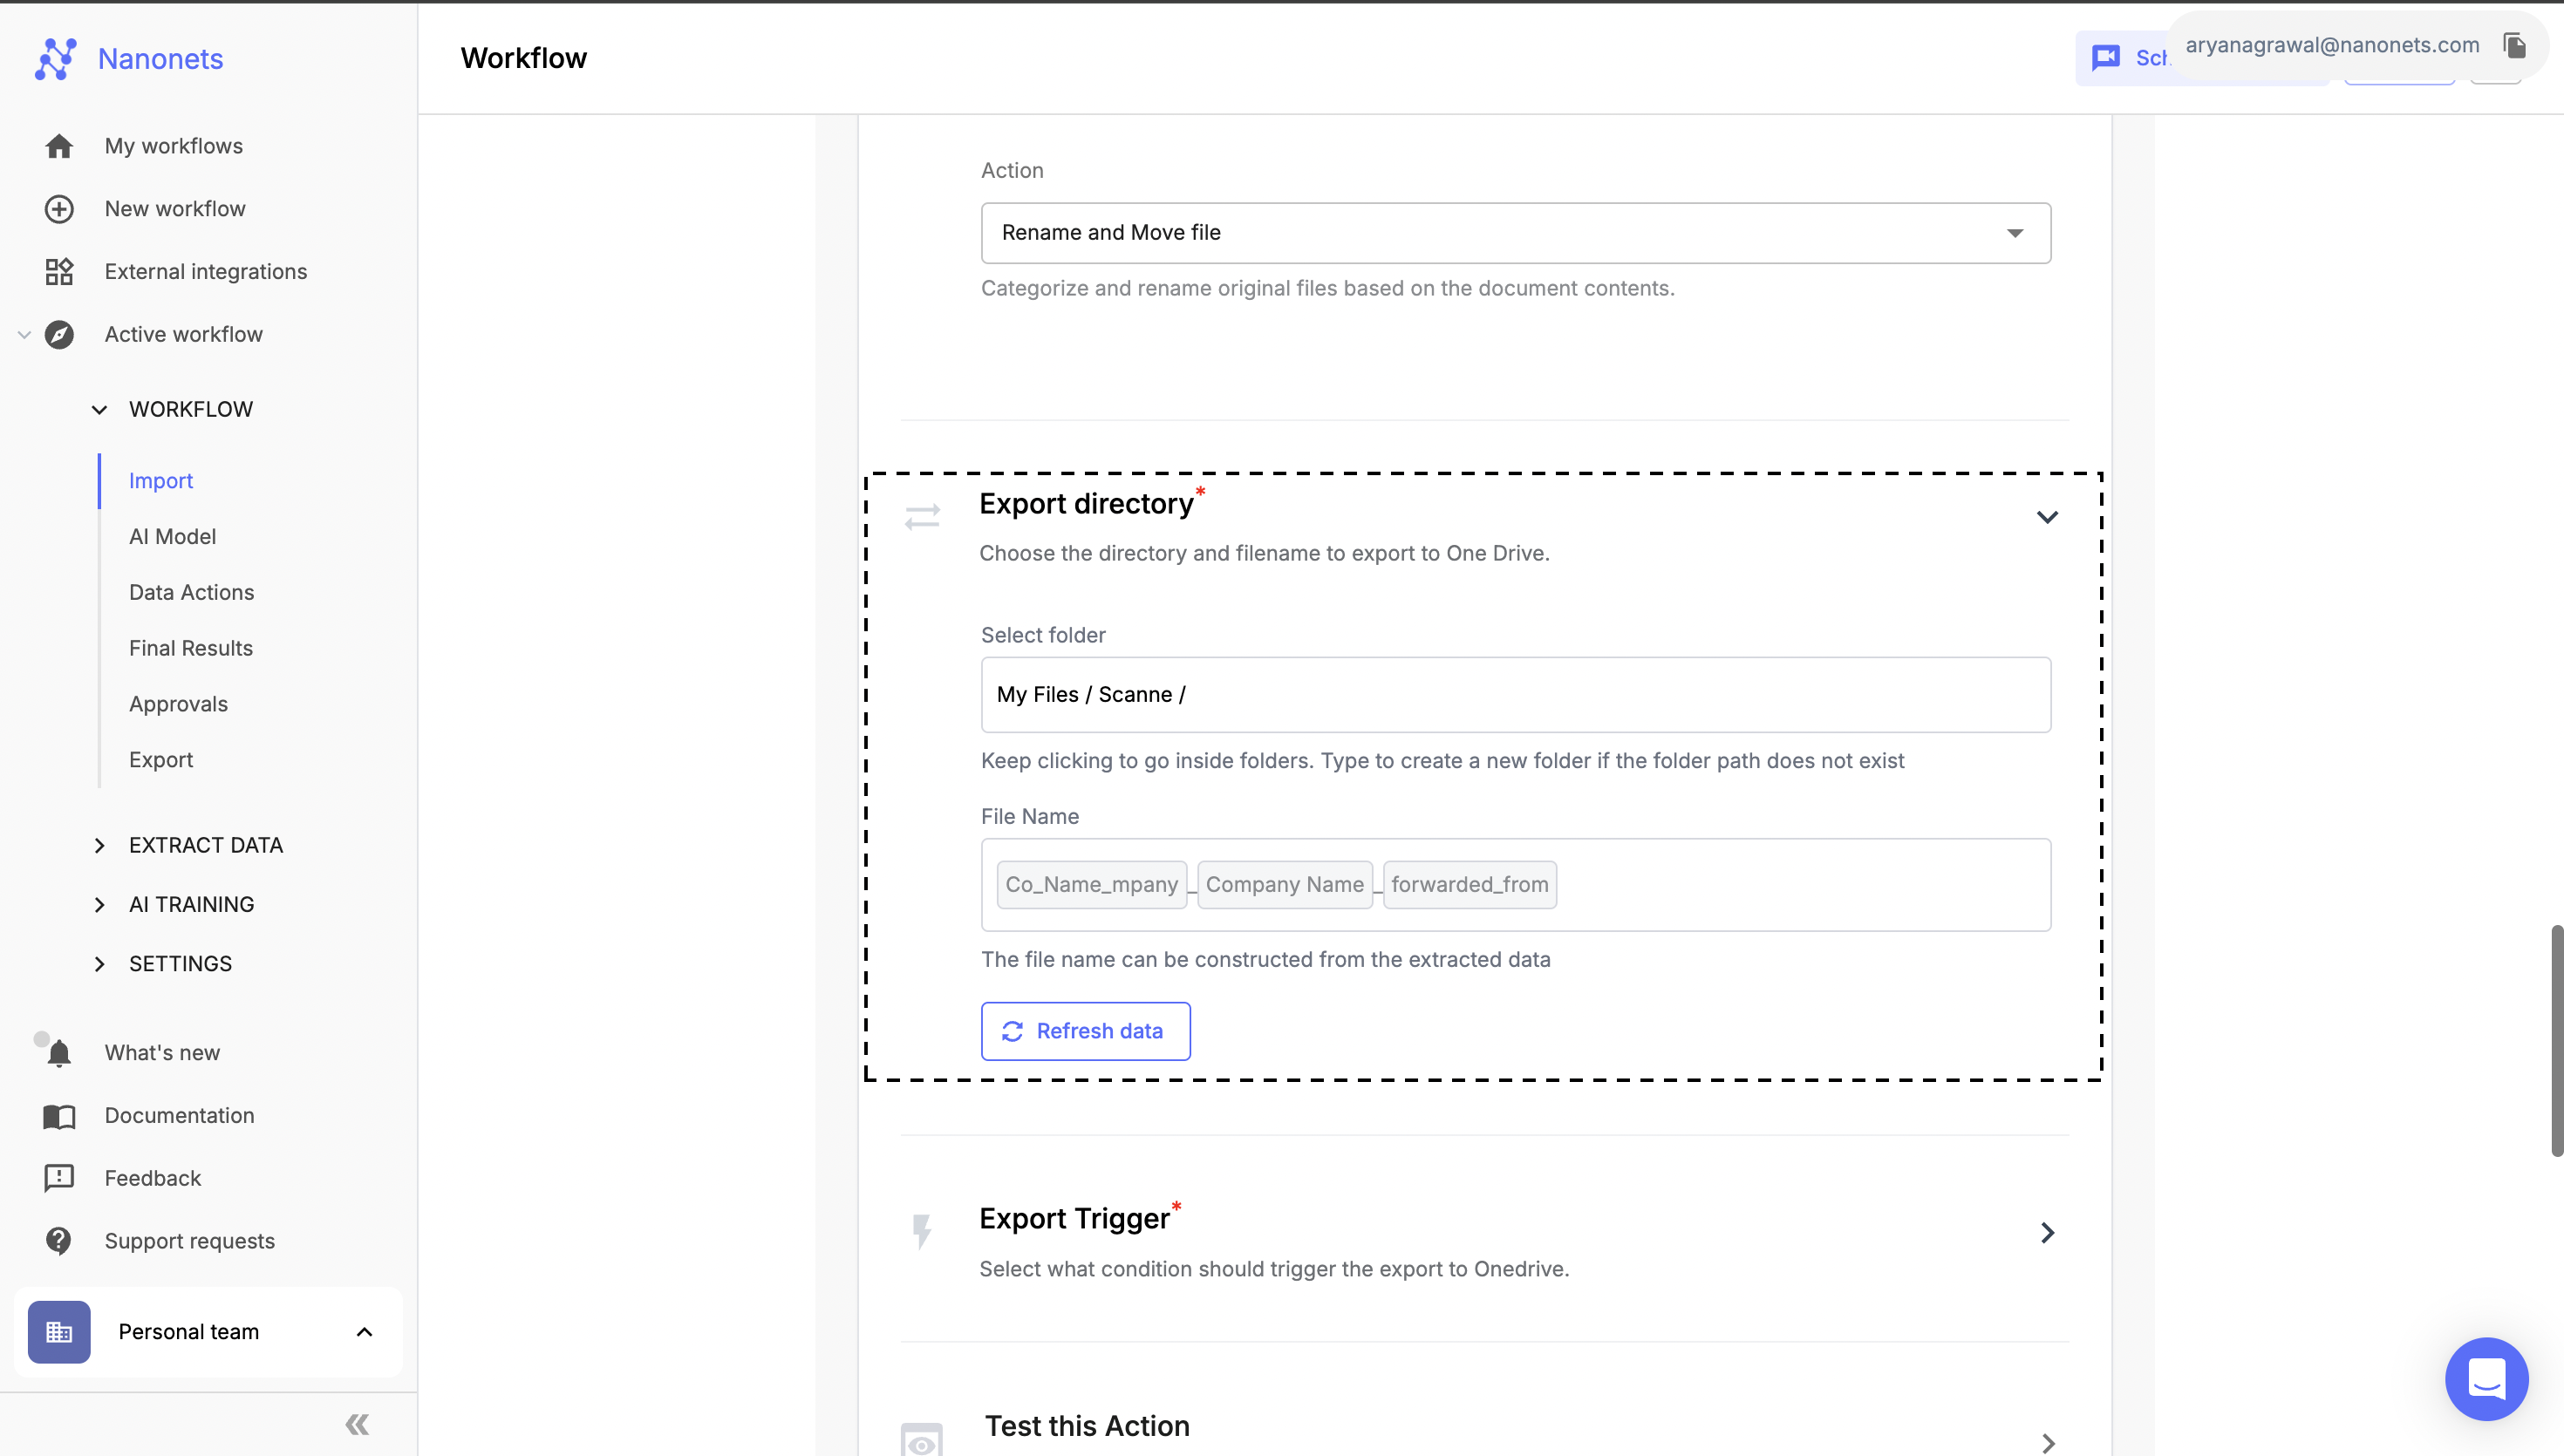
File Renaming
- Export Triggers:
- Set up one or more export triggers based on your requirements. Toggle each trigger to enable or disable it: These triggers works in OR condition
- On Inference: Automatically export data as soon as processing is complete.
- On All Validations Passing: Export only after all validations and approvals are confirmed.
- On Approval: Export upon manual approval.
- On Assignment: Export when a file is assigned or unassigned.
- On Rejection: Export when a file is manually rejected
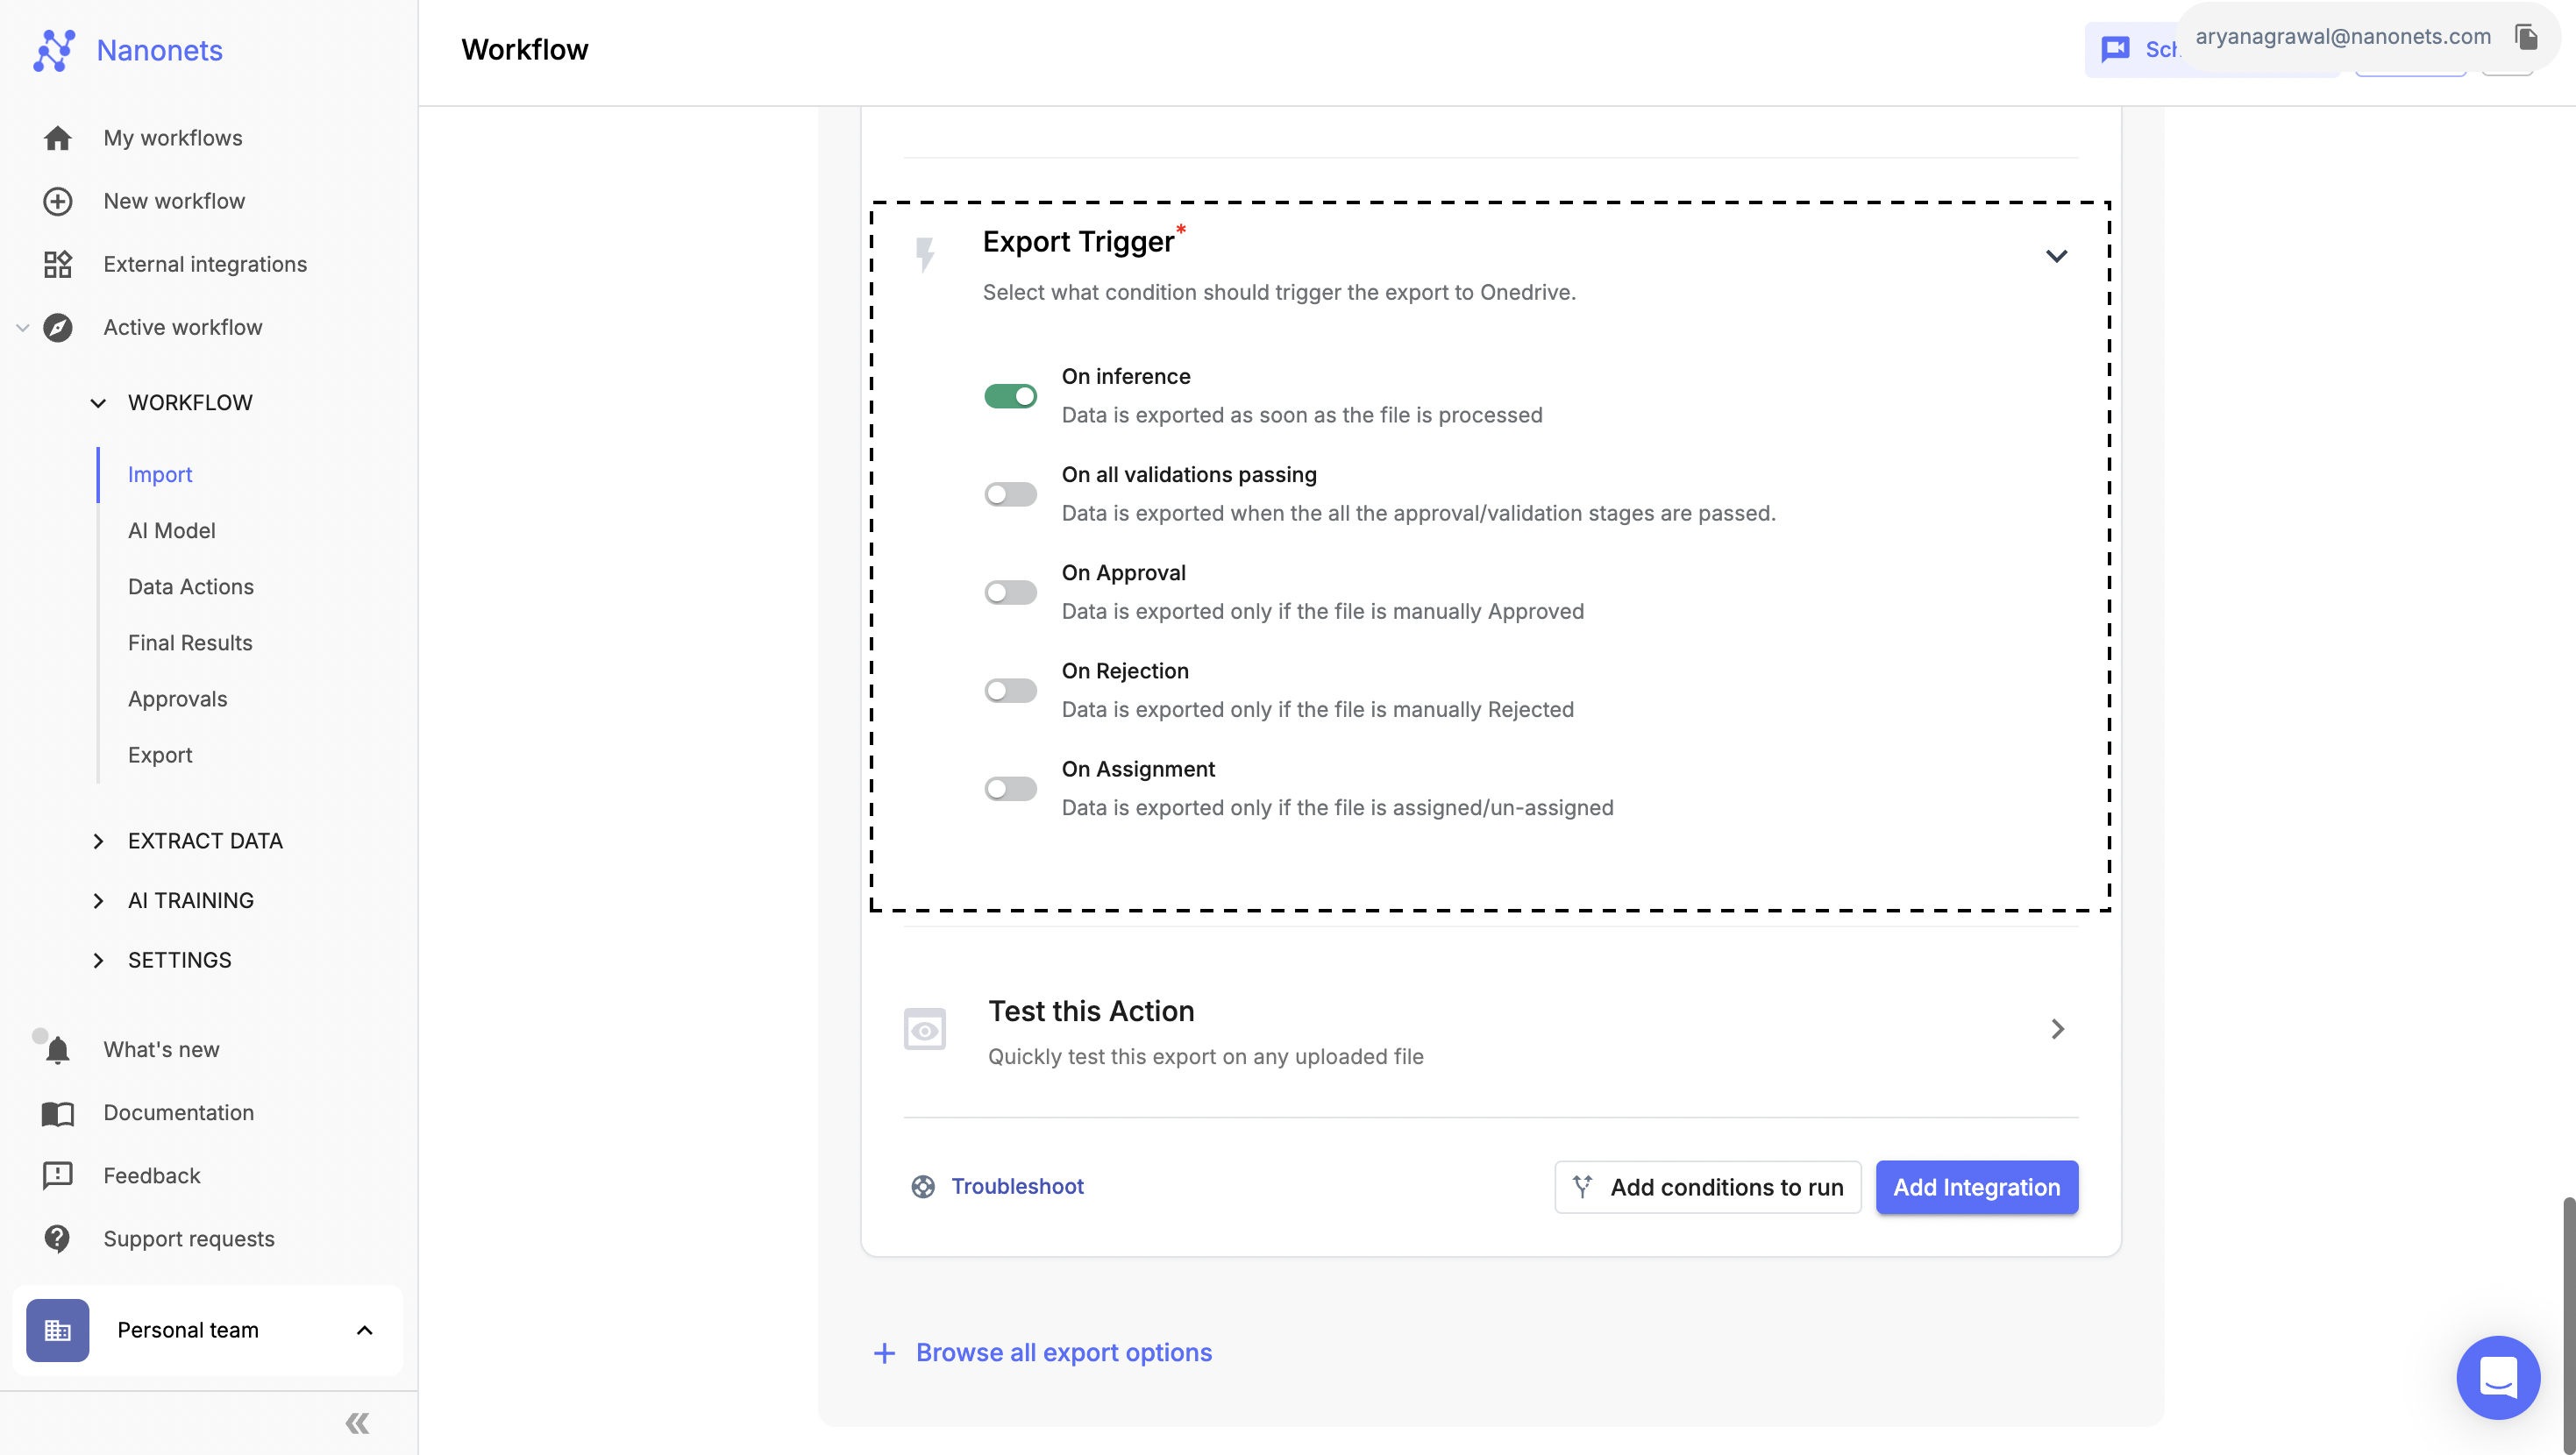
Export Trigger
- Save and Test Configuration:
- After authorizing Nanonets to access your OneDrive and setting the export preferences, use the “Test this Action” feature to ensure everything works as expected.
- Click "Add Integration" to apply and finalize your settings.
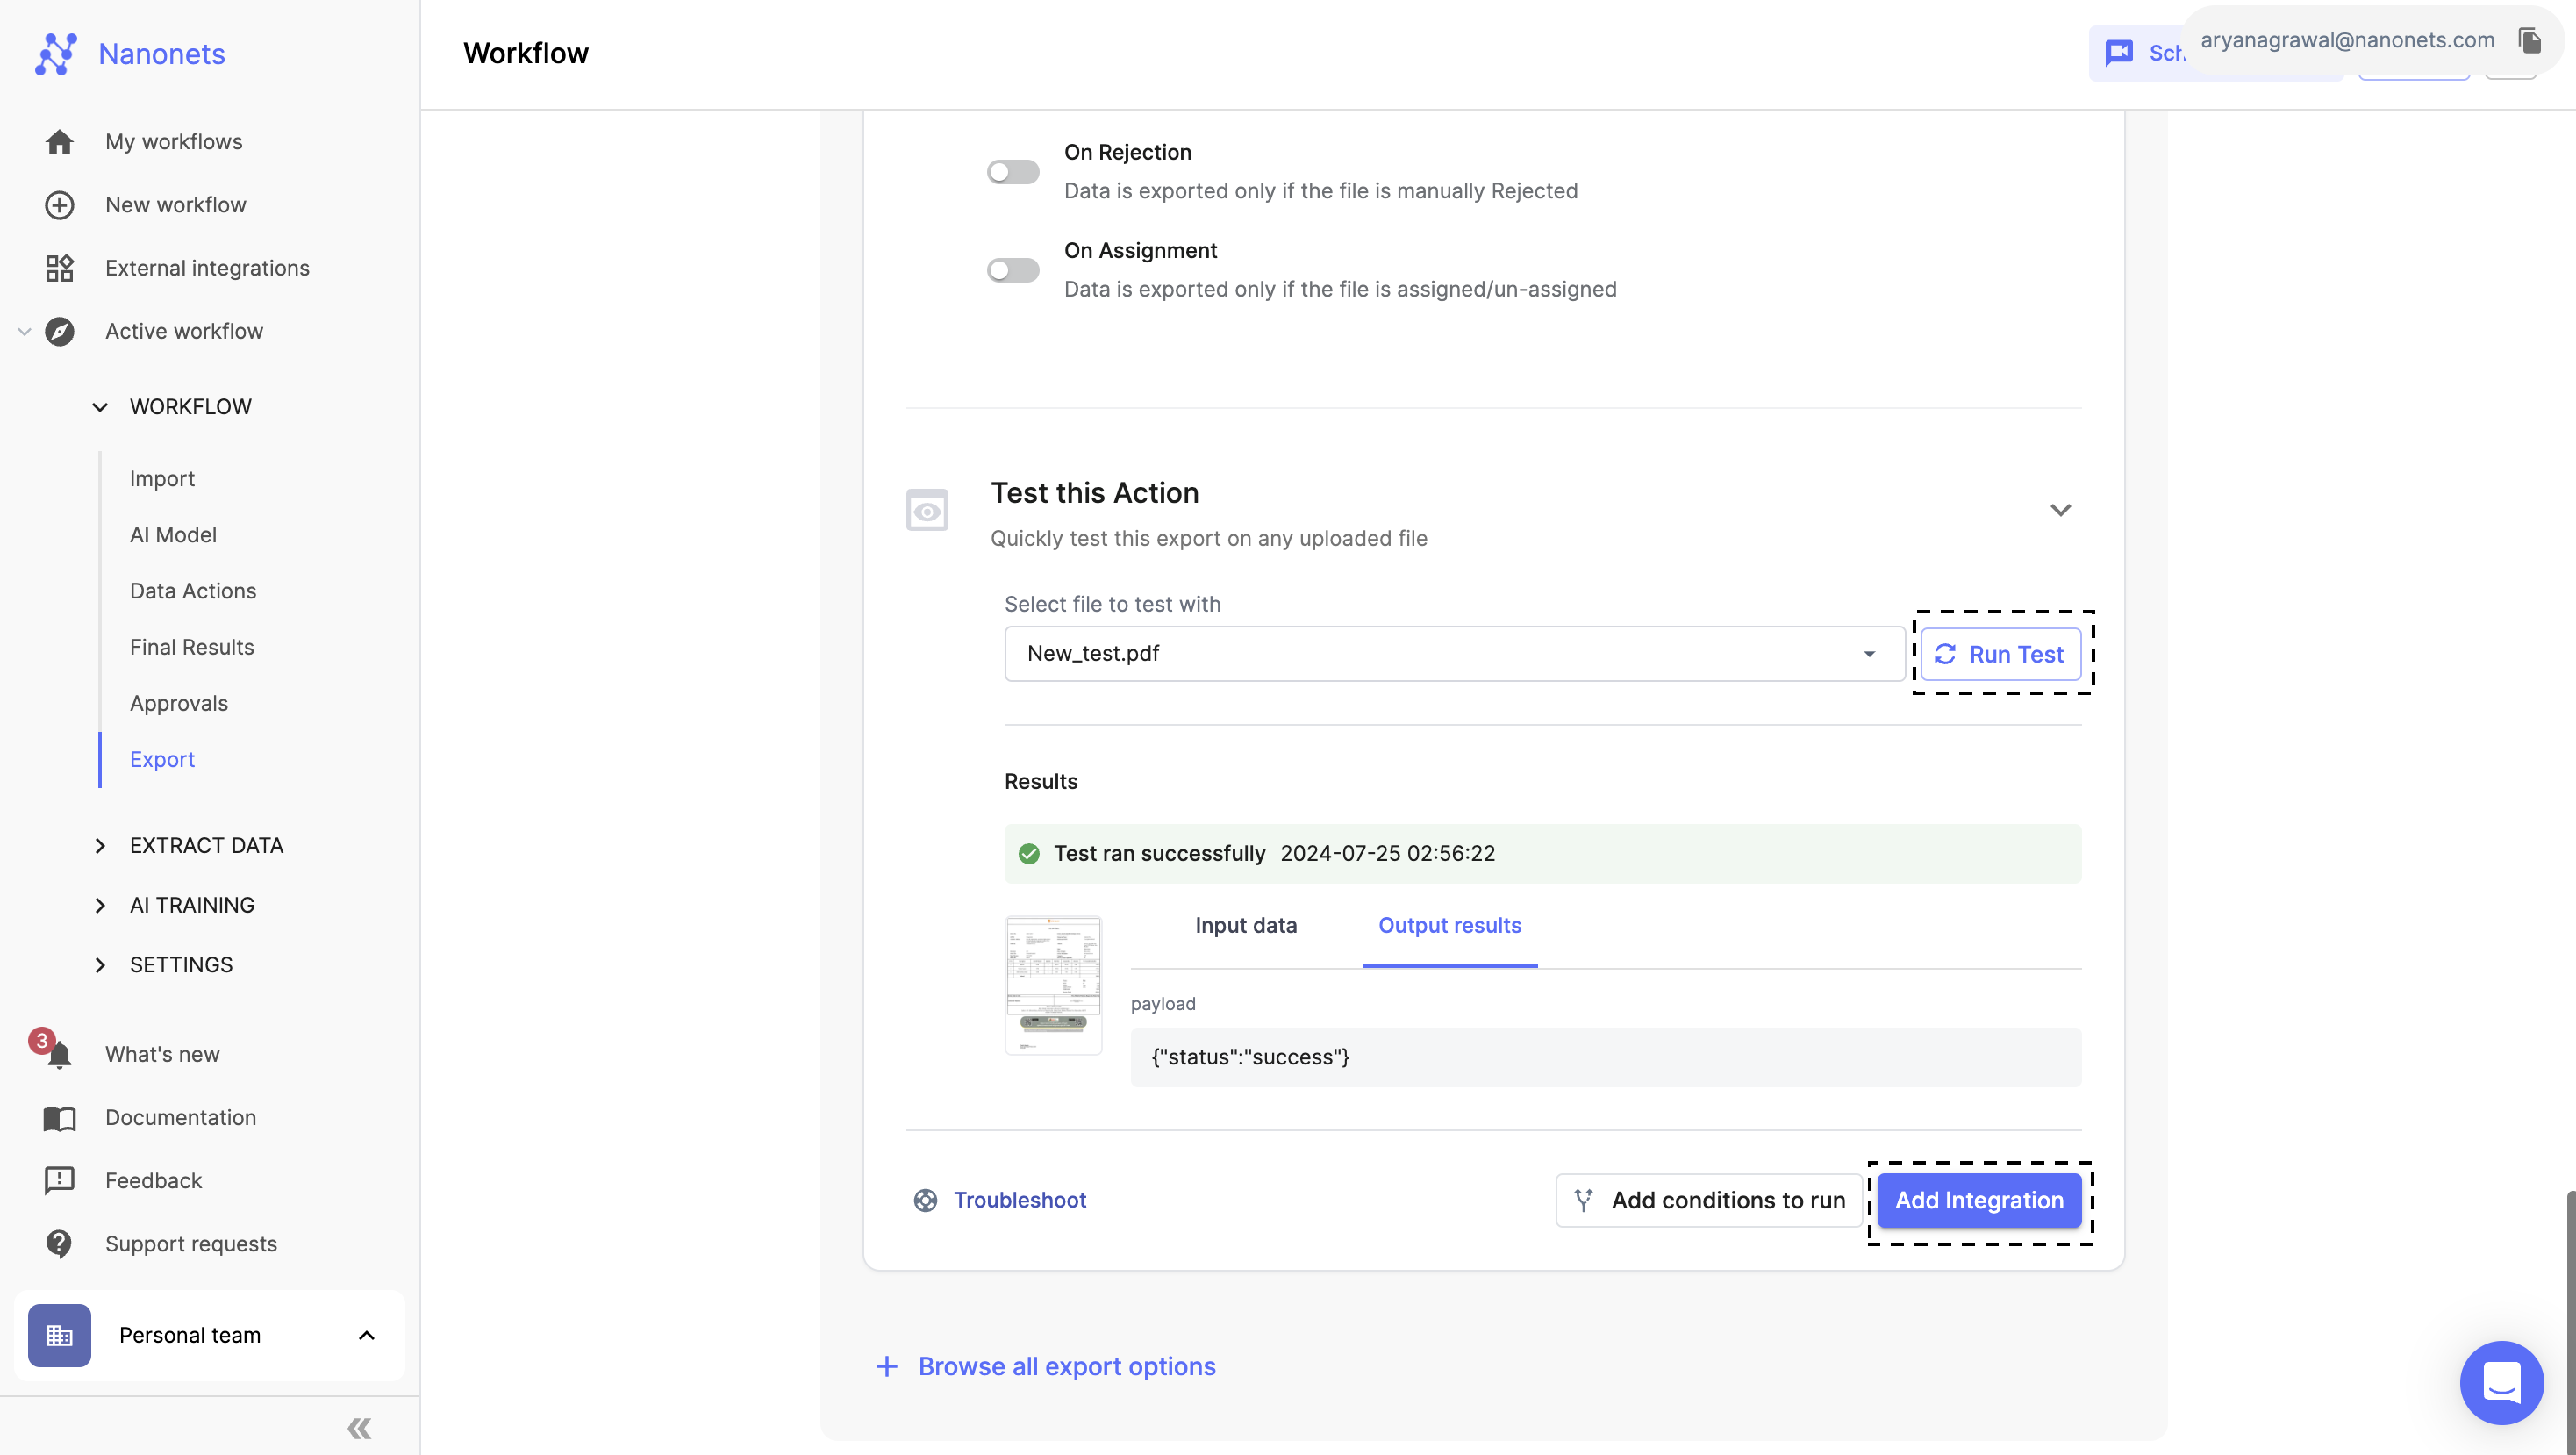
Test Export
How to add conditional export?
-
Configure Conditions:
-
Click the "Add Conditions to Run" button to start configuring your conditional export.
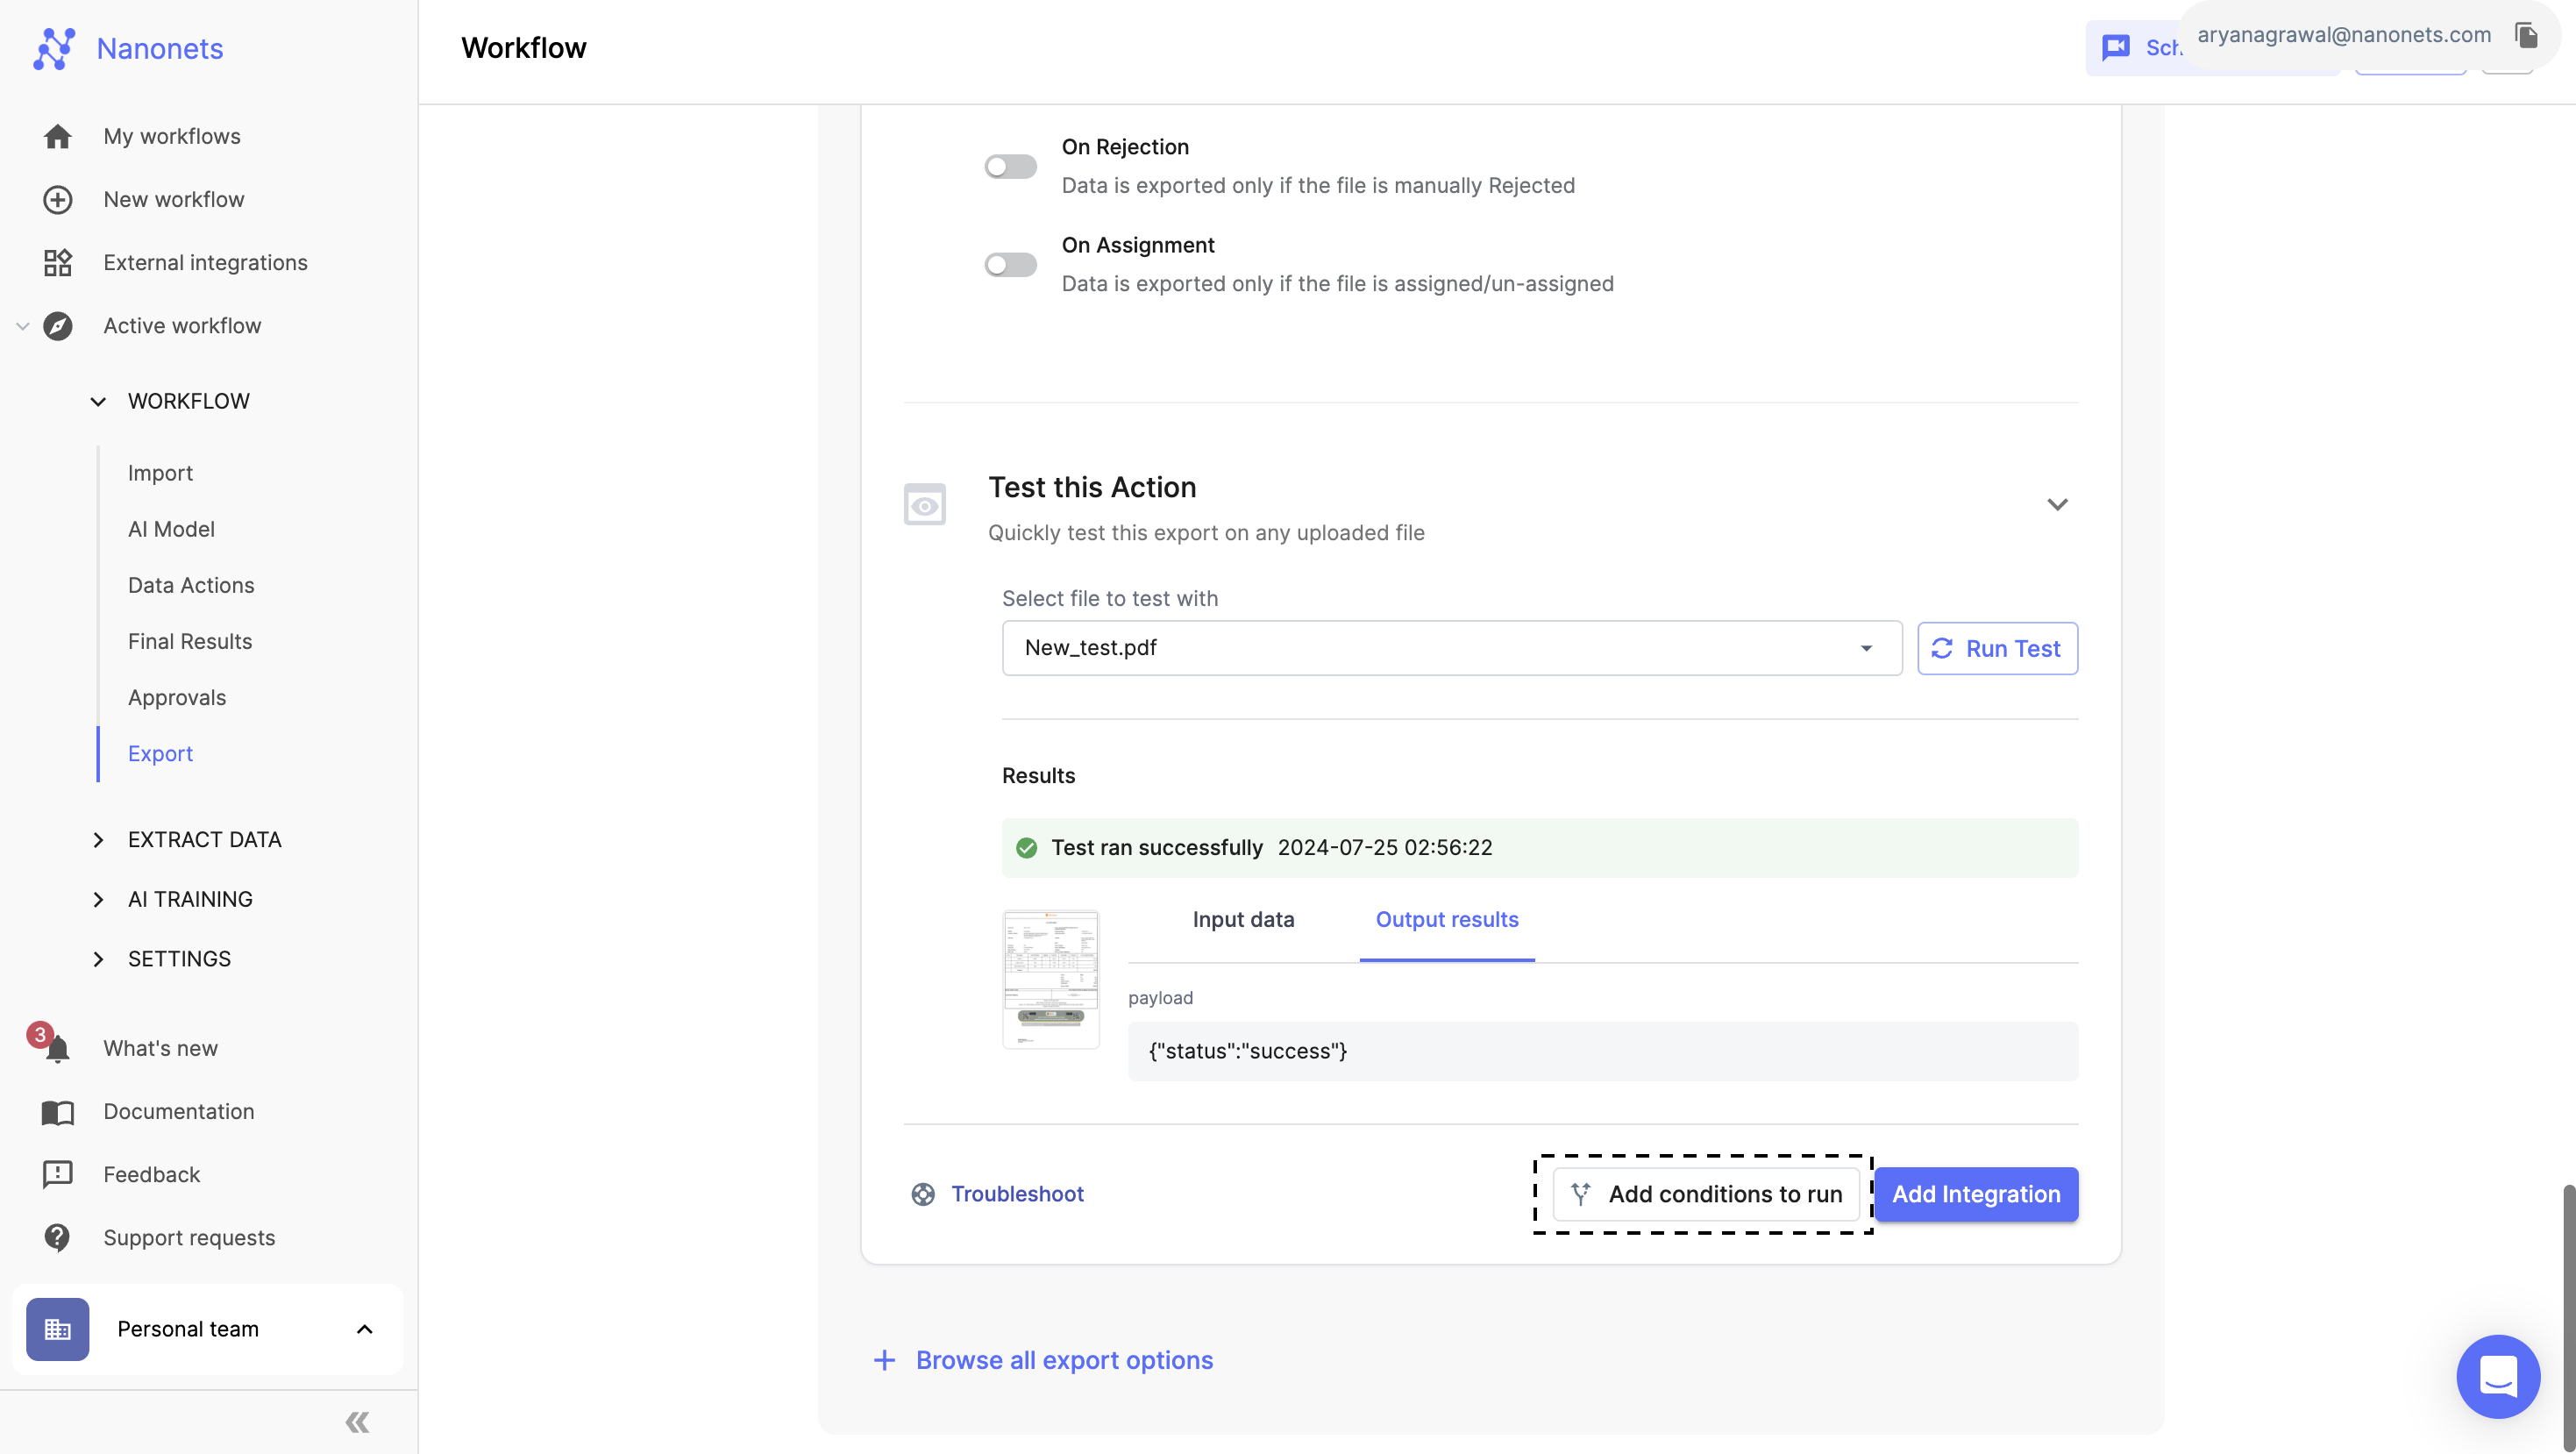
-
Add one or multiple conditions based on the extracted data fields. You can combine these conditions using 'AND' and 'OR' operators.
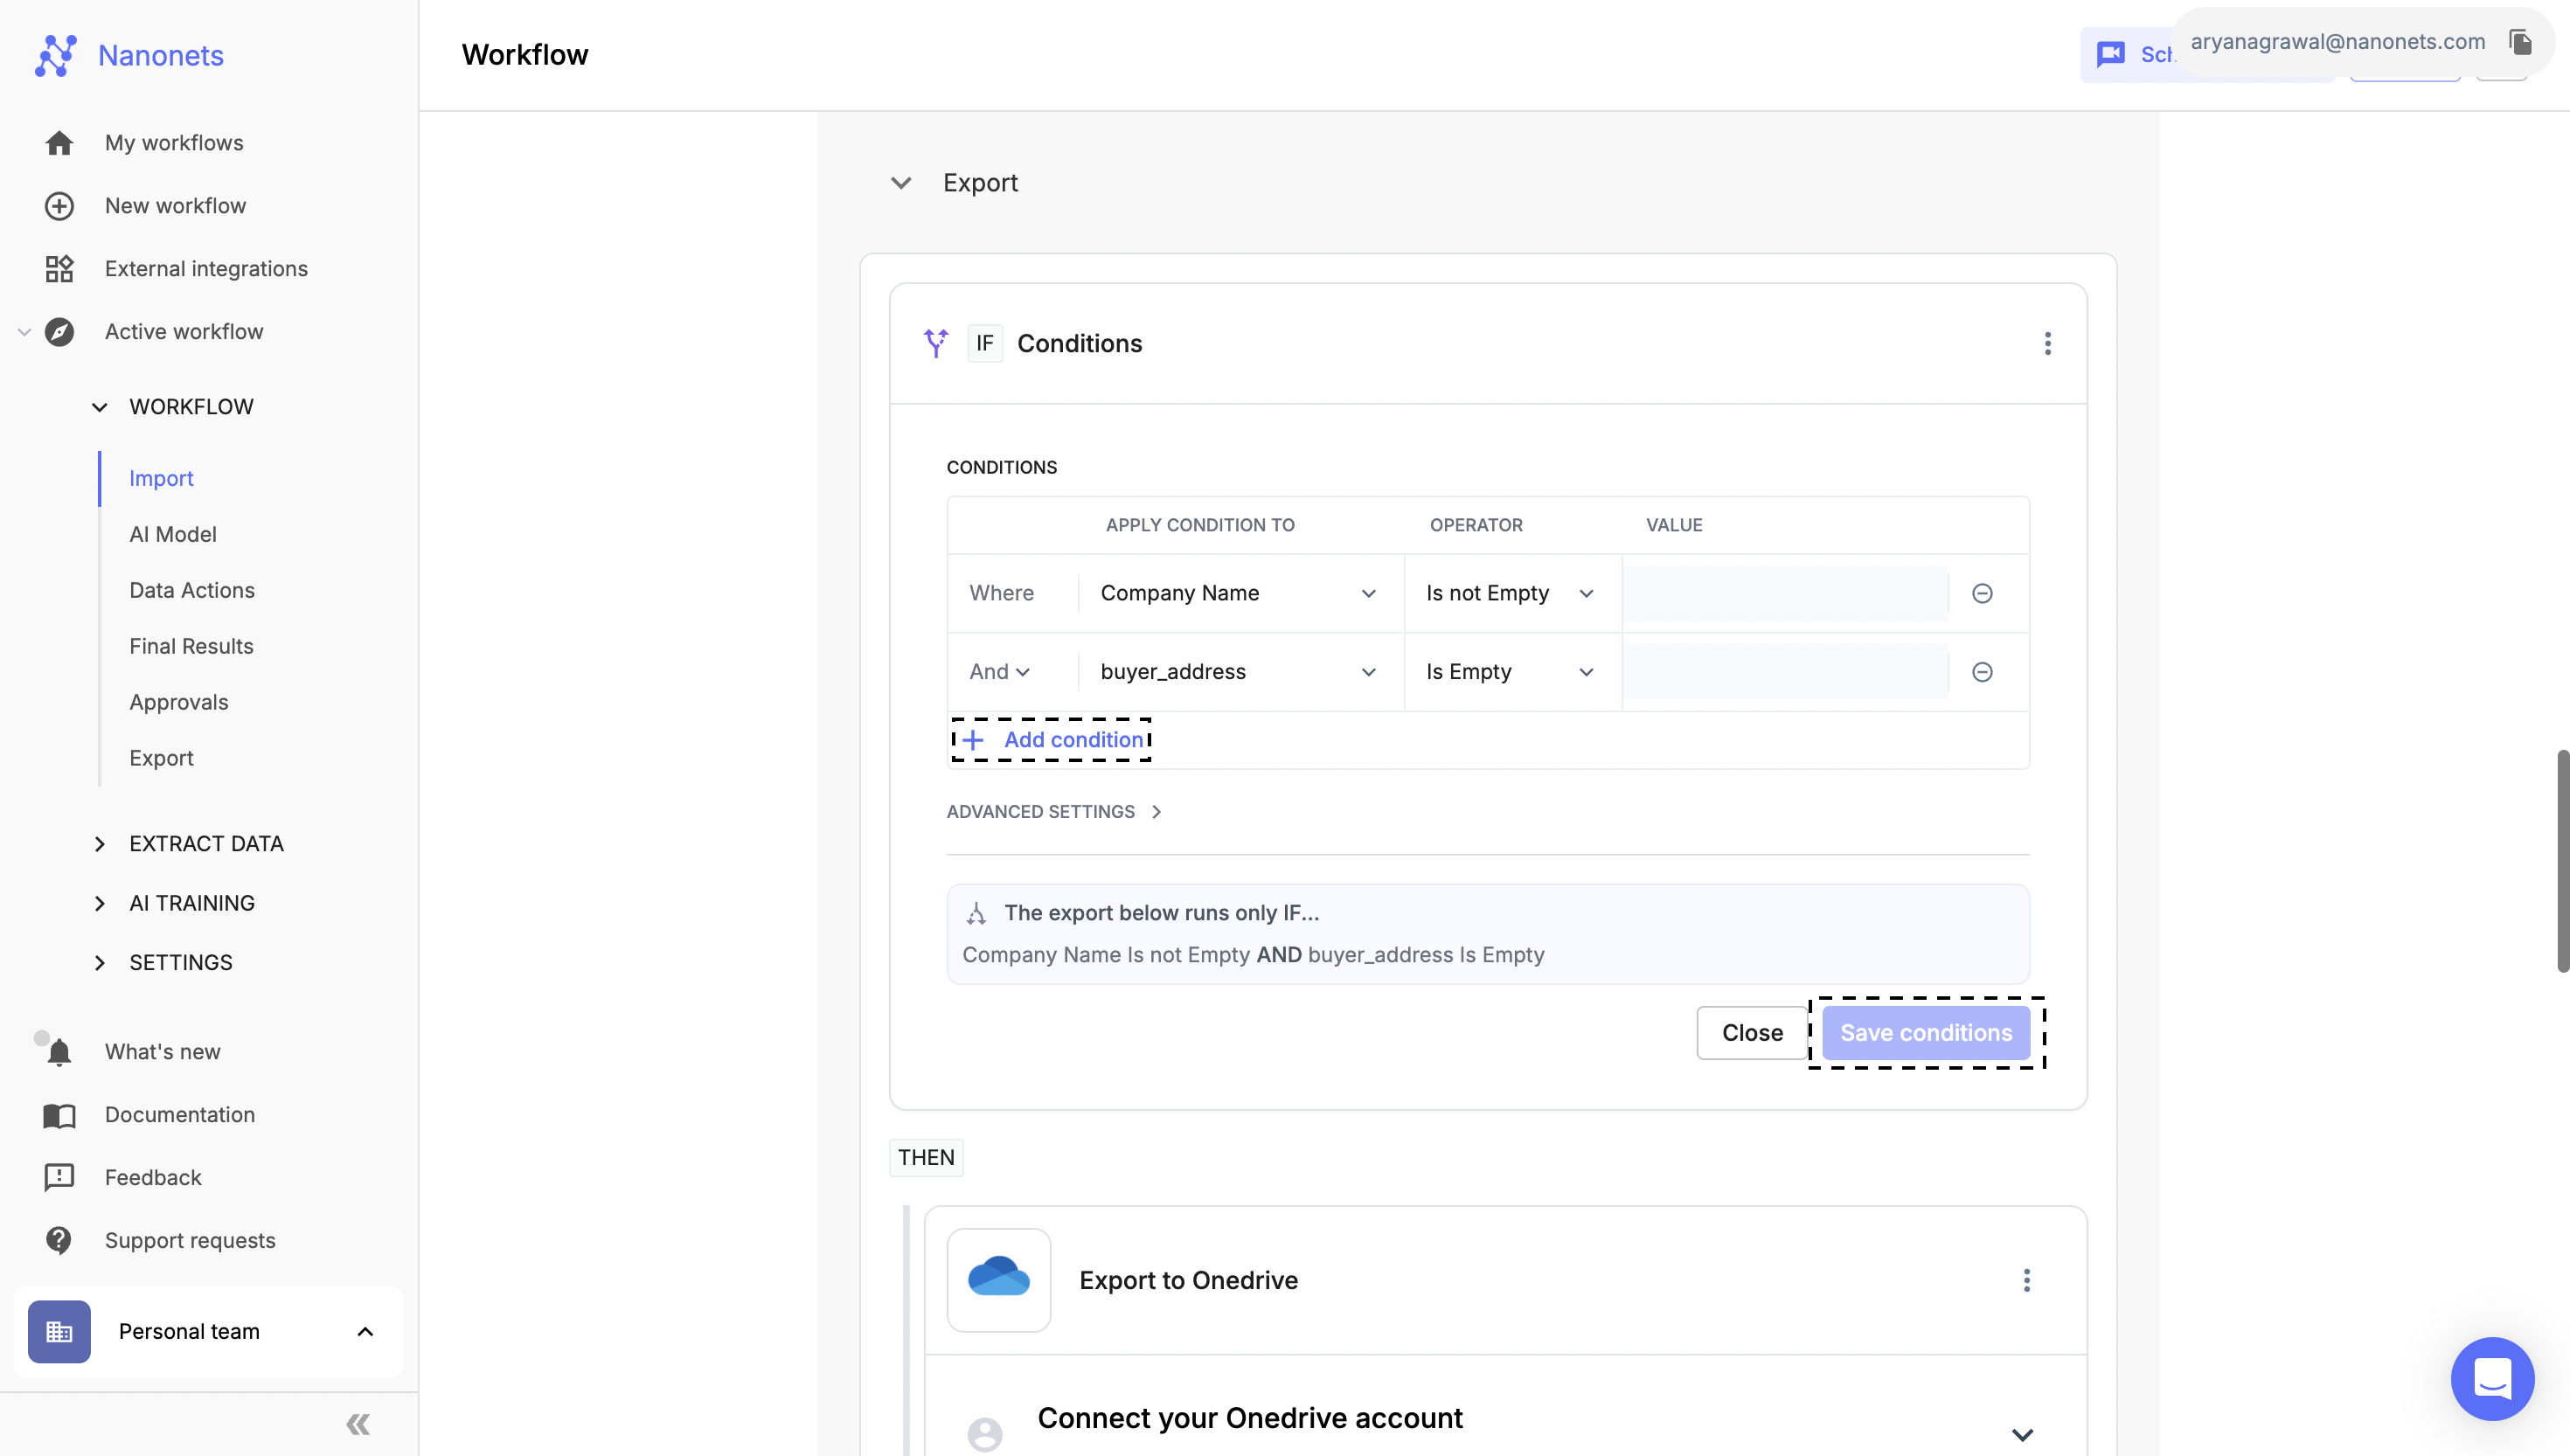
Conditional Export
-
-
Verify Export Setup:
- Ensure your export settings are correctly configured before implementing the conditional export logic.
Updated 9 months ago
