
How to setup your Workflow?
Import
Configuring Import Block
- Access Workflow: Start by navigating to the 'Workflow' section in the left panel of your Nanonets Extract Data page.
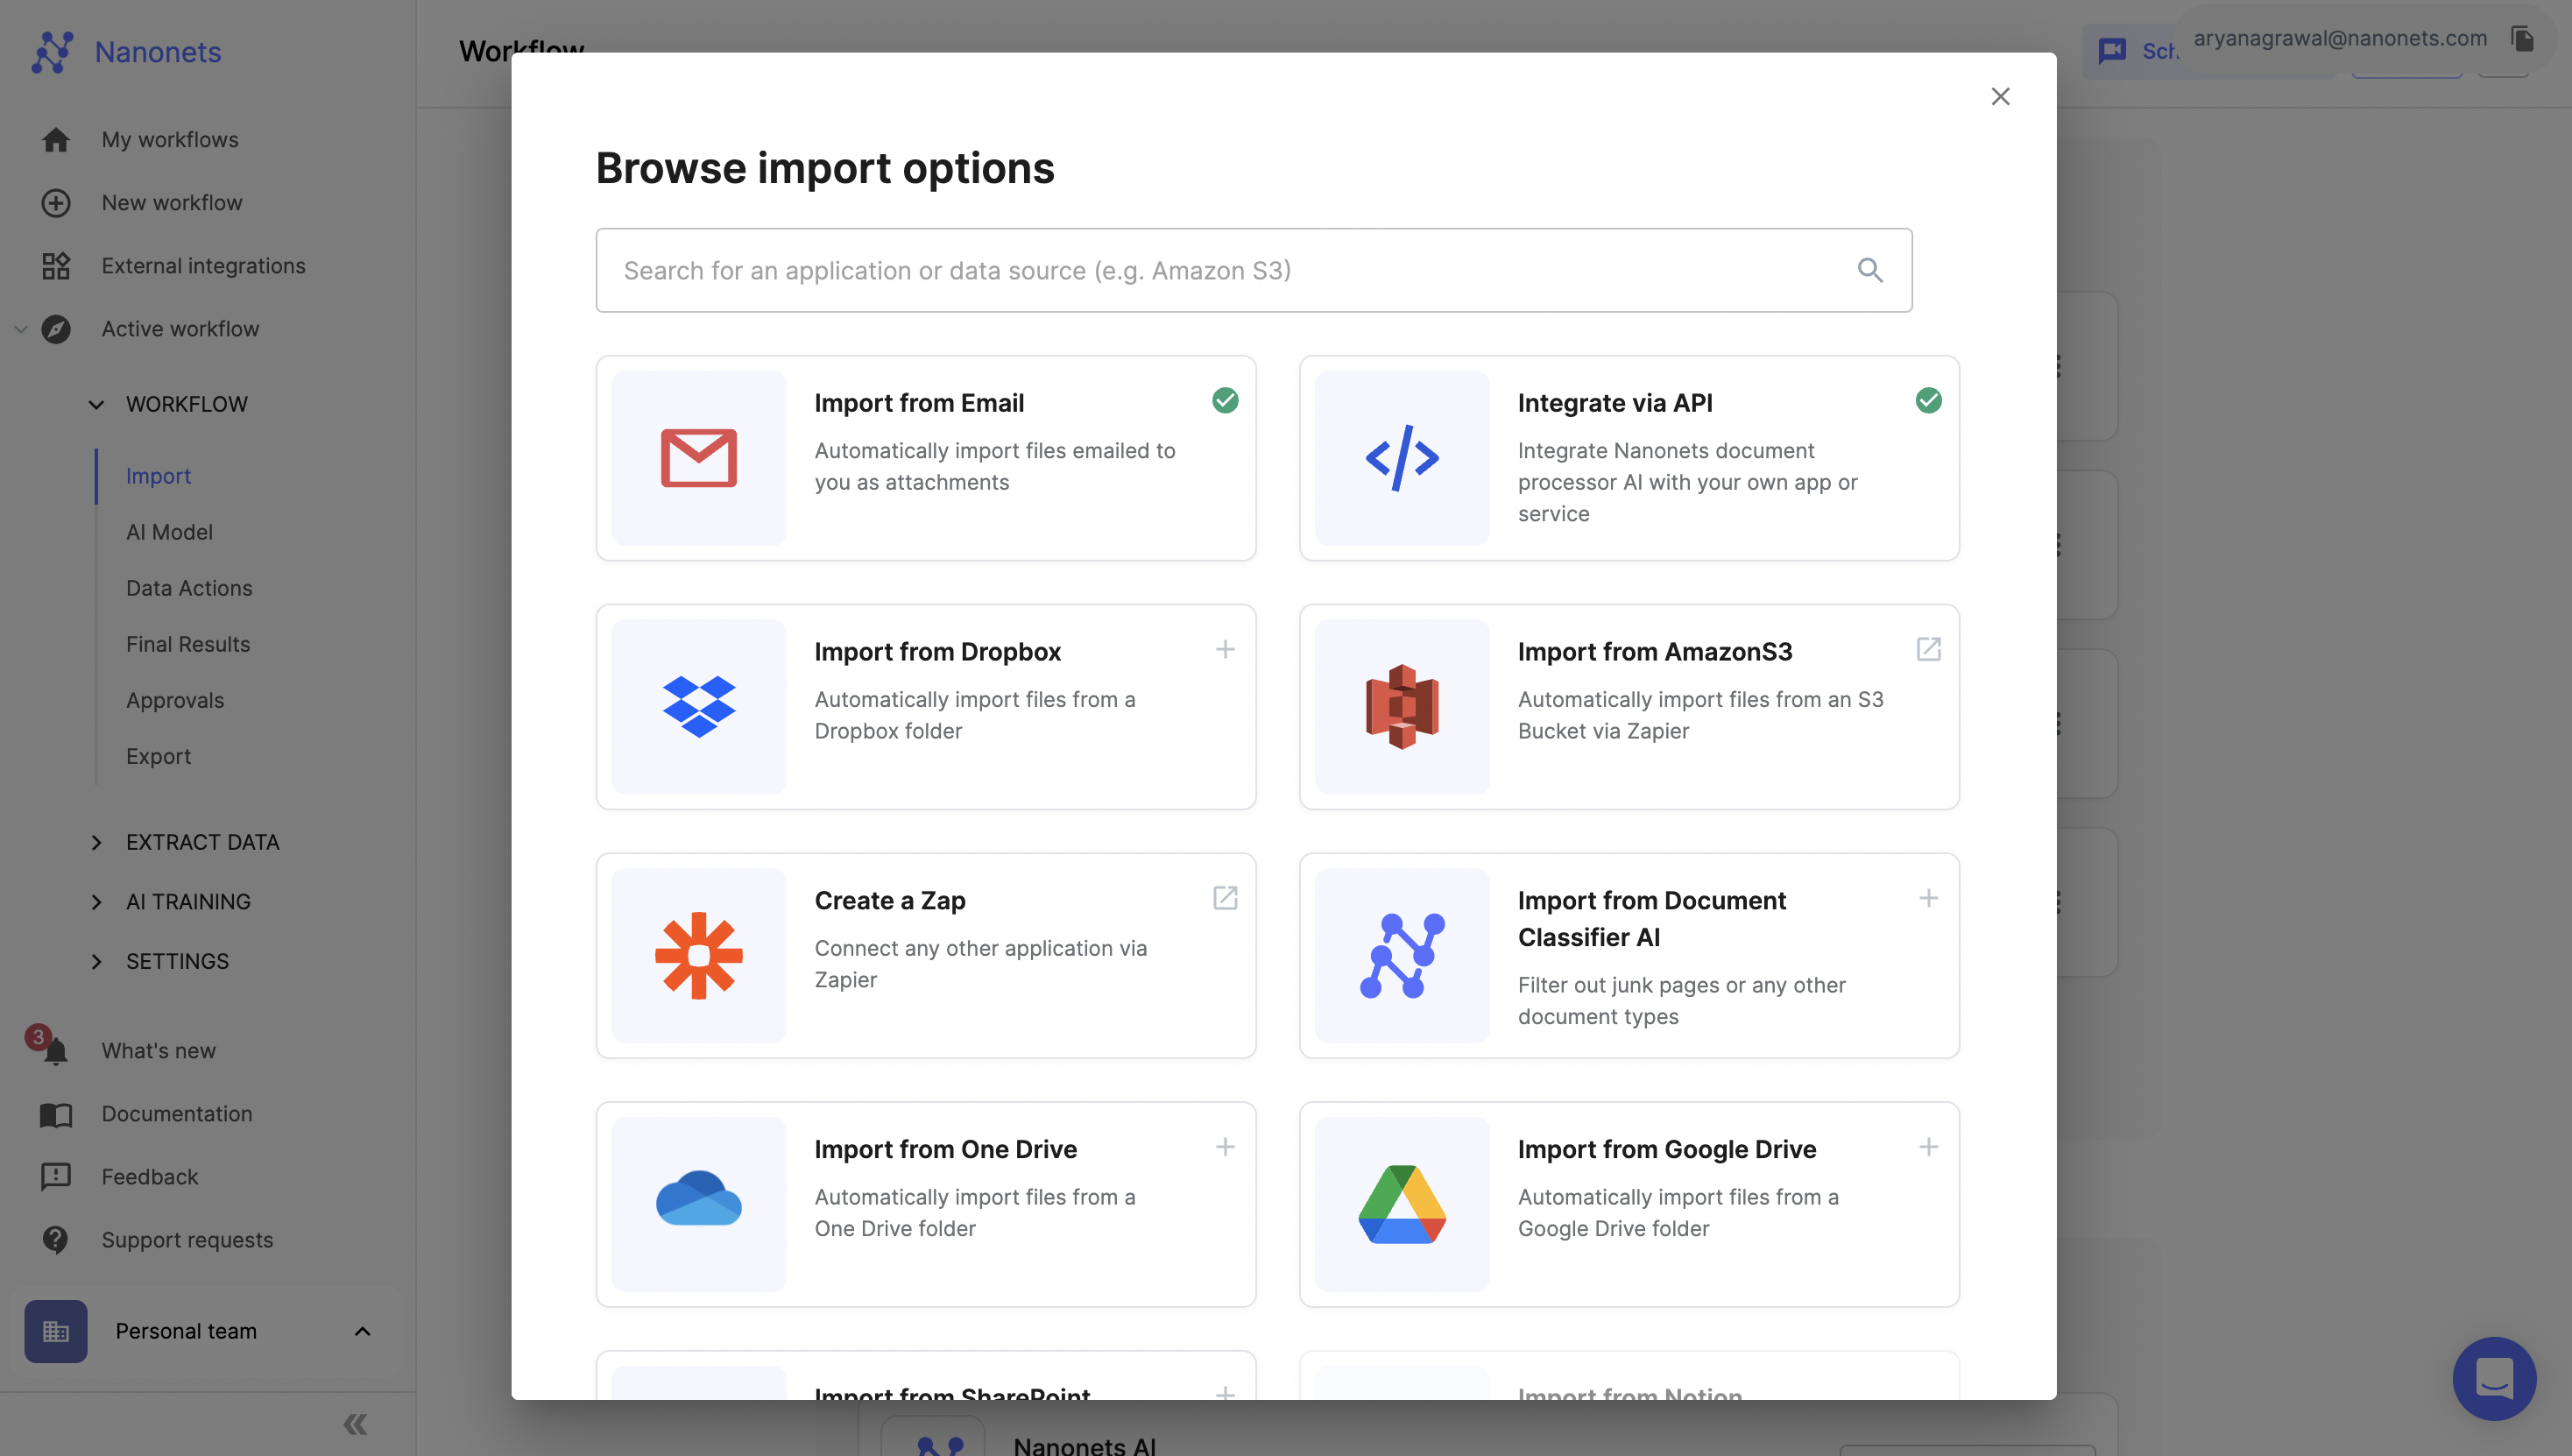
- Browse Import Options: Click on the “Browse import options” to view all supported import sources.
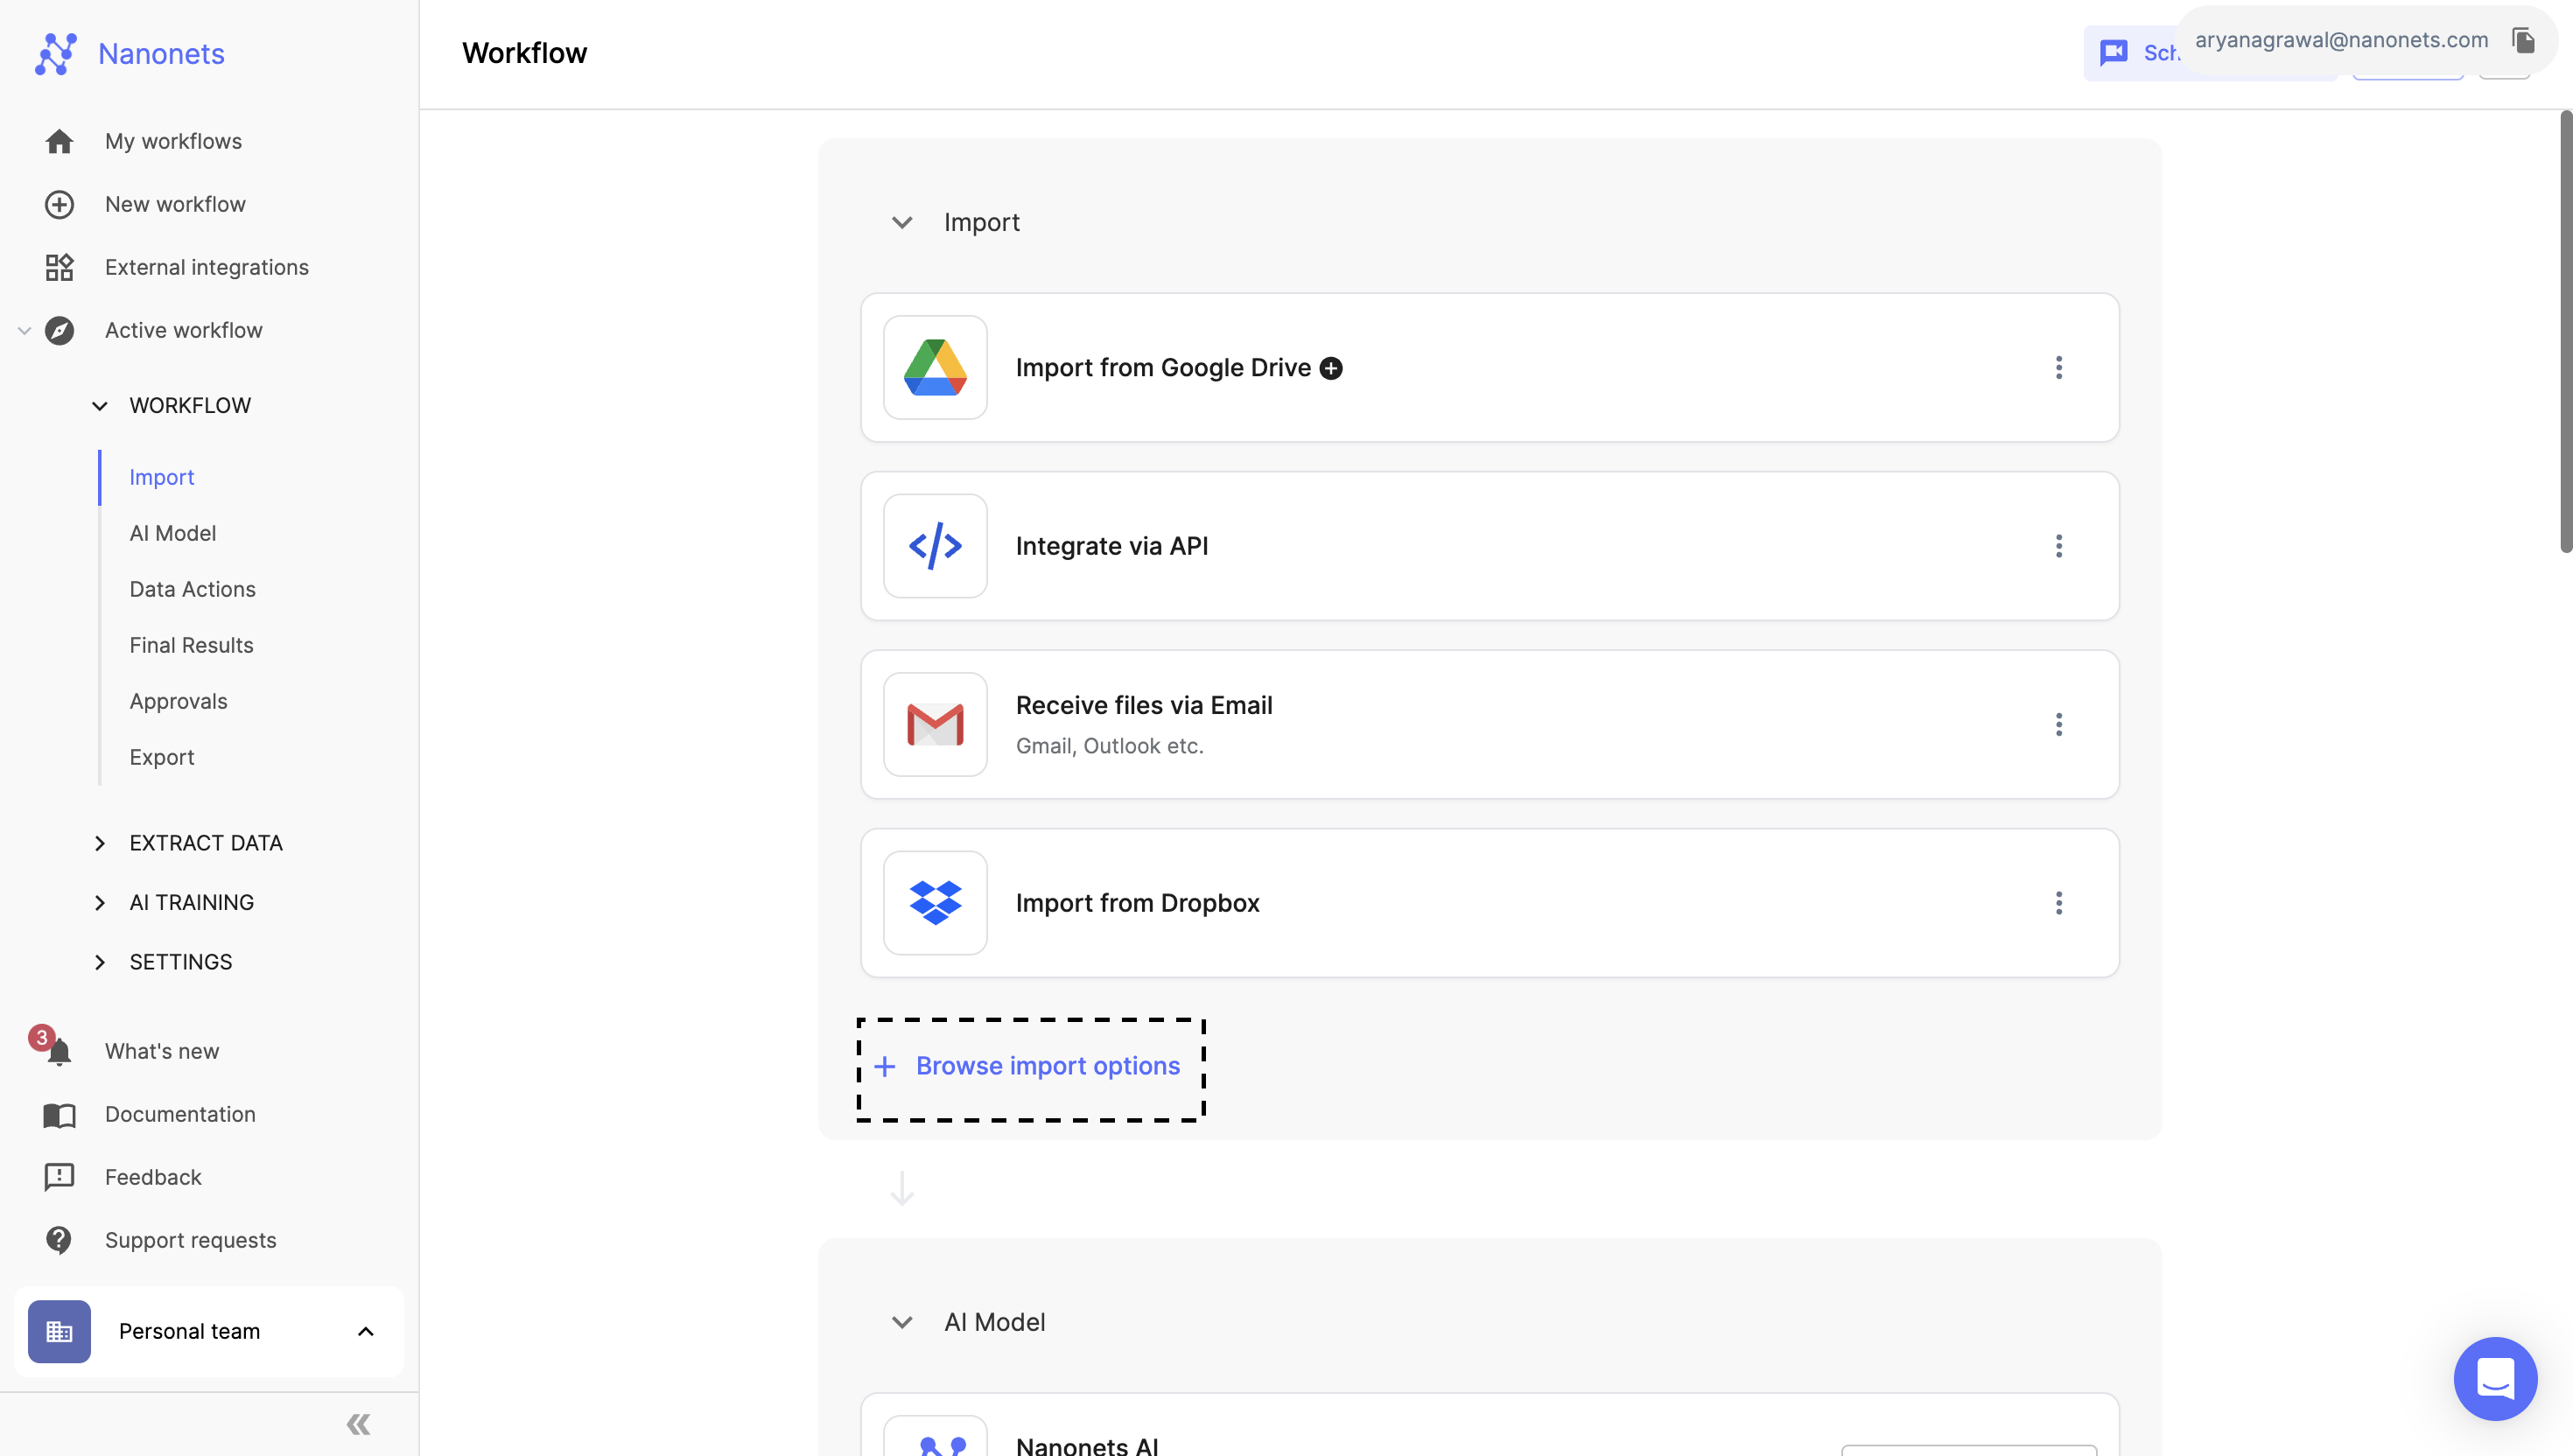
- Select Import Source:
- A list of available import options will be displayed.
- Choose the import source that best fits your needs (e.g., Email, Dropbox, Amazon S3, API integration).
- Authenticate and Configure:
- Depending on the chosen source, you may need to authenticate access. For example, to use Dropbox:
- Click on the Dropbox icon.
- Sign in to your Dropbox account and authorize Nanonets to access your files.
- Configure any necessary settings specific to the import source.
- Depending on the chosen source, you may need to authenticate access. For example, to use Dropbox:
- Complete Setup:
- After authentication and configuration, click on “Finish Setup” to save your settings.
- Verify and Test:
- Ensure that the import block is correctly set up by importing a test file.
- Verify that the file appears in extract data section.
Note: Not all import sources may not require authentication. Some sources might simply need you to setup the import block by choosing the block.
Data Actions
Configuring Data Actions
- Access Workflow: Start by navigating to the 'Workflow' section in the left panel of your Nanonets Extract Data page.
- Access Data Actions: Click on “Add a new step” to initiate the addition of a new data action block.
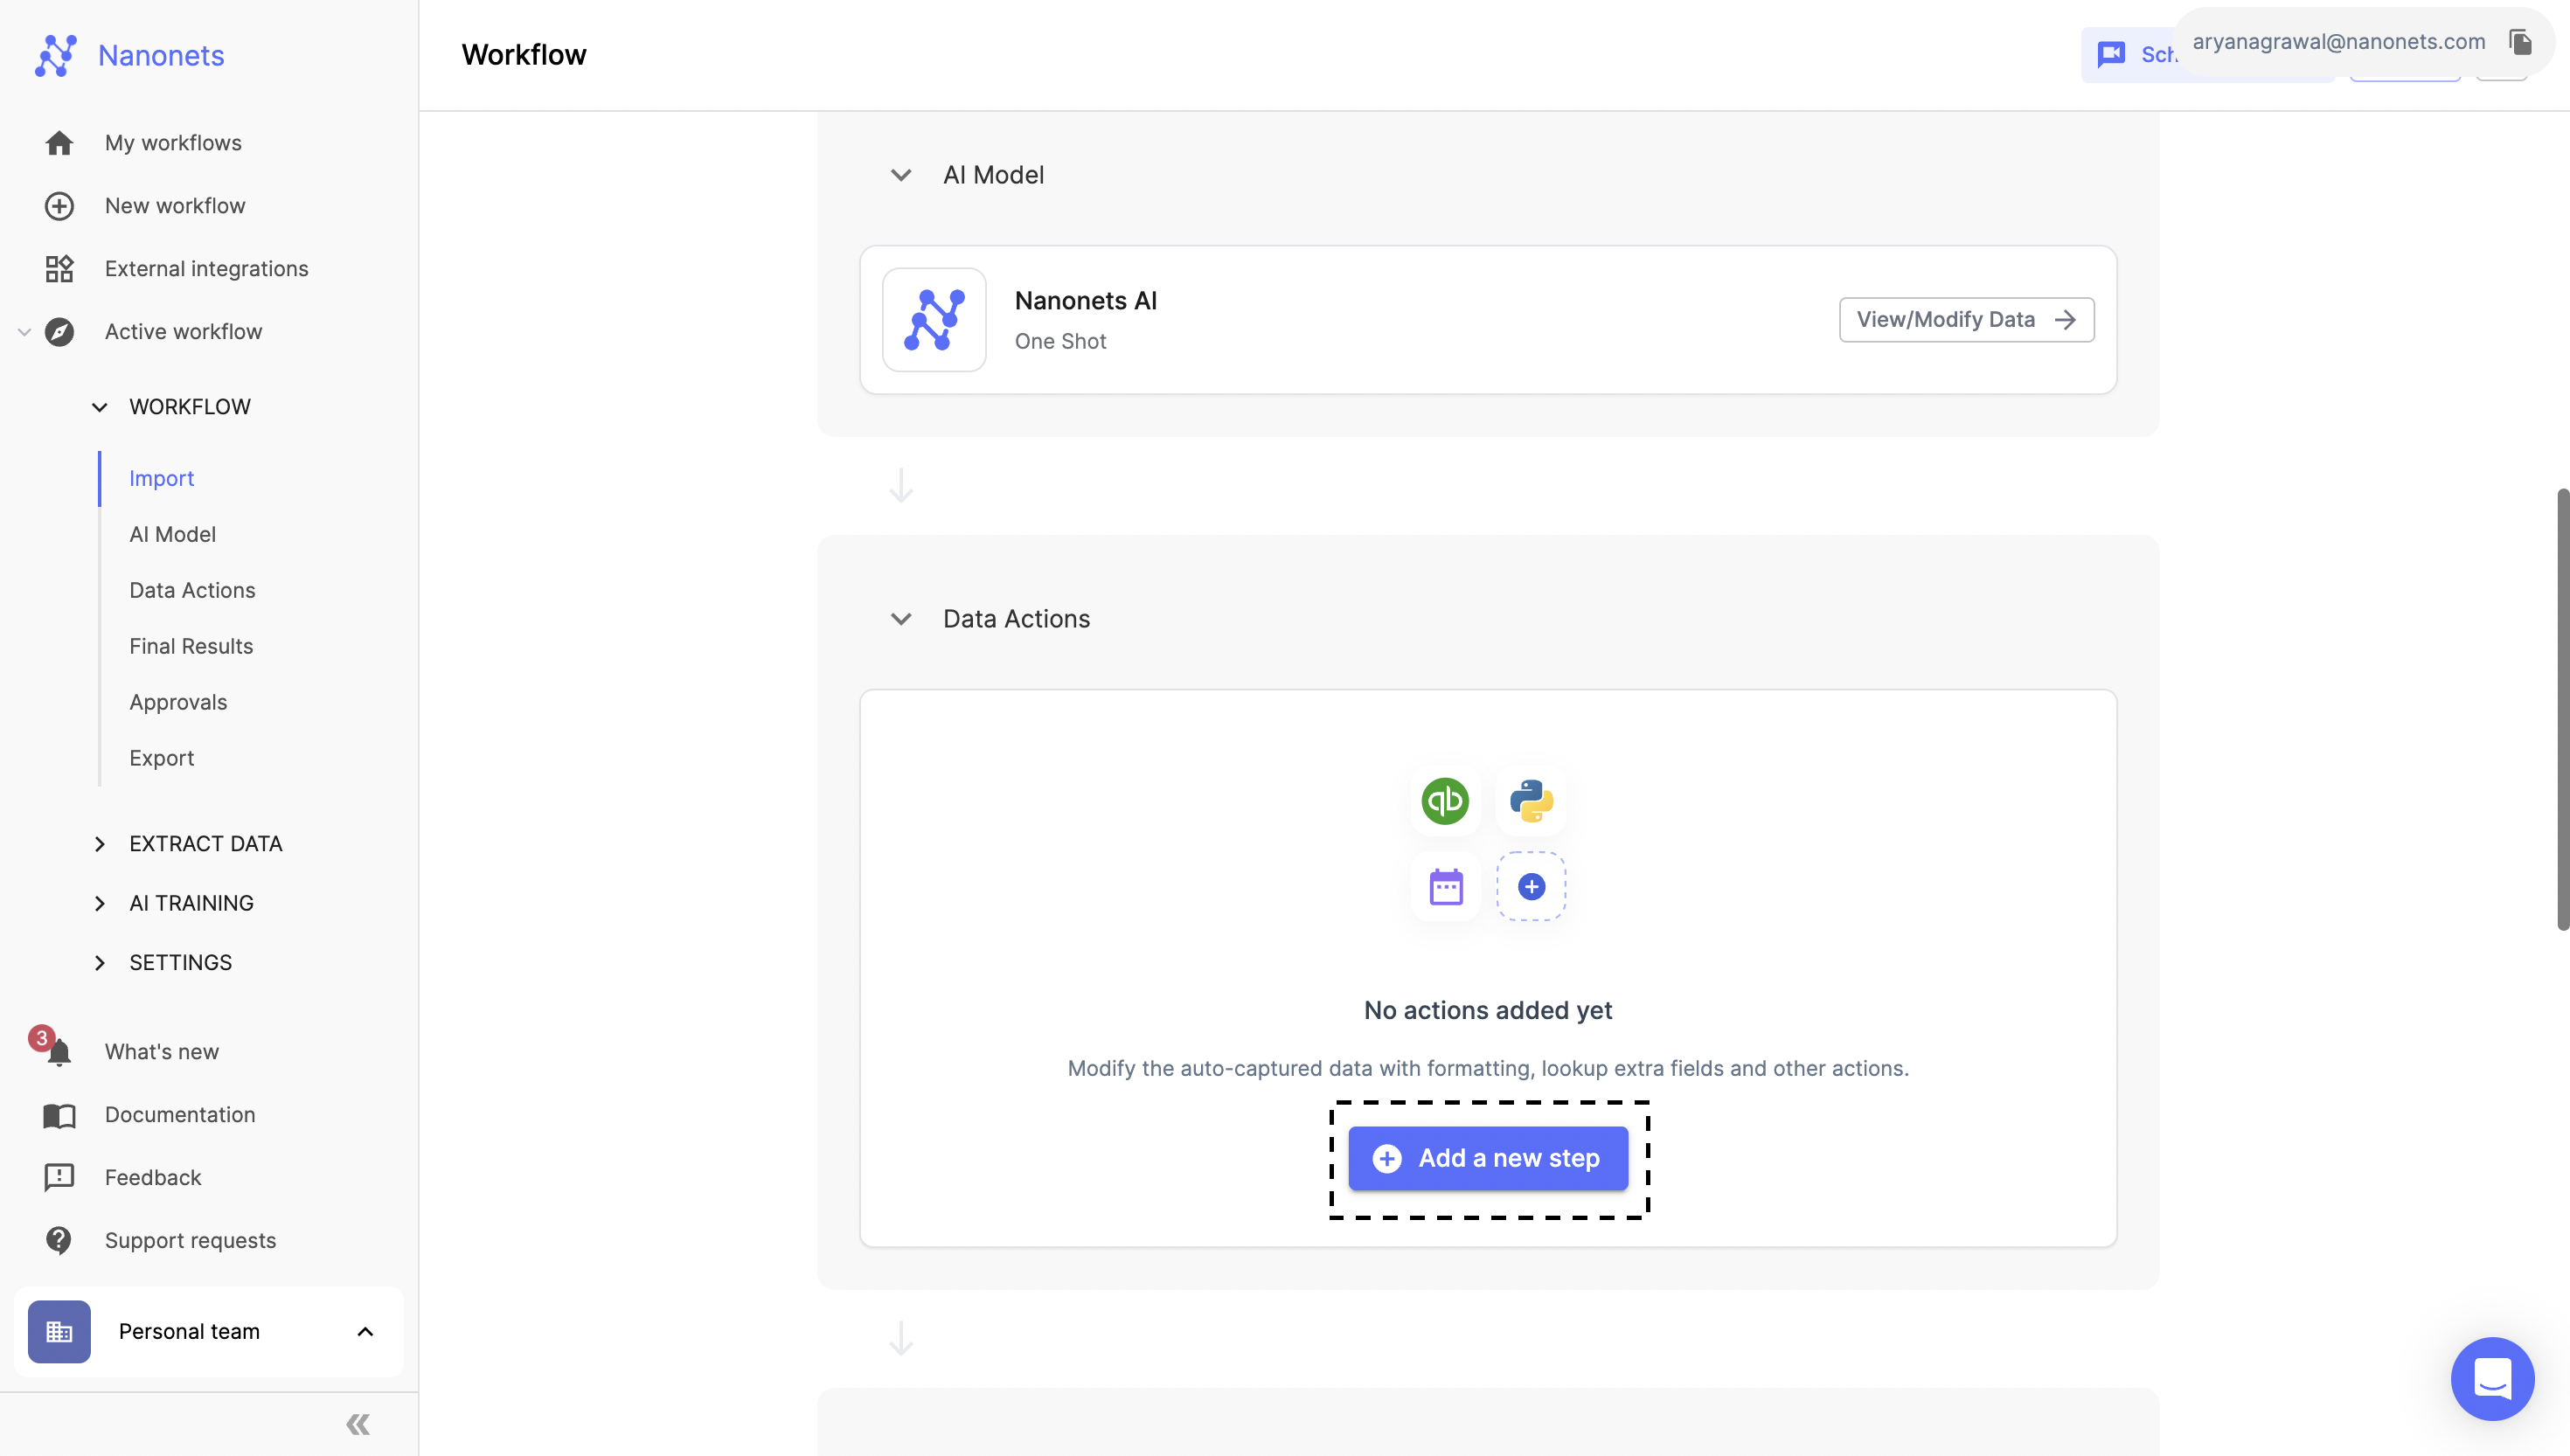
- Browse Data Action Blocks:
- A list of all available data action blocks will be displayed.
- These blocks represent different operations you can perform on your data, such as formatting, look-up, or applying conditions and actions.
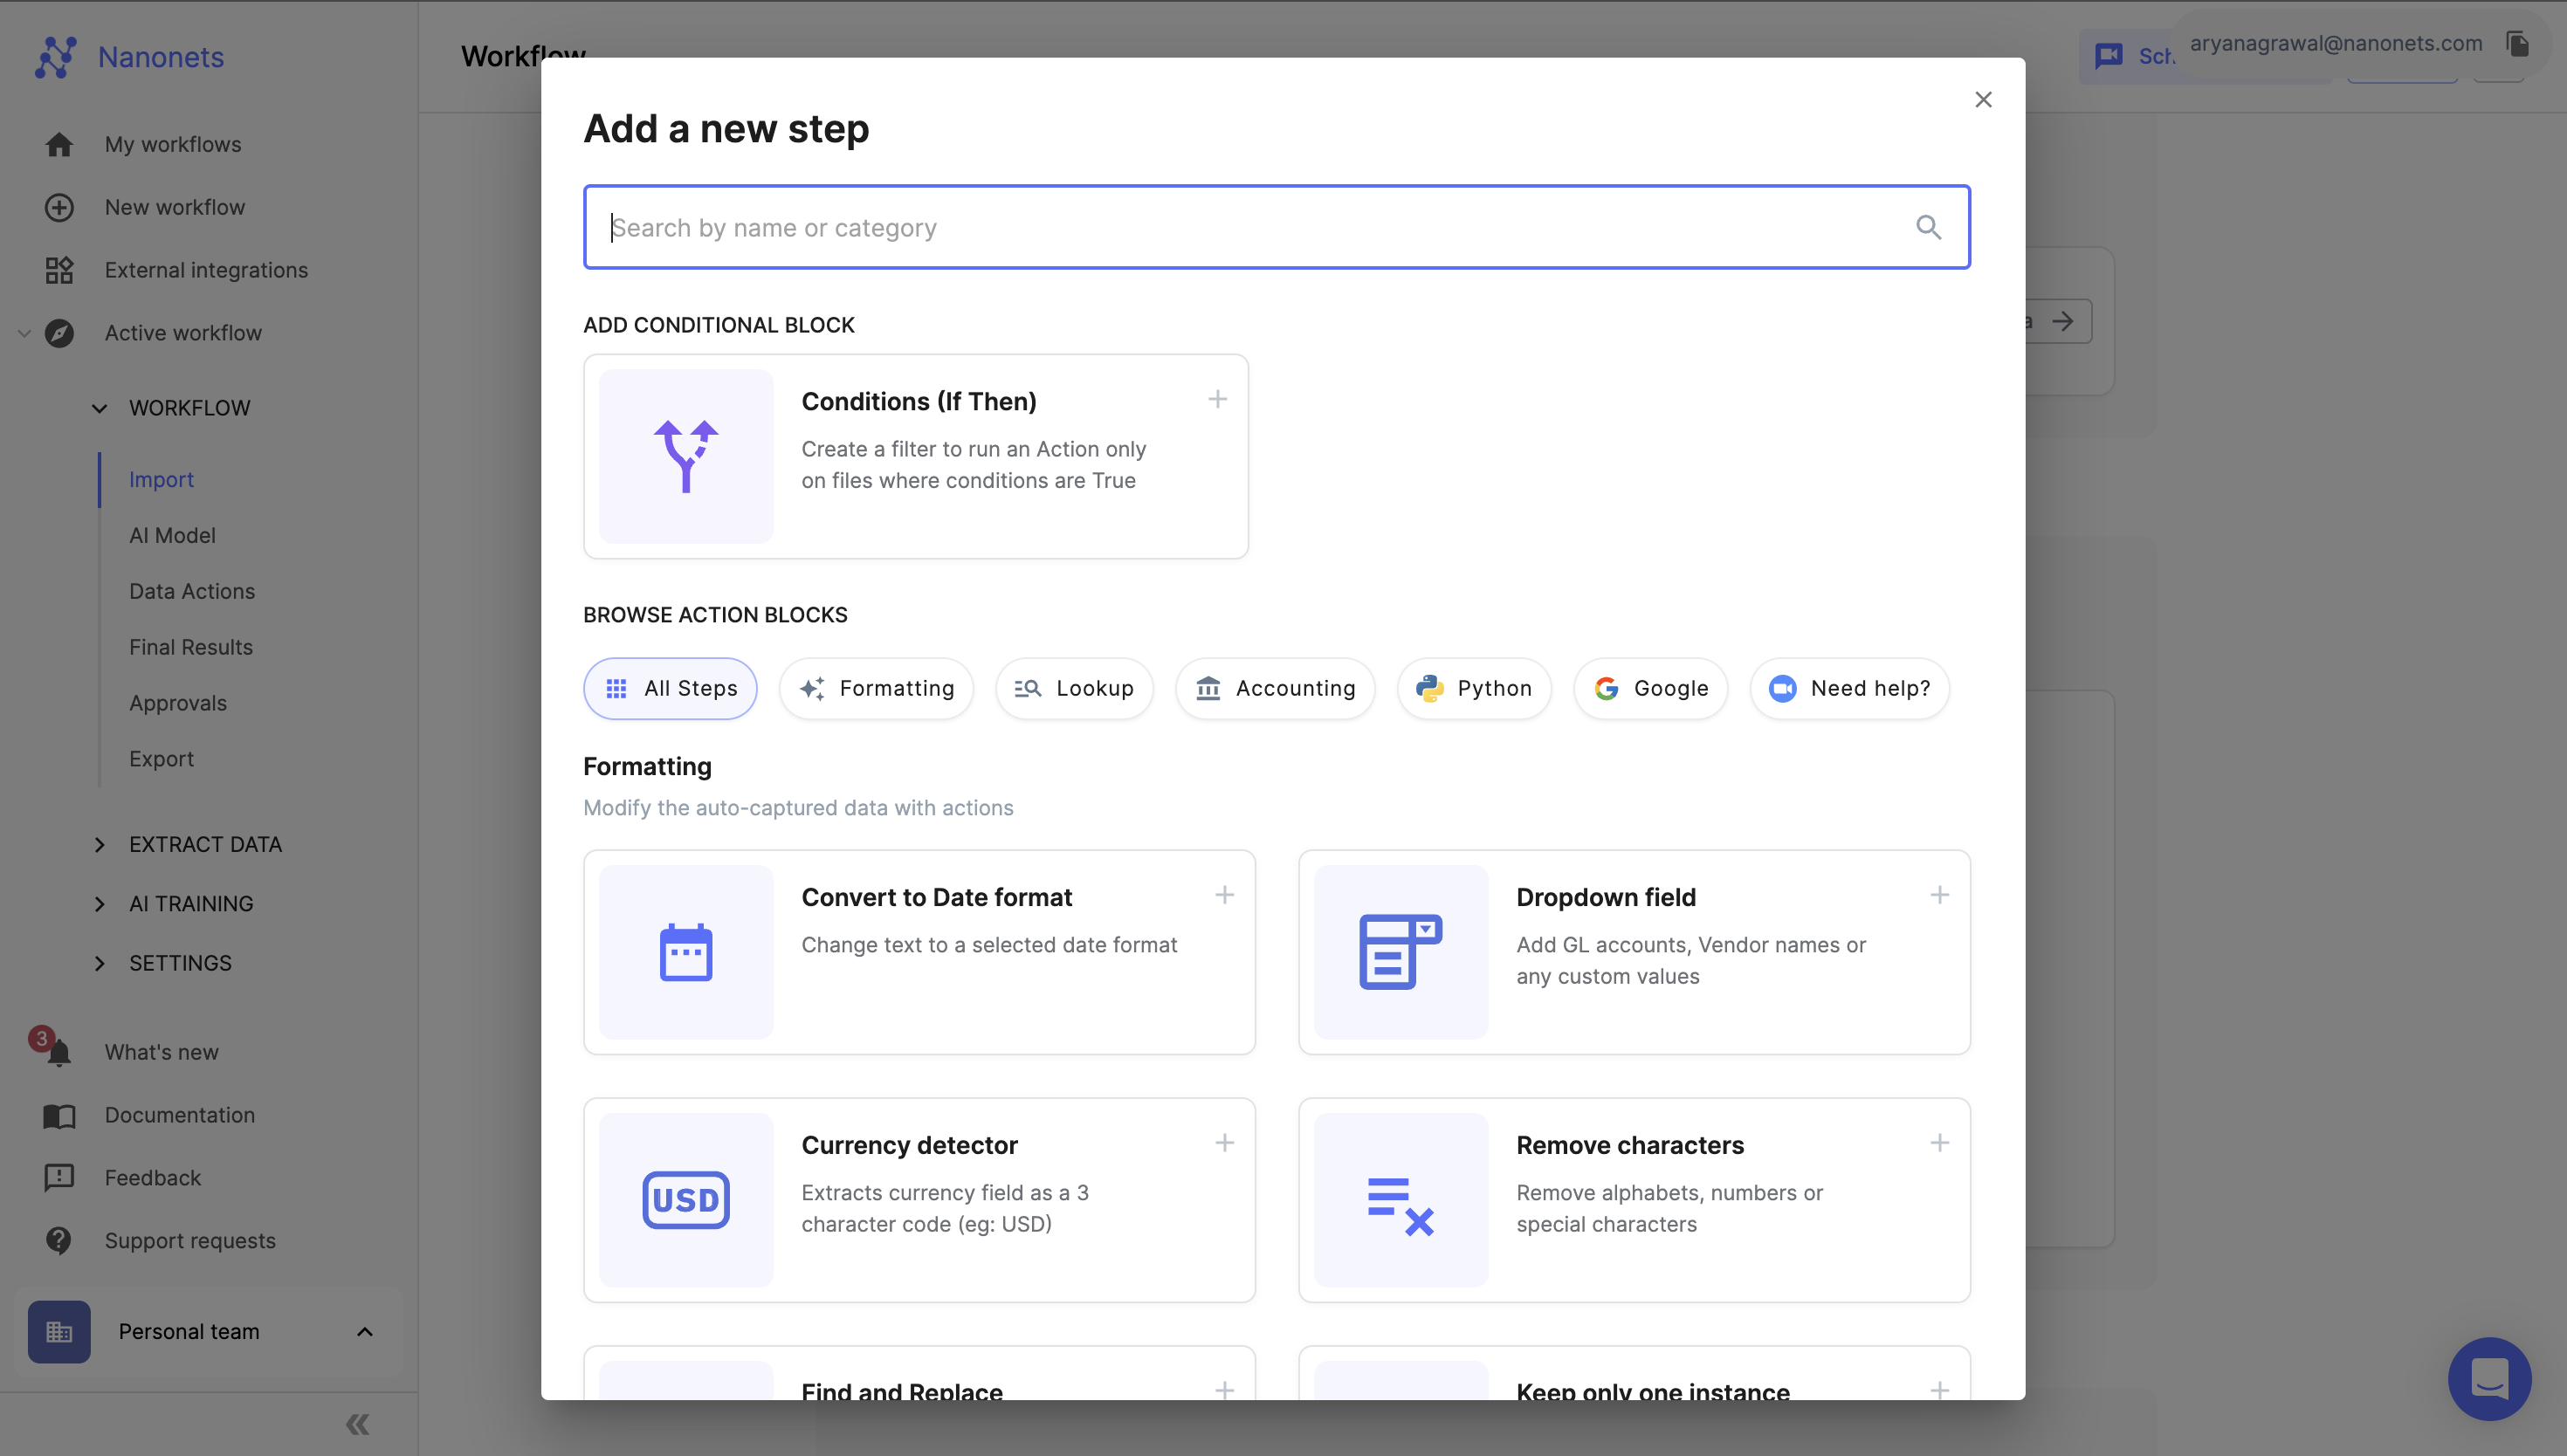
- Select a Data Action Block:
- Choose a block that fits your specific need. For example, if you need to perform an operation based on a condition, you might select a "Conditional Block."
- Configure the Data Action Block:
- Once the block is added to your workflow, configure it according to your needs.
- For a Conditional Block, specify the condition. For instance, set ‘field1 is NOT EMPTY’ to ensure the action only runs when ‘field1’ contains data.
- Define the Action:
- Determine what action should be taken when the condition is met. For example, if you want to format a date, set the action to convert the date to the format 'YYYY-MM-DD'.
- You can choose to overwrite the original field with the results of the data action or create a new field to store the modified data.
- Test the Data Action:
- Before finalizing, test the data action block.
- Use the “test this action” feature by selecting a sample file to see how the block processes the data in real-time.
- Save the Configuration:
- Once you are satisfied with the setup and testing, click on “Finish setup to save.”
- This saves the configured data action block to your workflow.
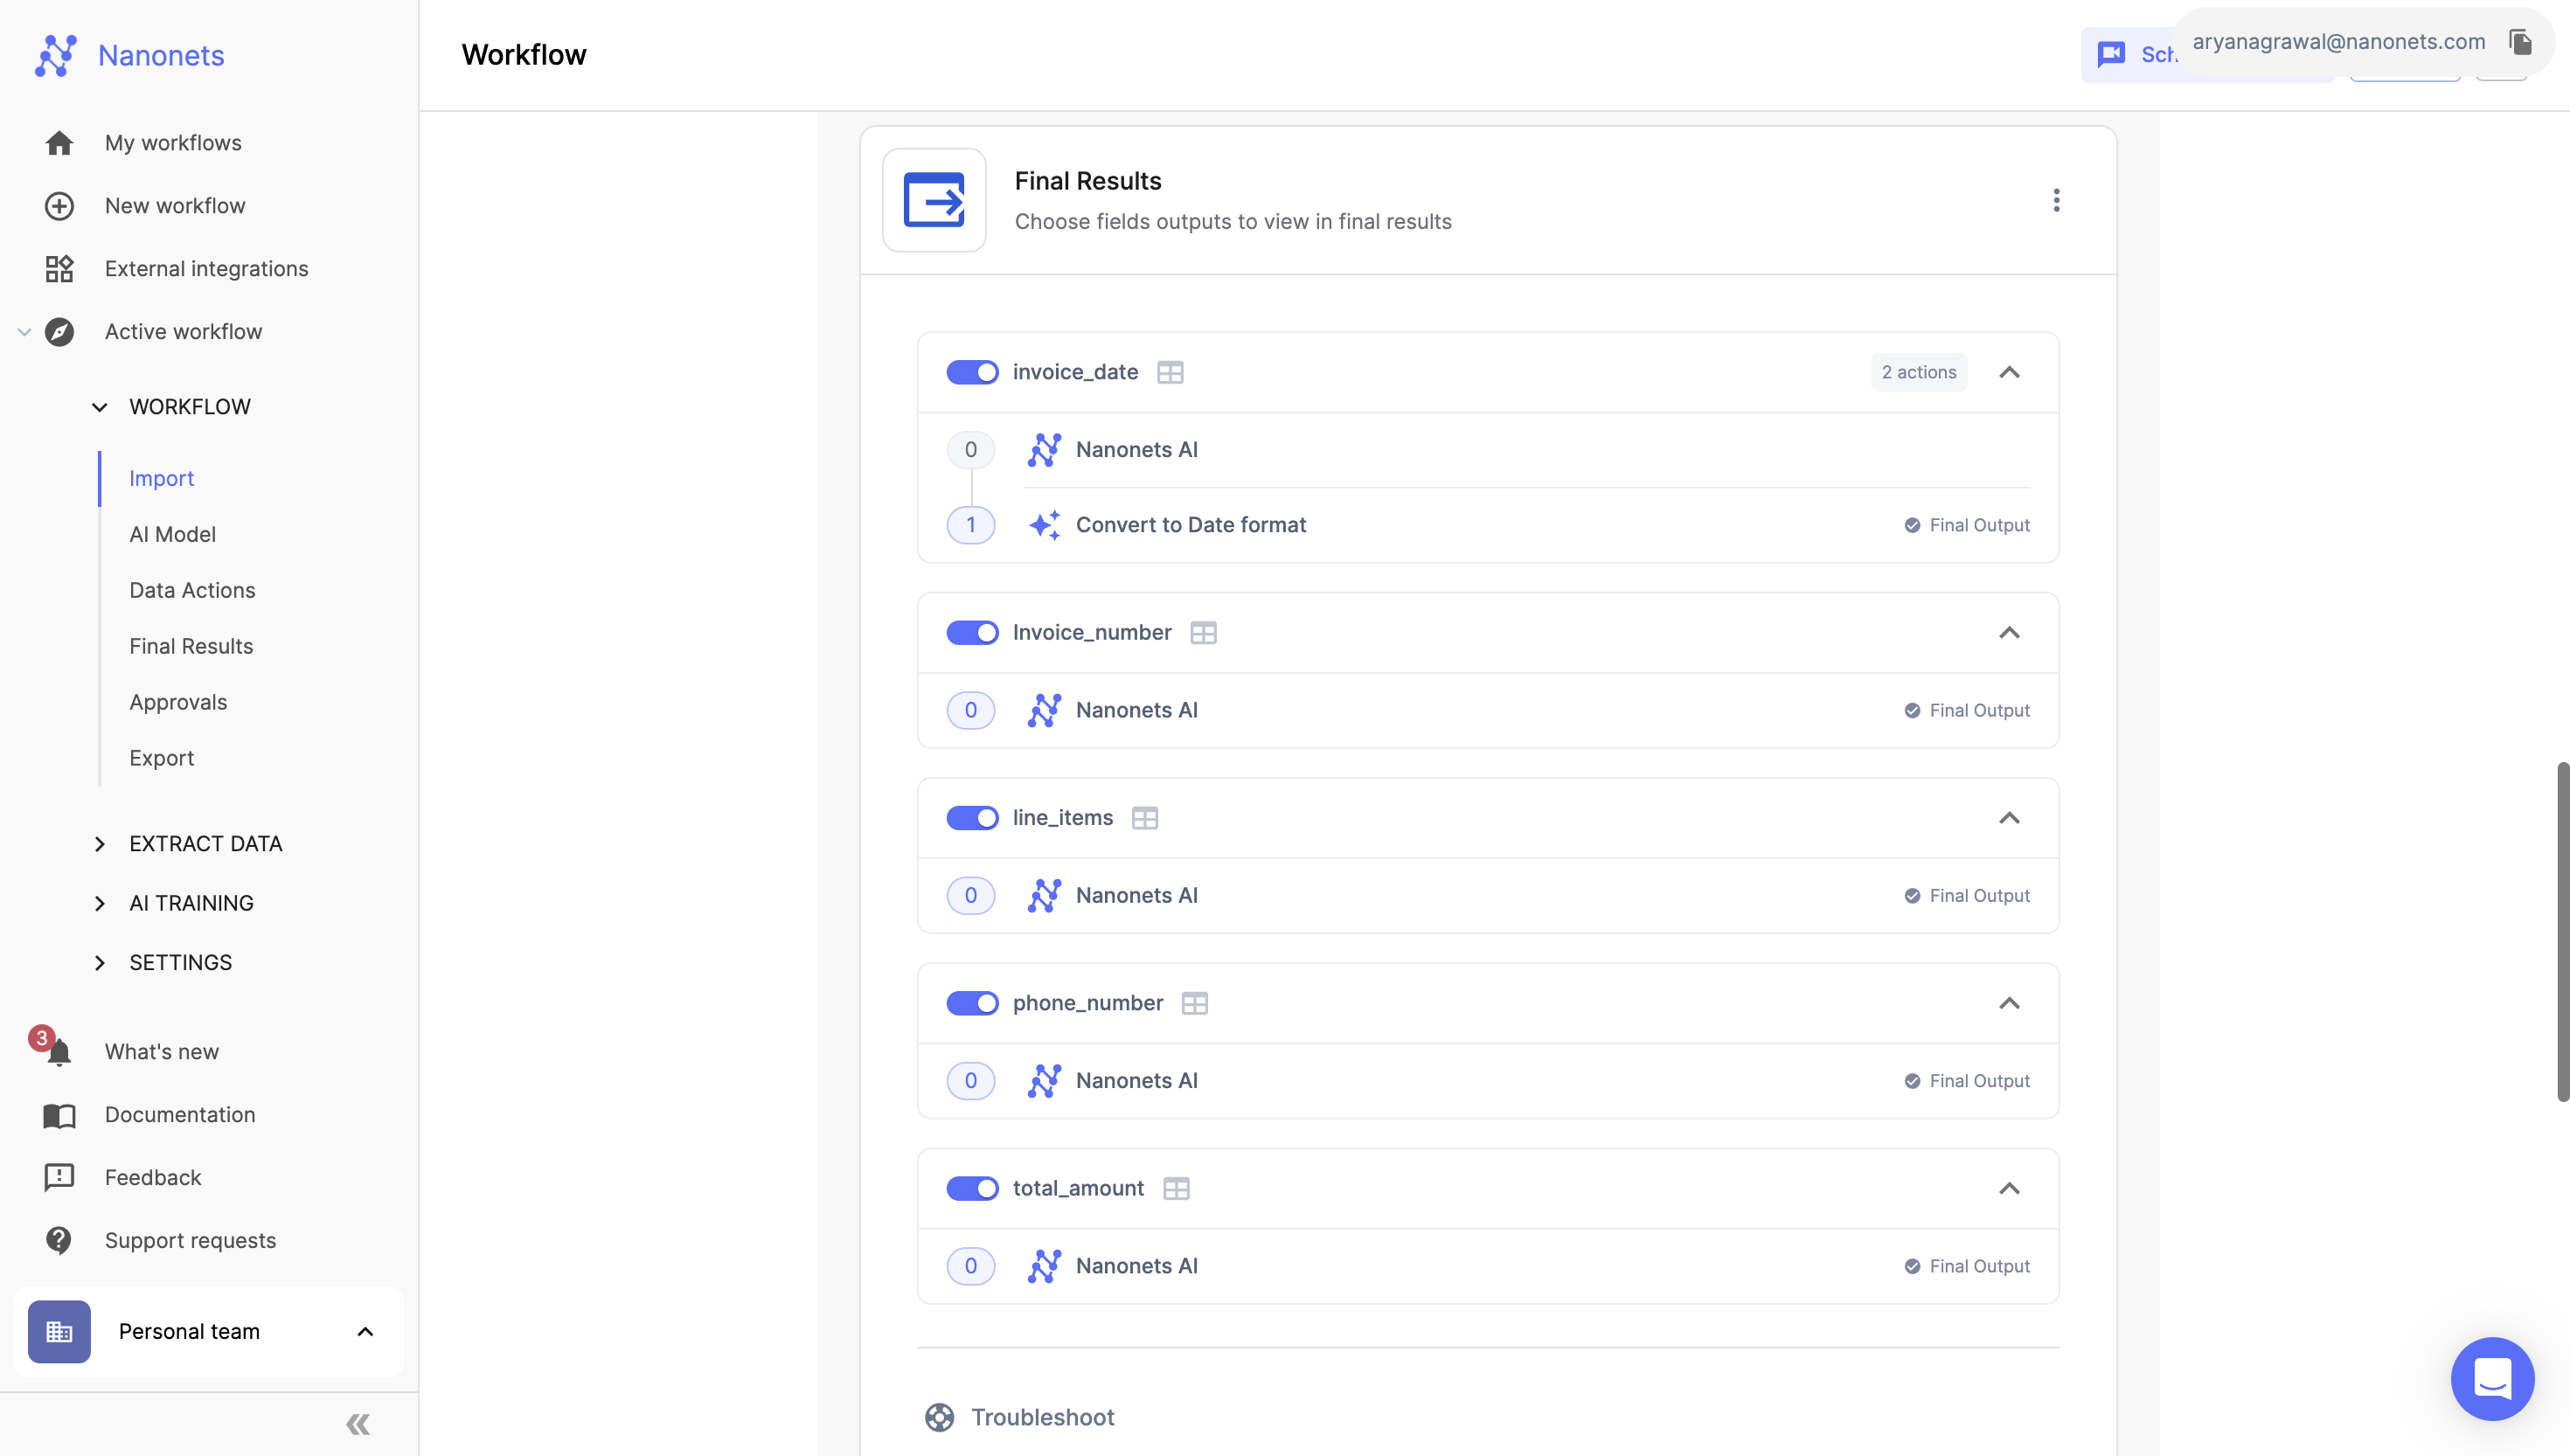
Final Results
Configuring Final Outputs
- Access the Final Results Section: Within your workflow page, locate and click on the "Final Results" tab. This section is dedicated to finalizing the output of your workflow.
- Select Fields:
- You will see a list of all fields processed in previous steps of the workflow.
- Toggle the fields you want to include in the final results. For example, fields like
invoice_date,Invoice_number,line_items,phone_number, andtotal_amountcan be selected based on your requirements.
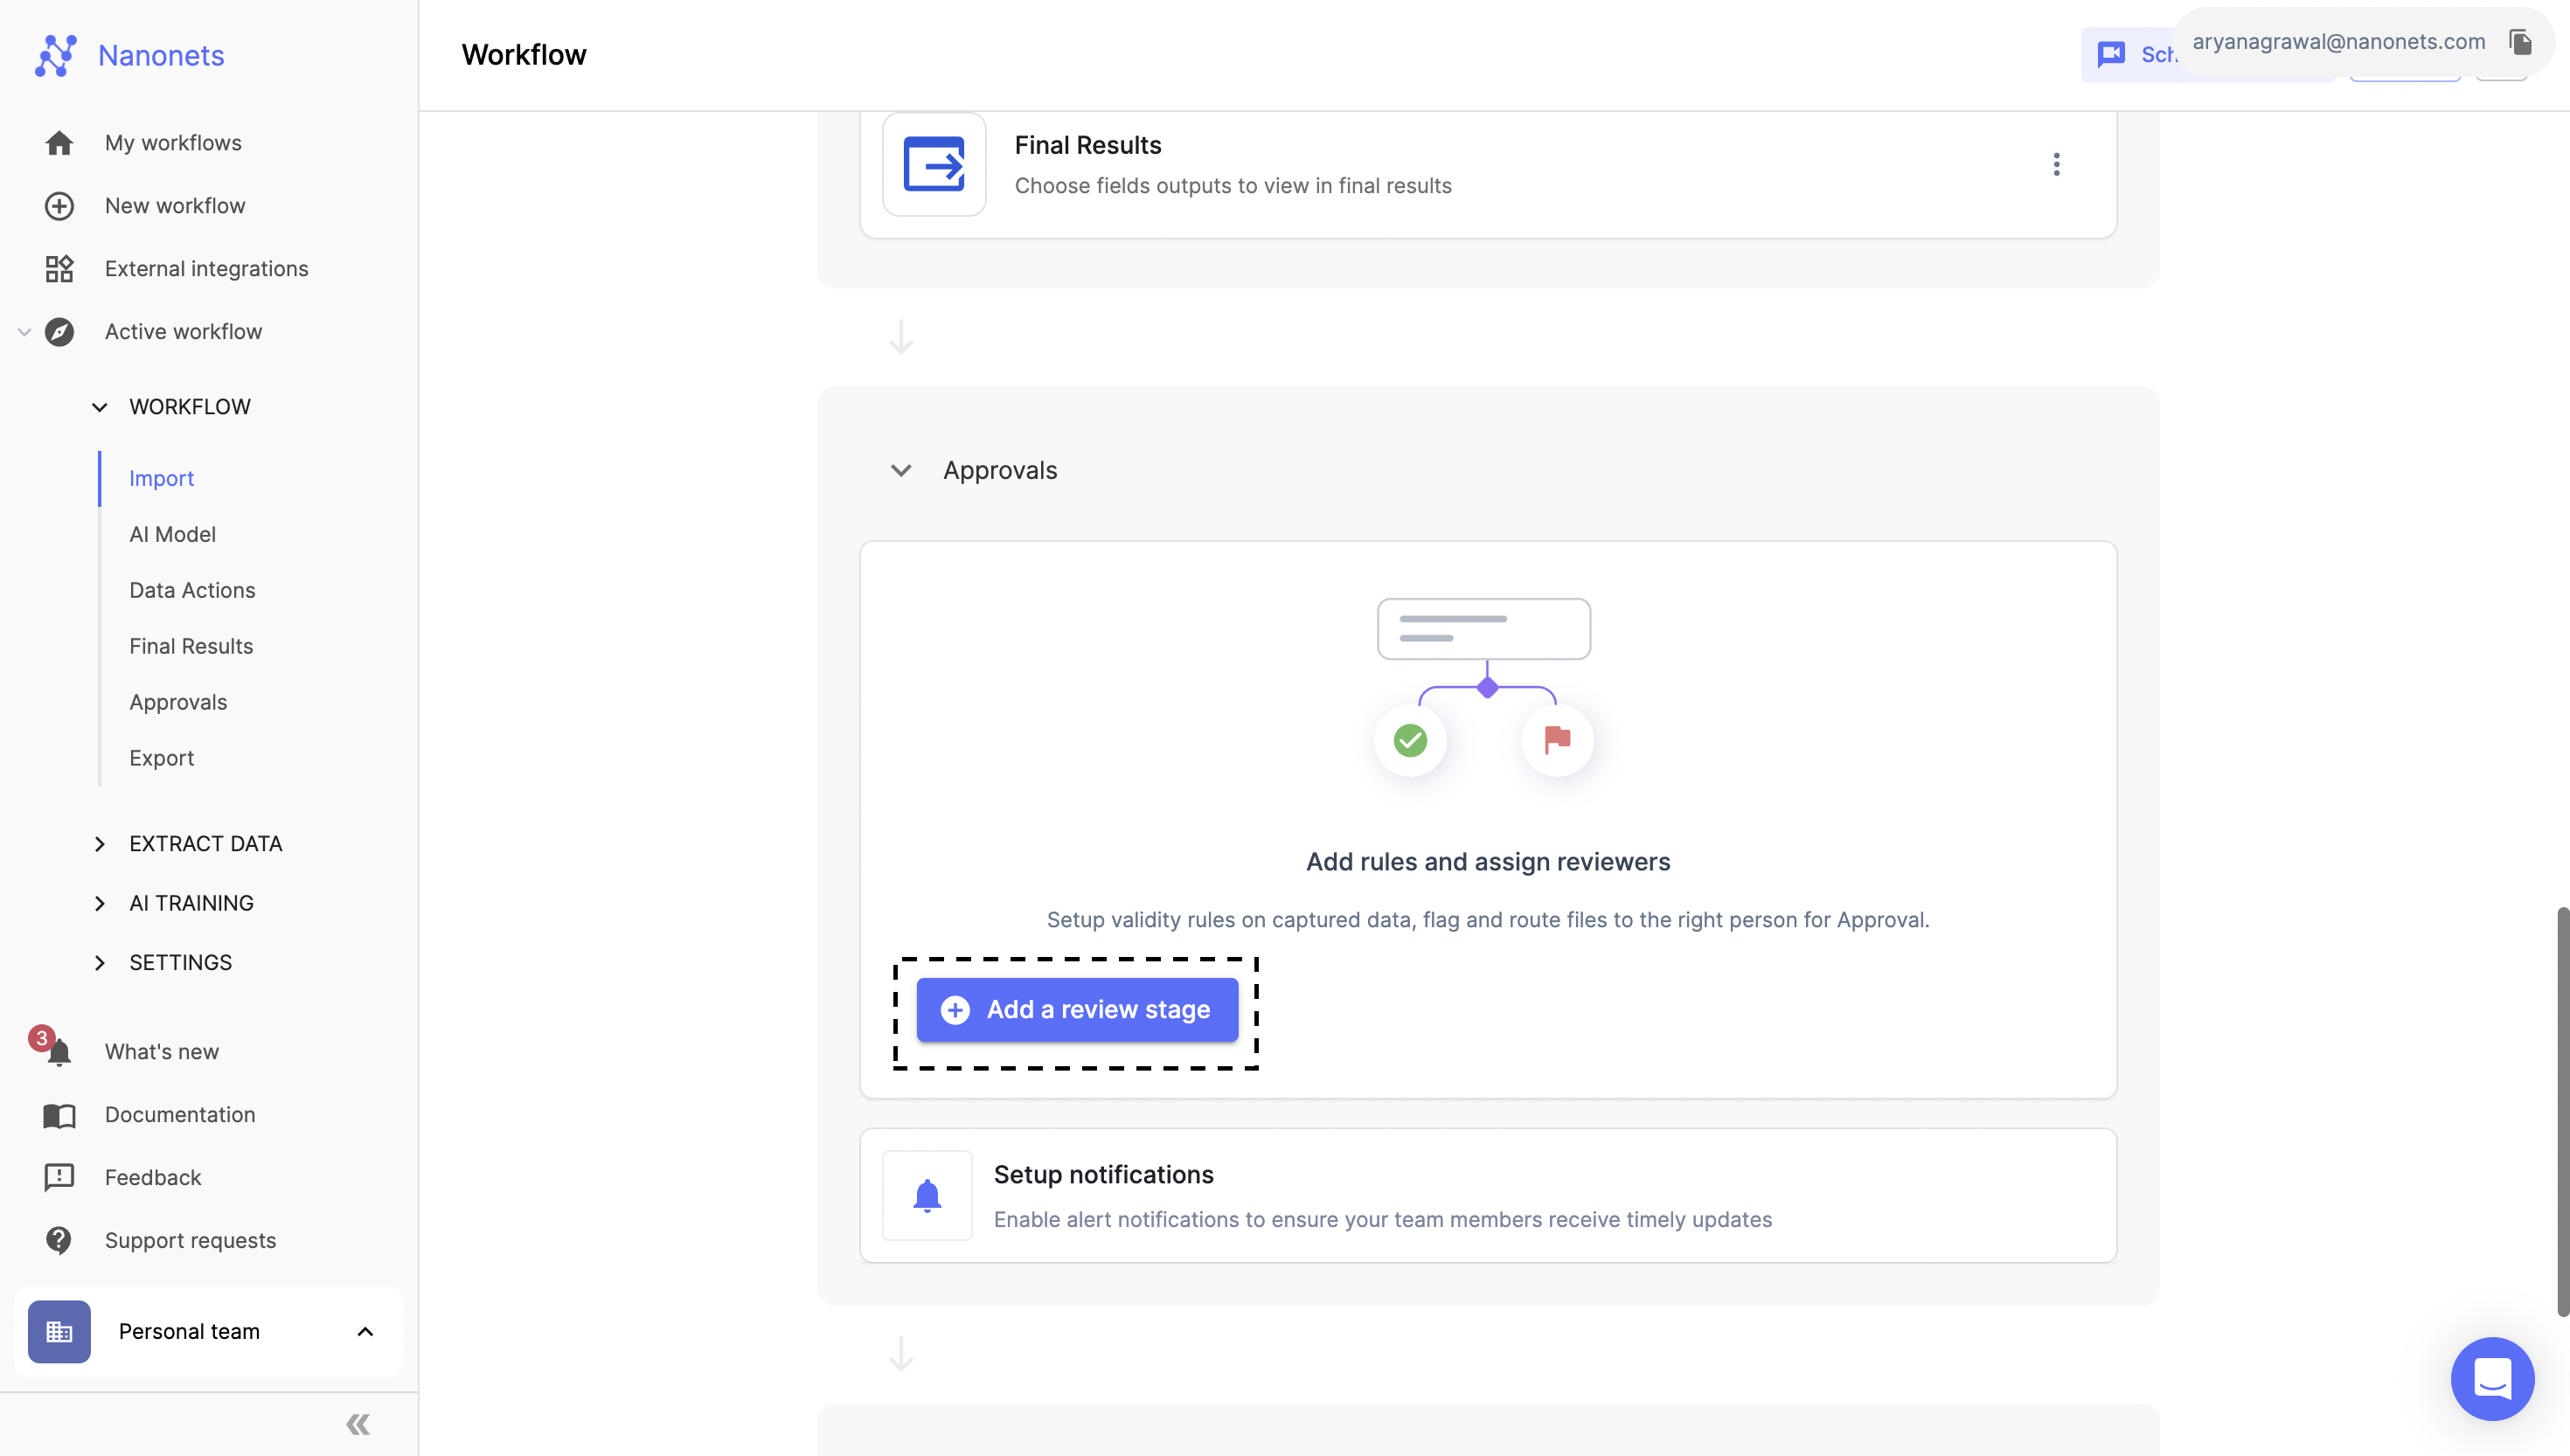
Approvals
Configuring Approval Stages
- Access Workflow: Start by navigating to the 'Workflow' section in the left panel of your Nanonets Extract Data page.
- Add a Review Stage:
- Click on the "Add a review stage" button to begin setting up a new approval rule within your workflow.
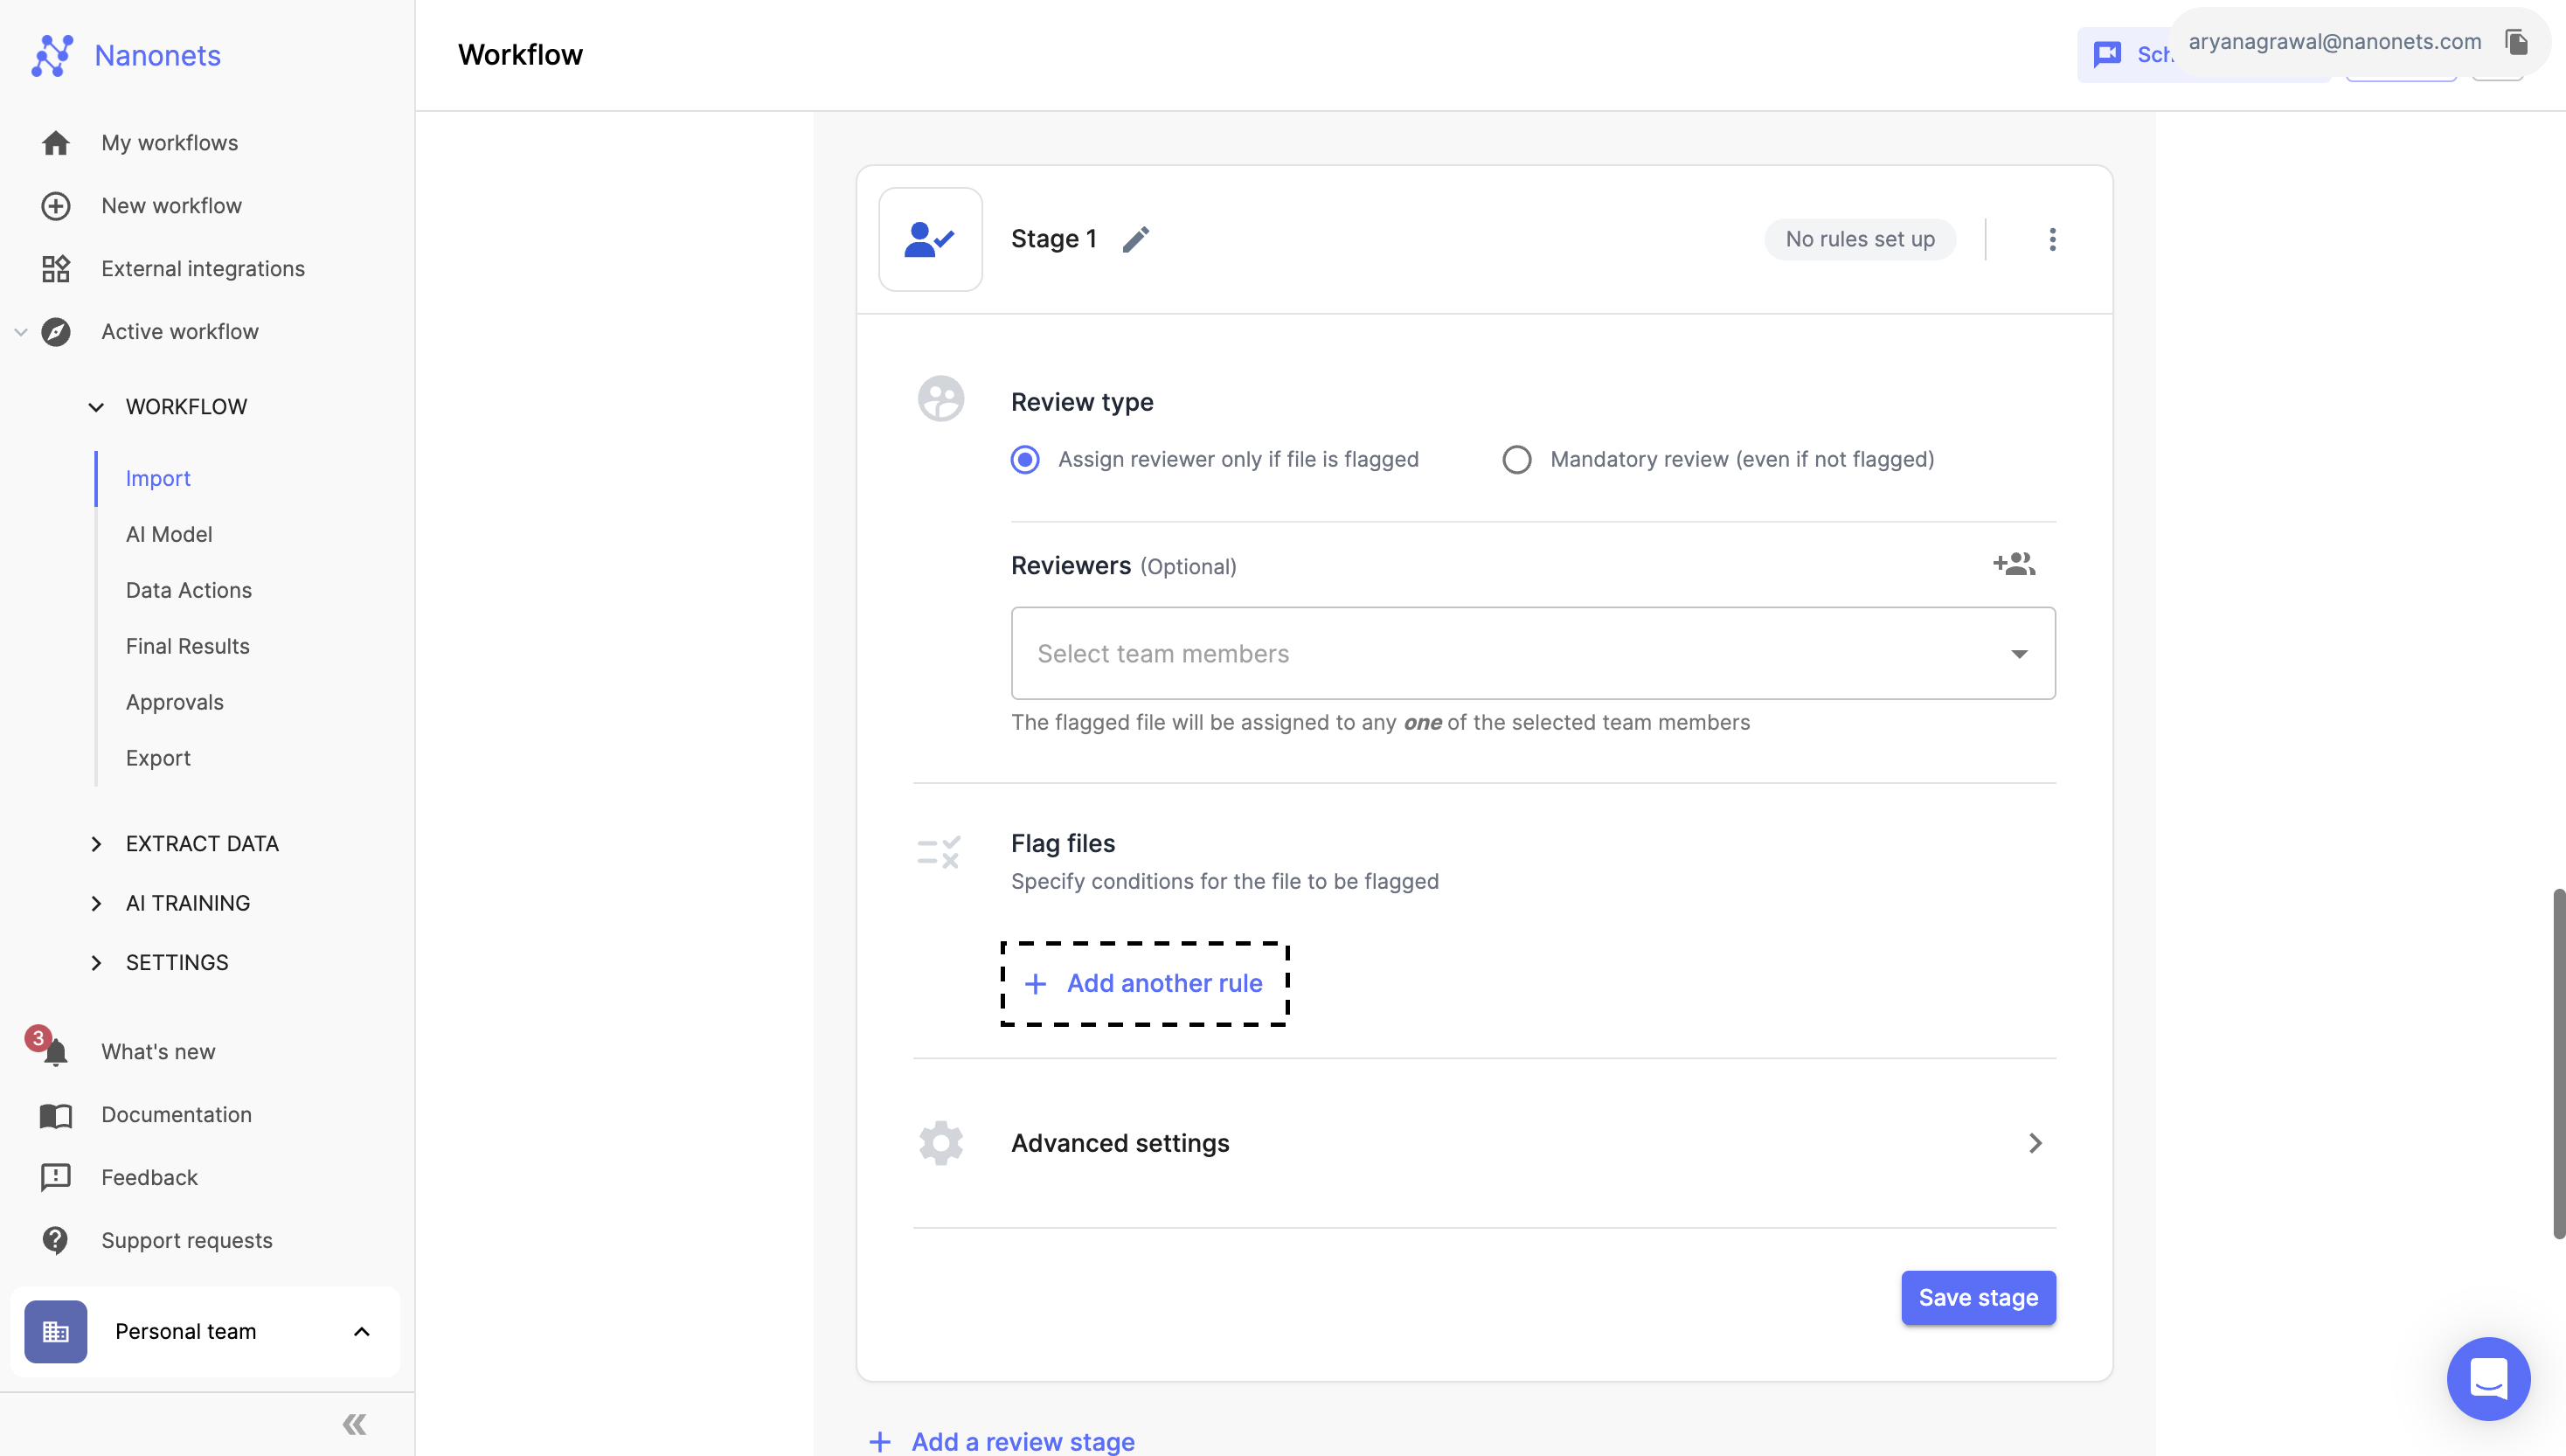
- Choose Review Type:
- Select from two types of review settings:
- Assign reviewer only if file is flagged: This option assigns a reviewer only to files that meet specific flagged conditions.
- Mandatory review (even if not flagged): This option requires a review for every file, regardless of whether it is flagged.
- Select from two types of review settings:

- Select Reviewers:
- Choose the team members who will be responsible for reviewing the files.
- You can add multiple reviewers to the pool; a flagged file will be assigned to one of the reviewers.
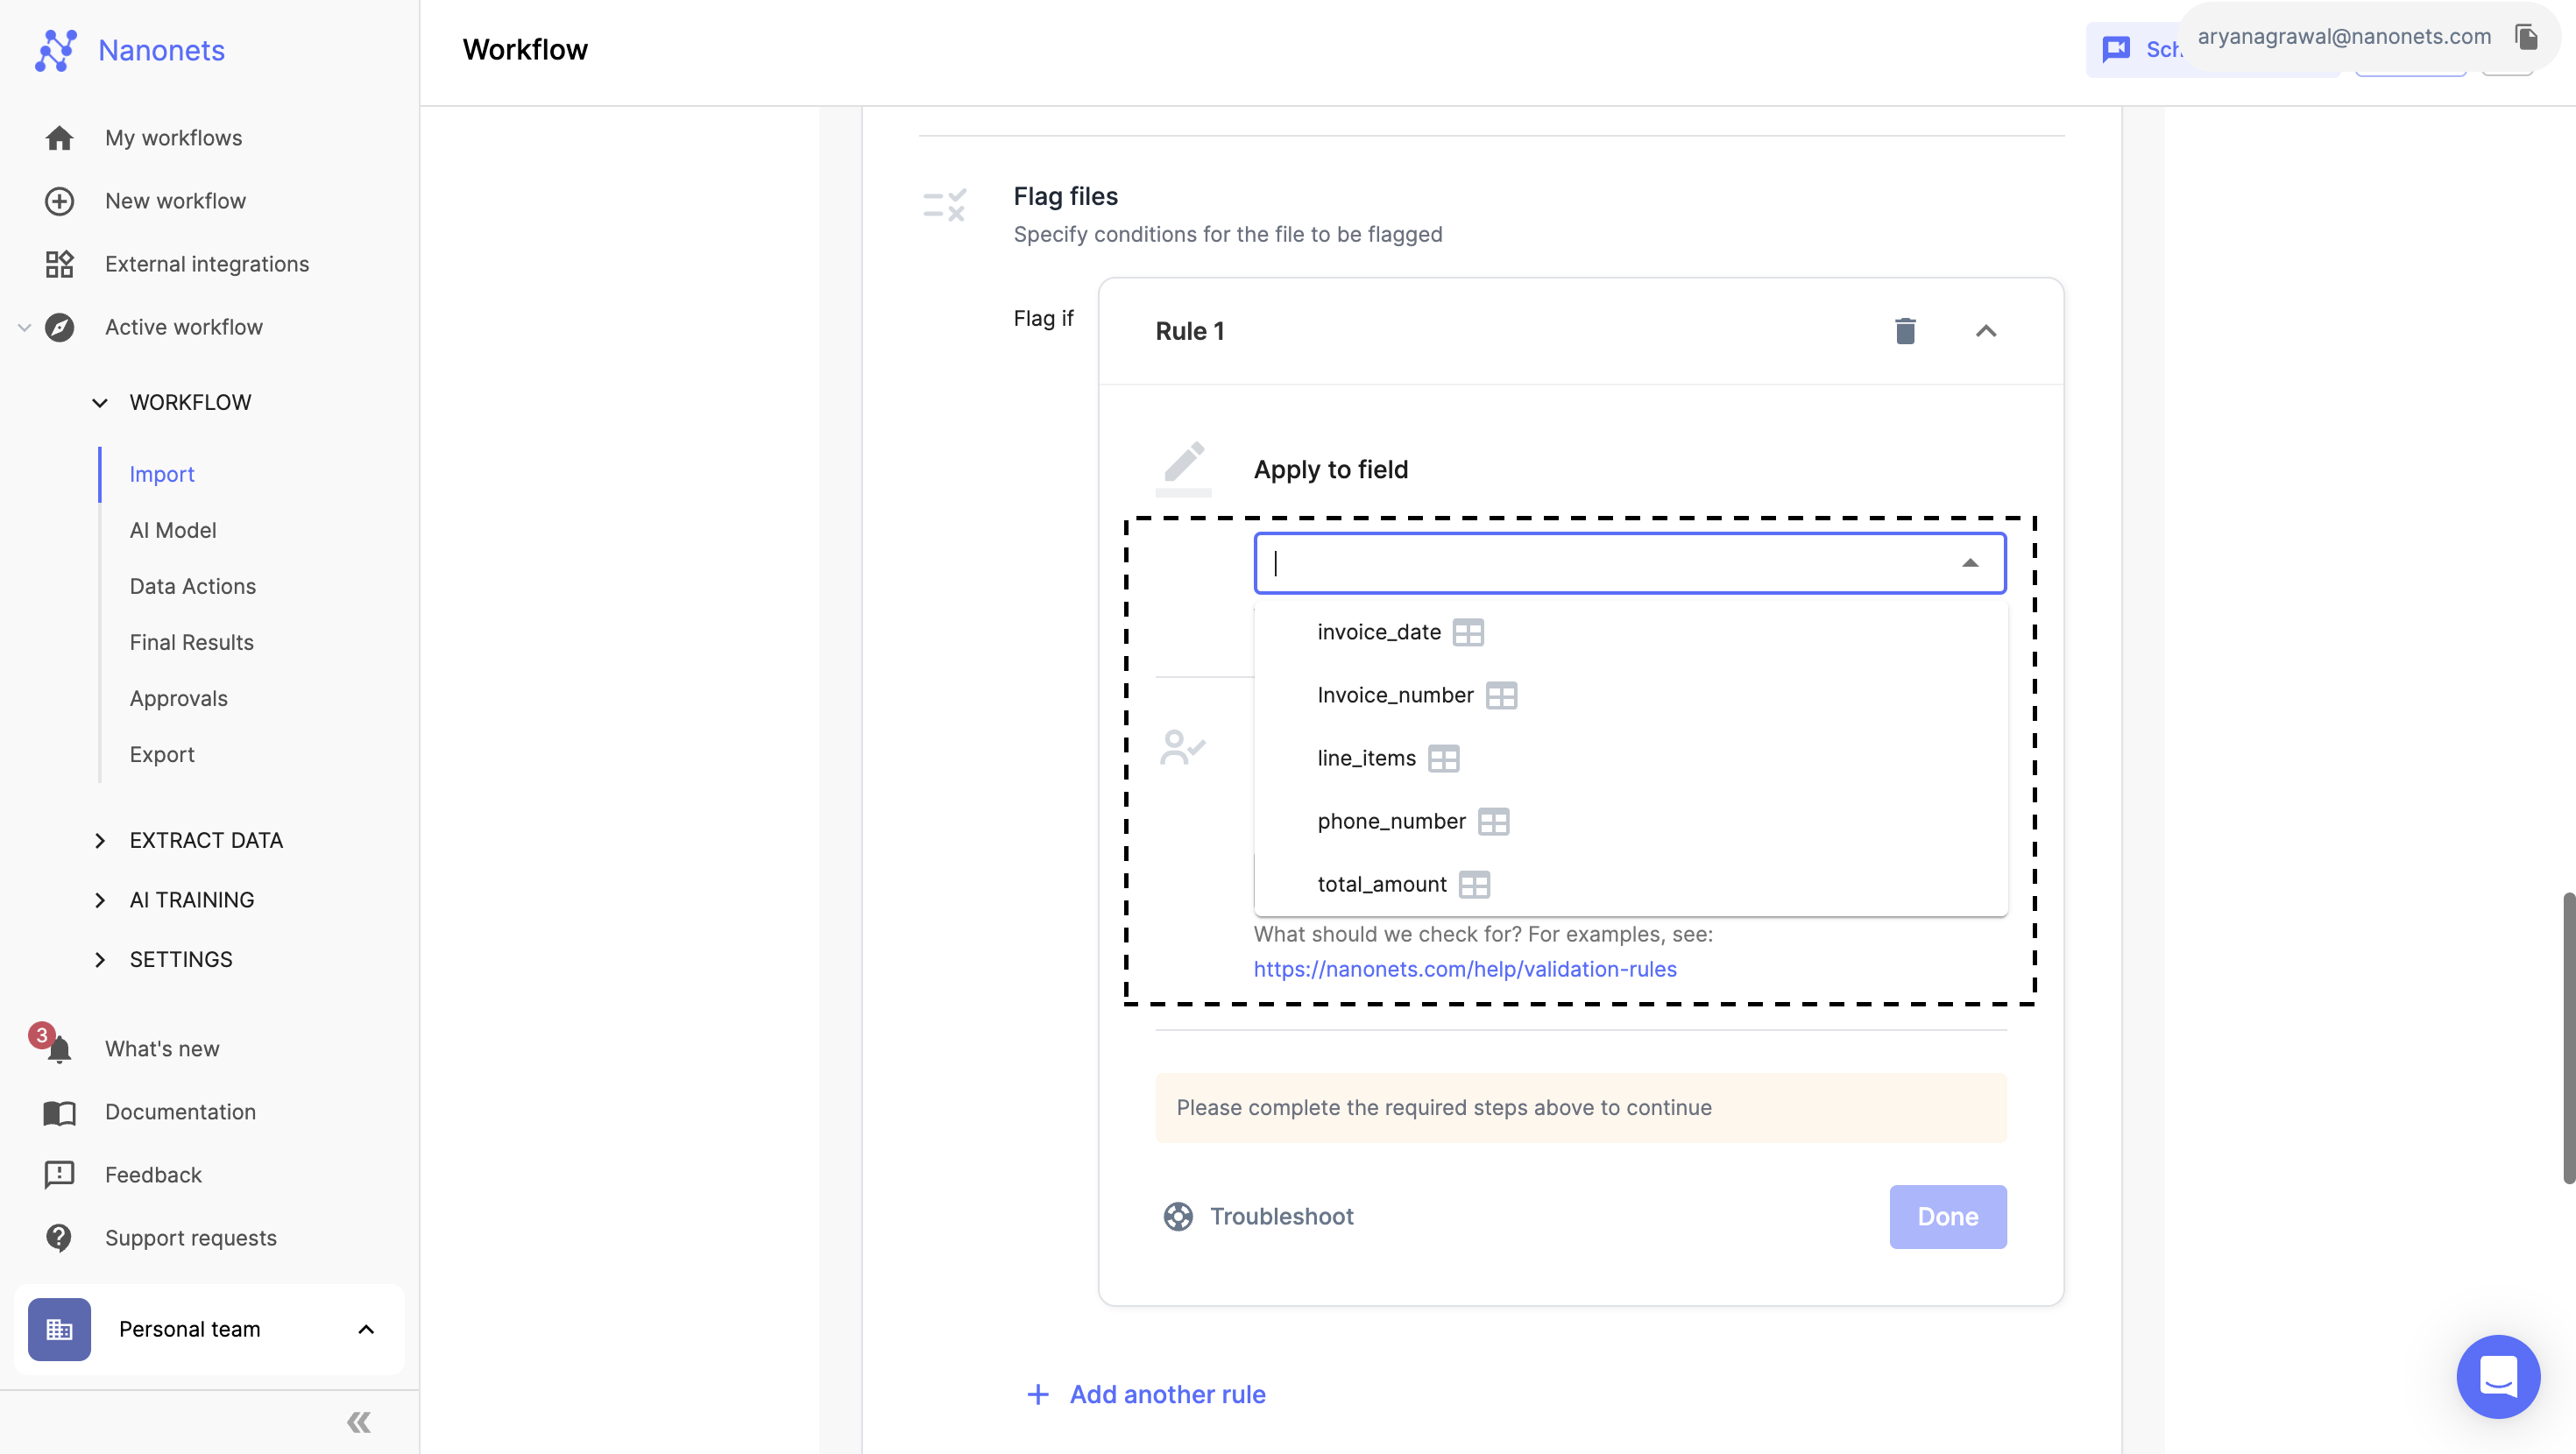
- Configure Flagging Rules: Click on the “Add another rule”
- Set up criteria that determine when a file should be flagged for review.
- Select the field you want to apply rules to, then choose from pre-defined rules or create a custom rule using a Python block for more complex conditions.
- Once you have selected the field and condition click on the “Done” button.
- Define Rule Logic:
- If you have multiple rules, decide how these should be applied:
- AND Condition: All conditions must be met for the file to be flagged.
- OR Condition: Any of the conditions can trigger flagging.
- If you have multiple rules, decide how these should be applied:
- Save the Approval Stage:
- After setting the review type, selecting reviewers, and configuring rules, click on the "save stage" button to finalize the approval stage.
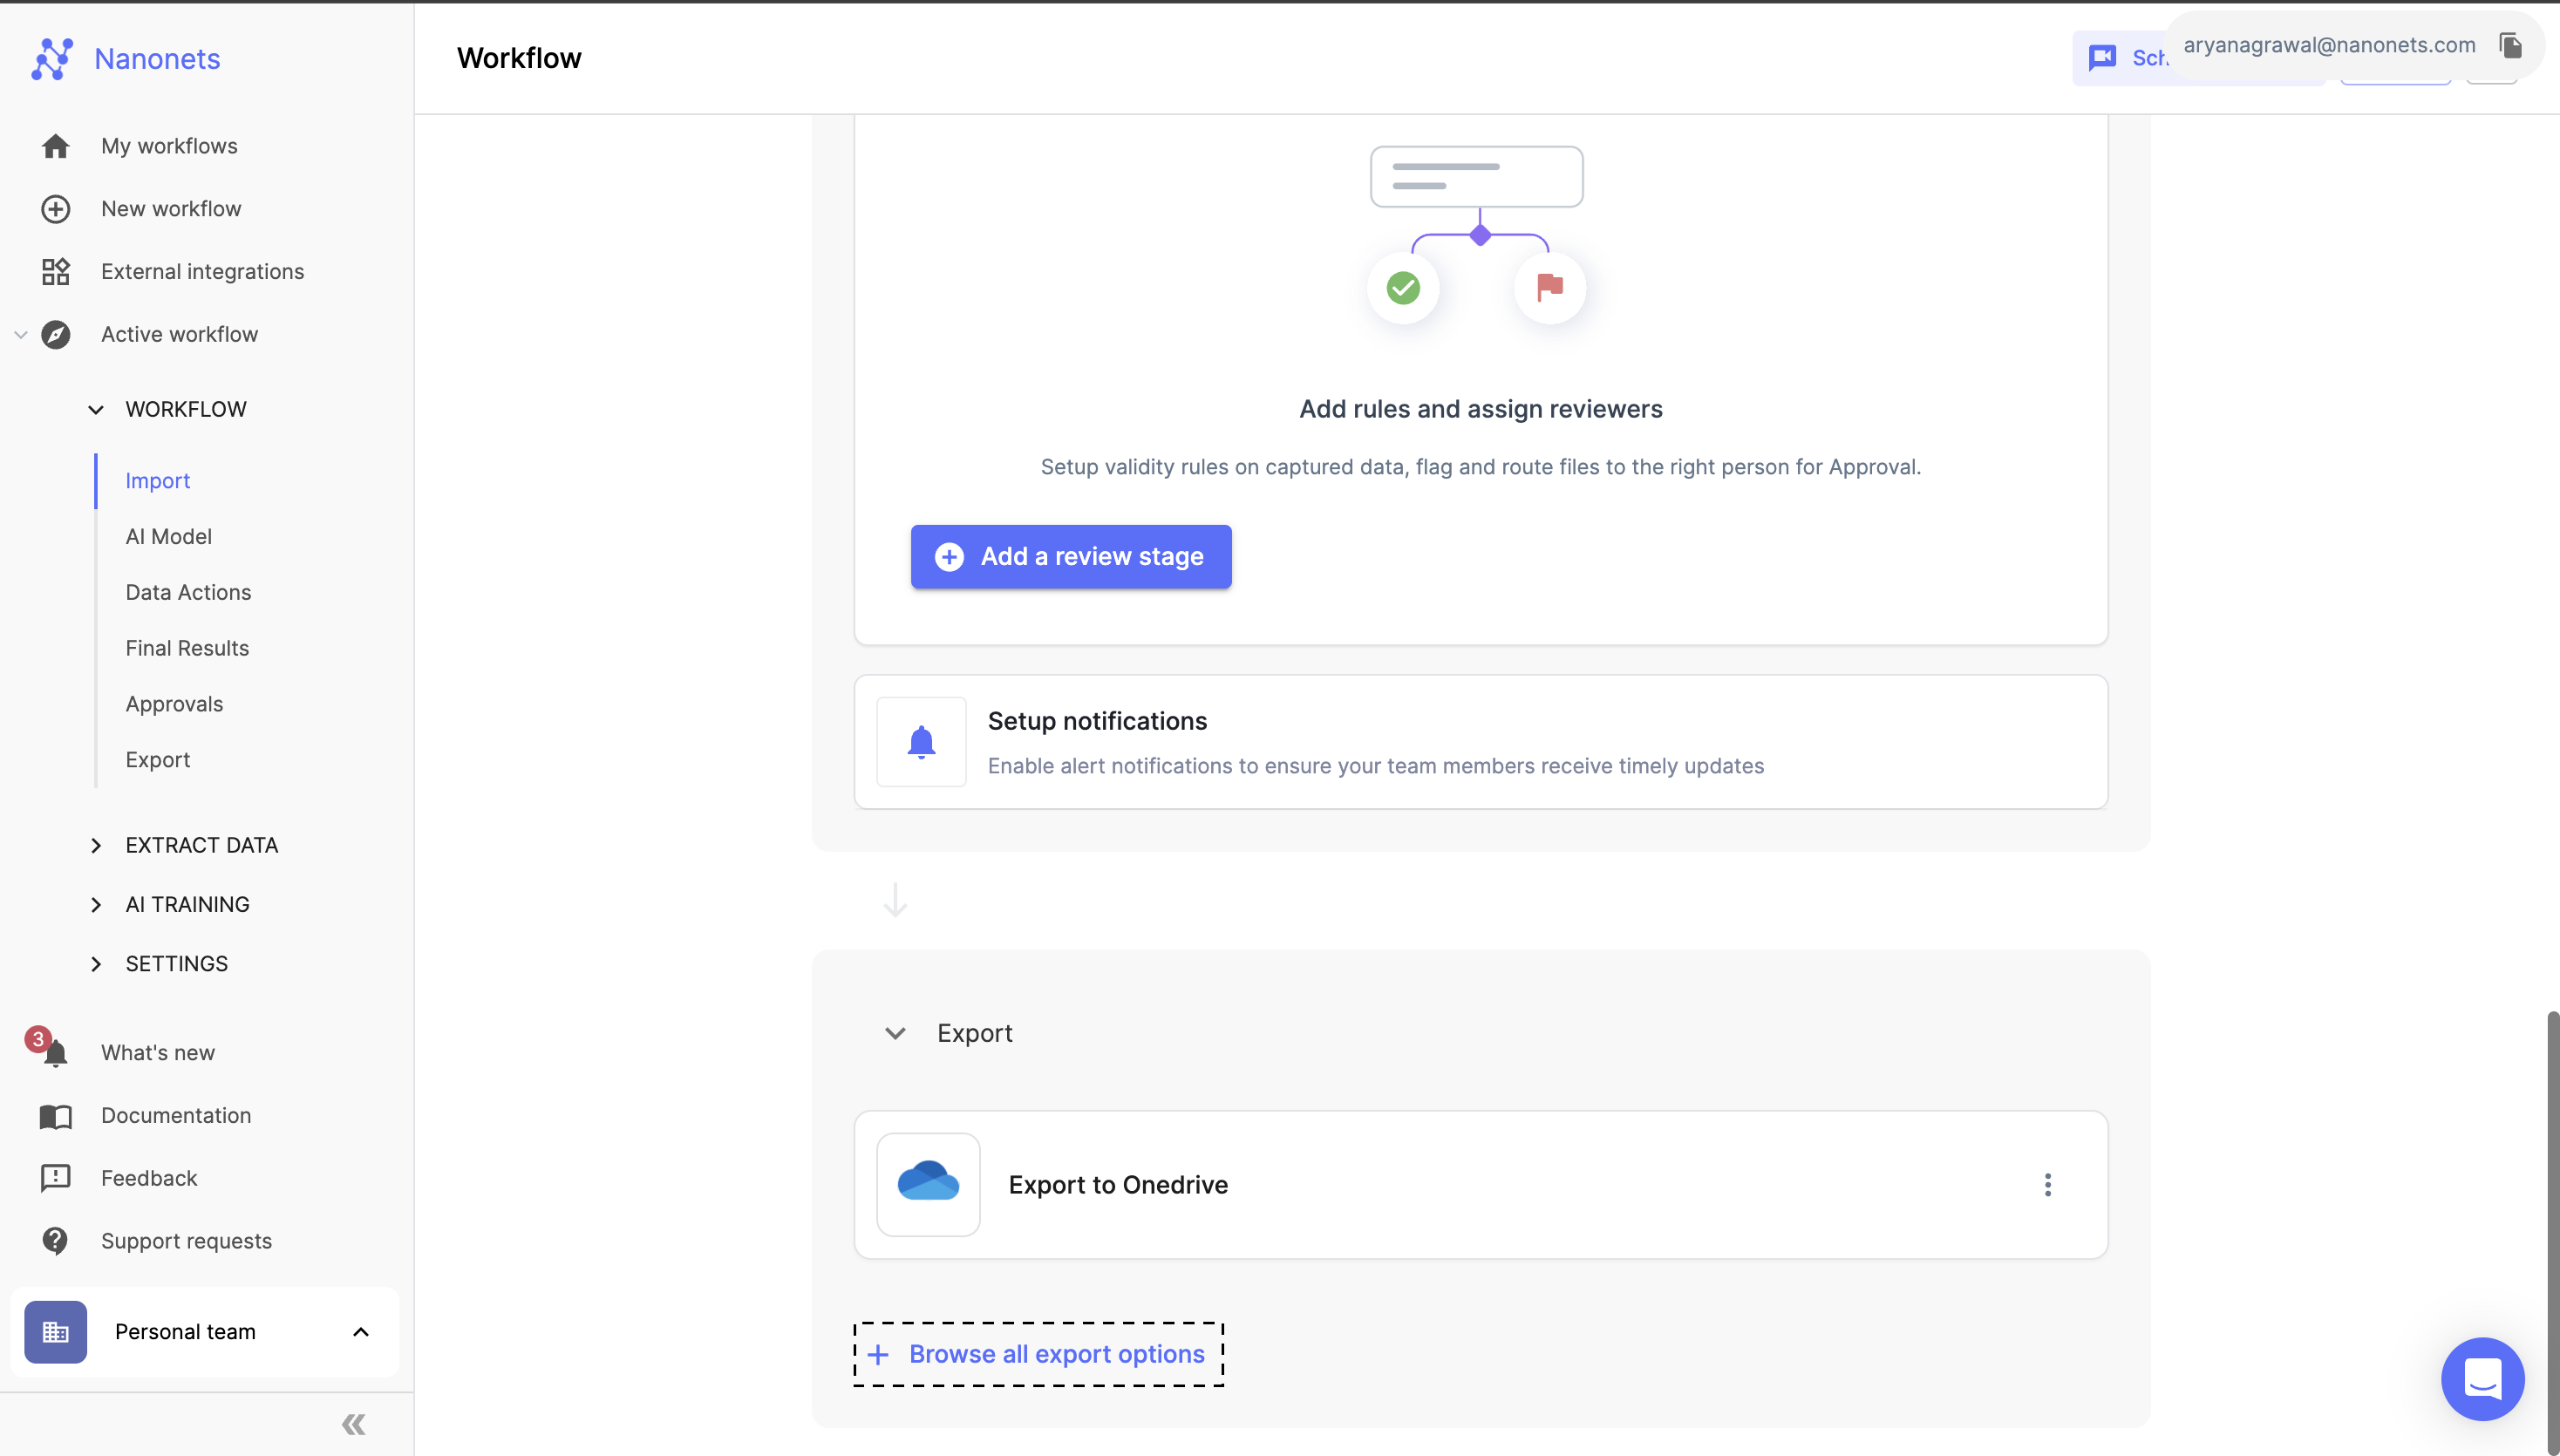
Exports
Configuring Export Block
- Access Workflow: Start by navigating to the 'Workflow' section in the left panel of your Nanonets Extract Data page.
- Browse Export Options: Click on the “Browse all export options” to view all supported export destinations.
- Select Export Block:
- A list of available export options will be displayed.
- Choose the export destination that best fits your needs (e.g., Google Drive, Dropbox, FTP Server, etc).
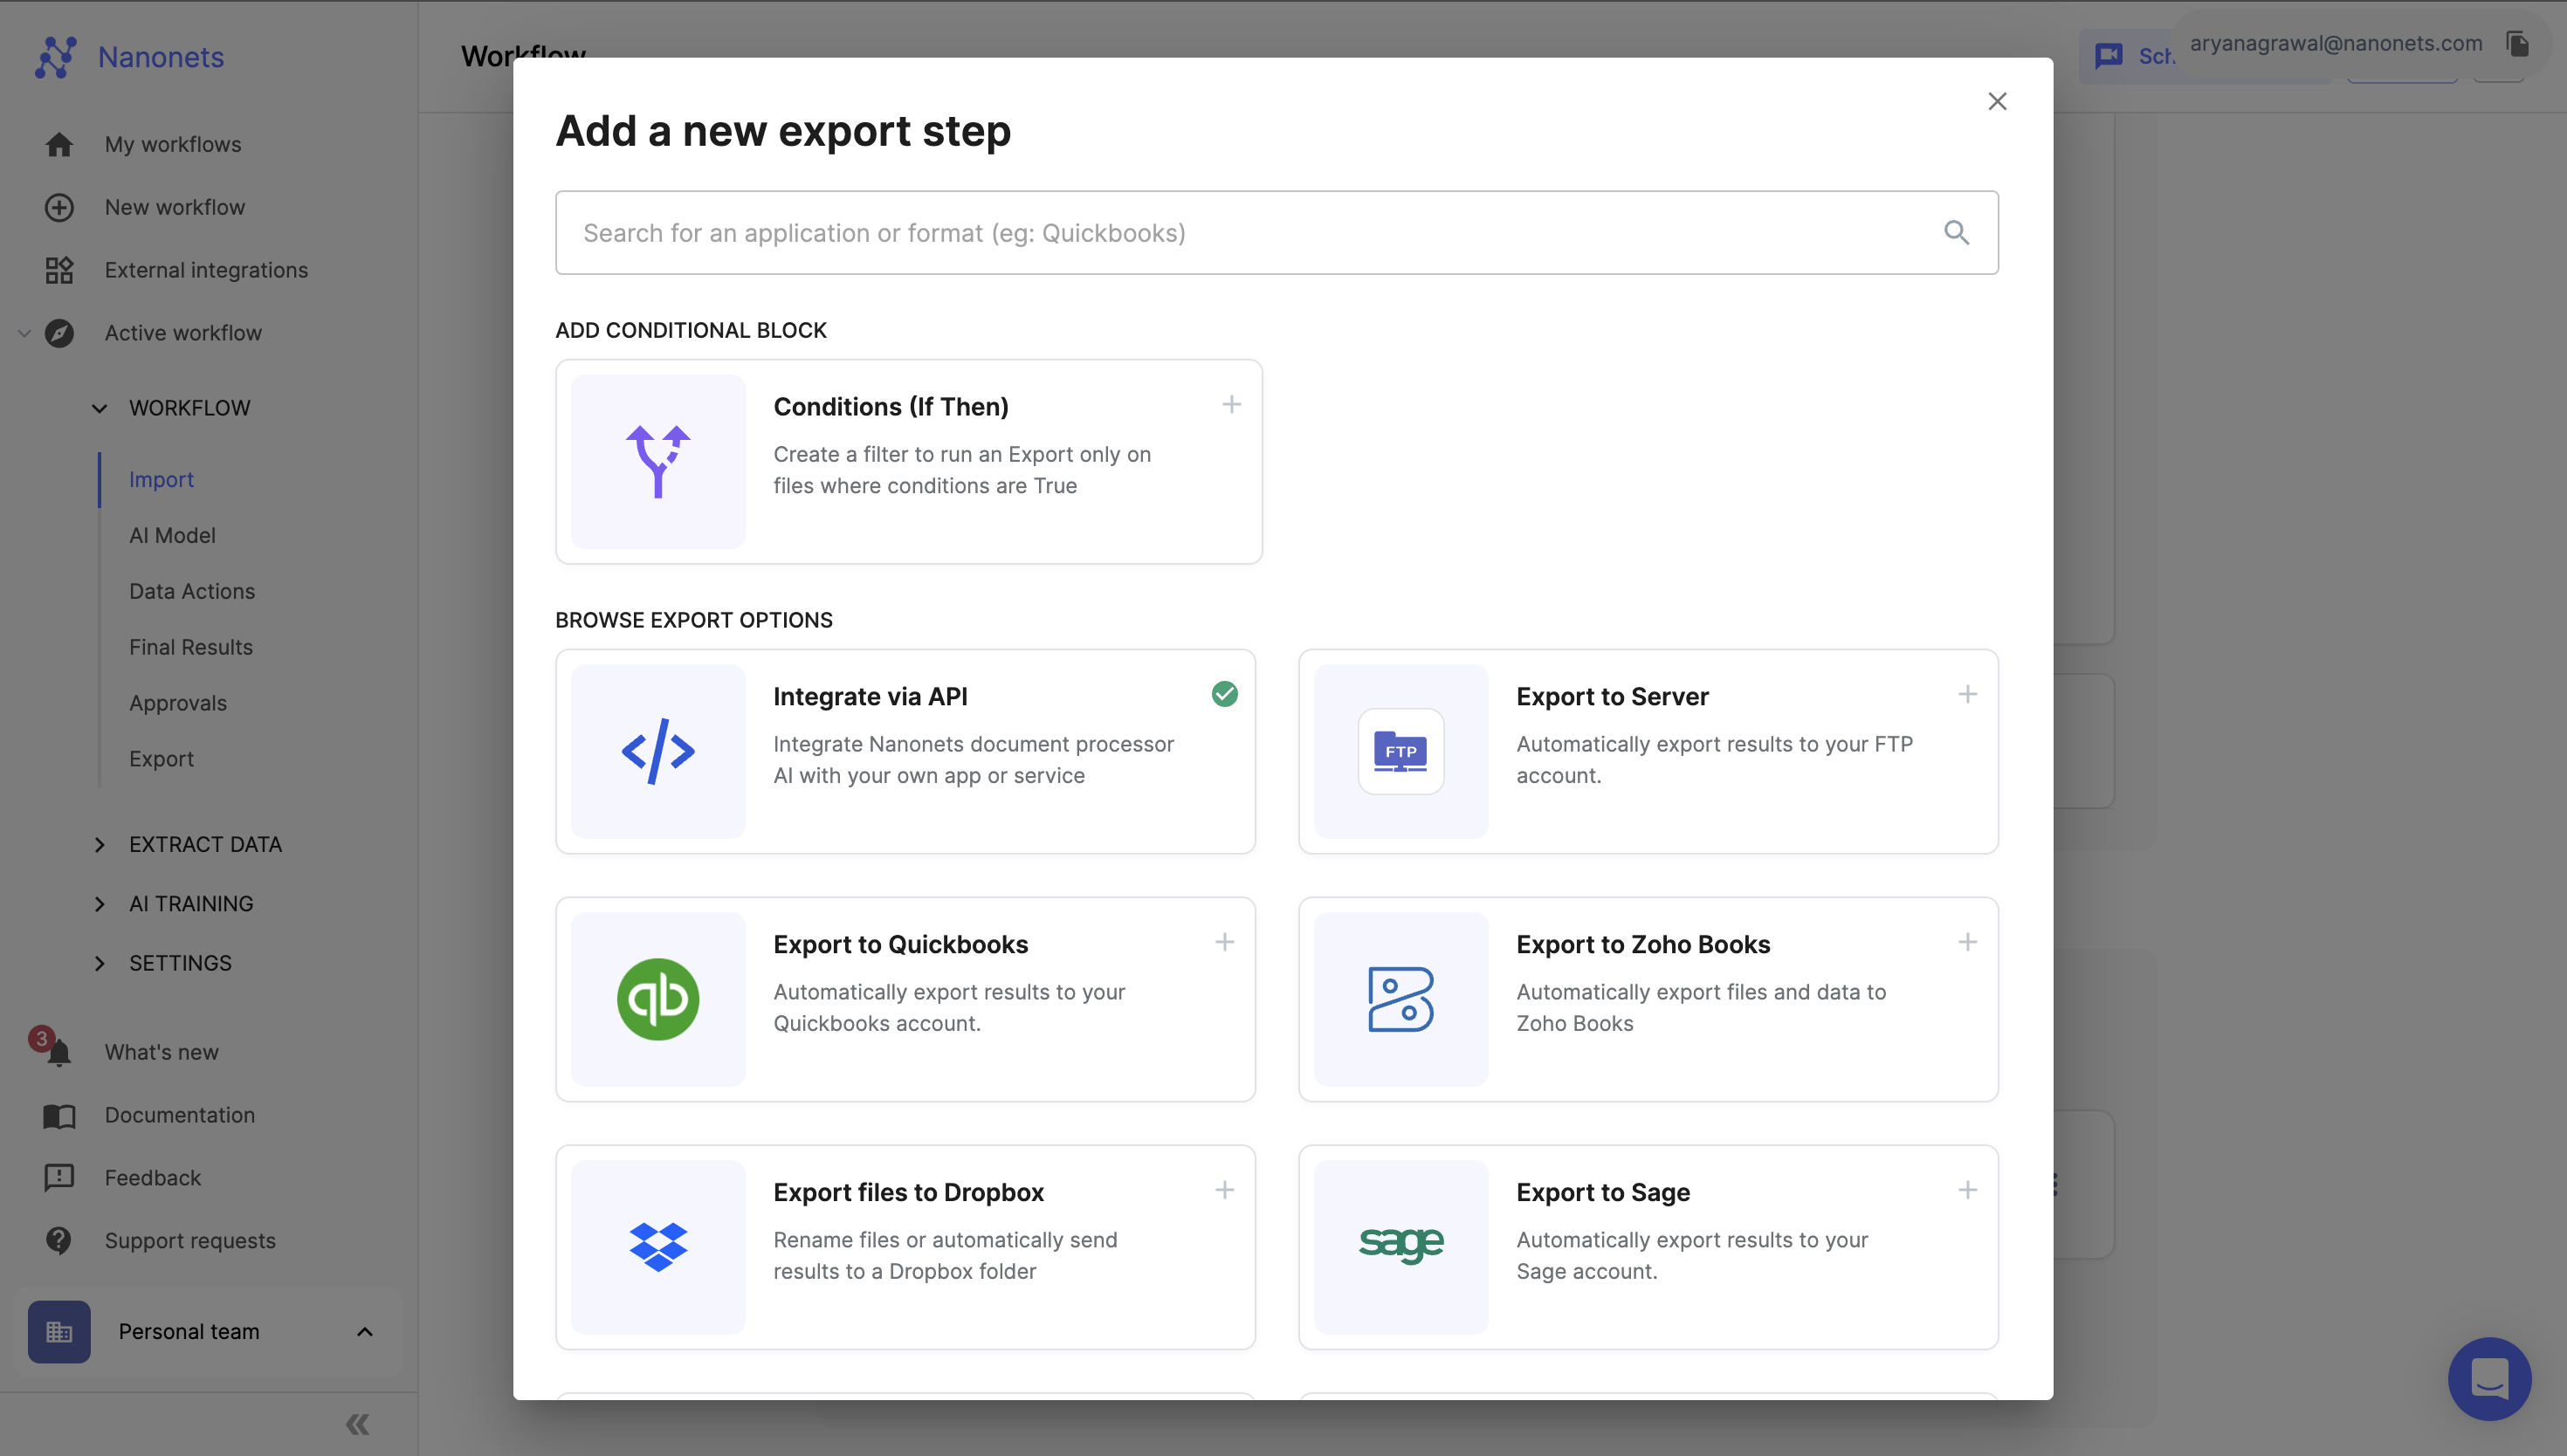
- Authenticate and Configure:
- Depending on the chosen source, you may need to authenticate access. For example, to use Google Drive:
- Click on the Google Drive icon.
- Sign in to your Google Drive account and authorize Nanonets to access your files.
- Configure any necessary settings specific to the export destination.
- Depending on the chosen source, you may need to authenticate access. For example, to use Google Drive:
- Complete Setup:
- After authentication and configuration, click on “Add Integration” to save your settings.
- Verify and Test:
- Ensure that the export block is correctly set up by exporting a test file.
- Verify that the file or the extracted data appears in selected destination.
Note: Not all export blocks may not require authentication. Some export destinations might simply need you to setup the export block by choosing the block.
Updated about 1 year ago
Did this page help you?