
Google Sheets Export
Setting up the export to Google Sheets option within our UI involves a few straightforward steps. Here’s a step-by-step guide to help you through the process:
Step-by-Step Guide to Export to Google Sheets in Nanonets UI
-
Log in to Nanonets:
- Go to the Nanonets website (https://app.nanonets.com/) and log in to your account.
-
Navigate to your Model:
- Once logged in, you should see a list of your models. Click on the model for which you want to set up the Google Sheets export.
-
Go to “Workflow” on the left panel and navigate to “Export”:
- On the left panel, you should see the “Workflow” option, navigate to “Export” and click on “Export to Google Sheets”. It appears as the default.
-
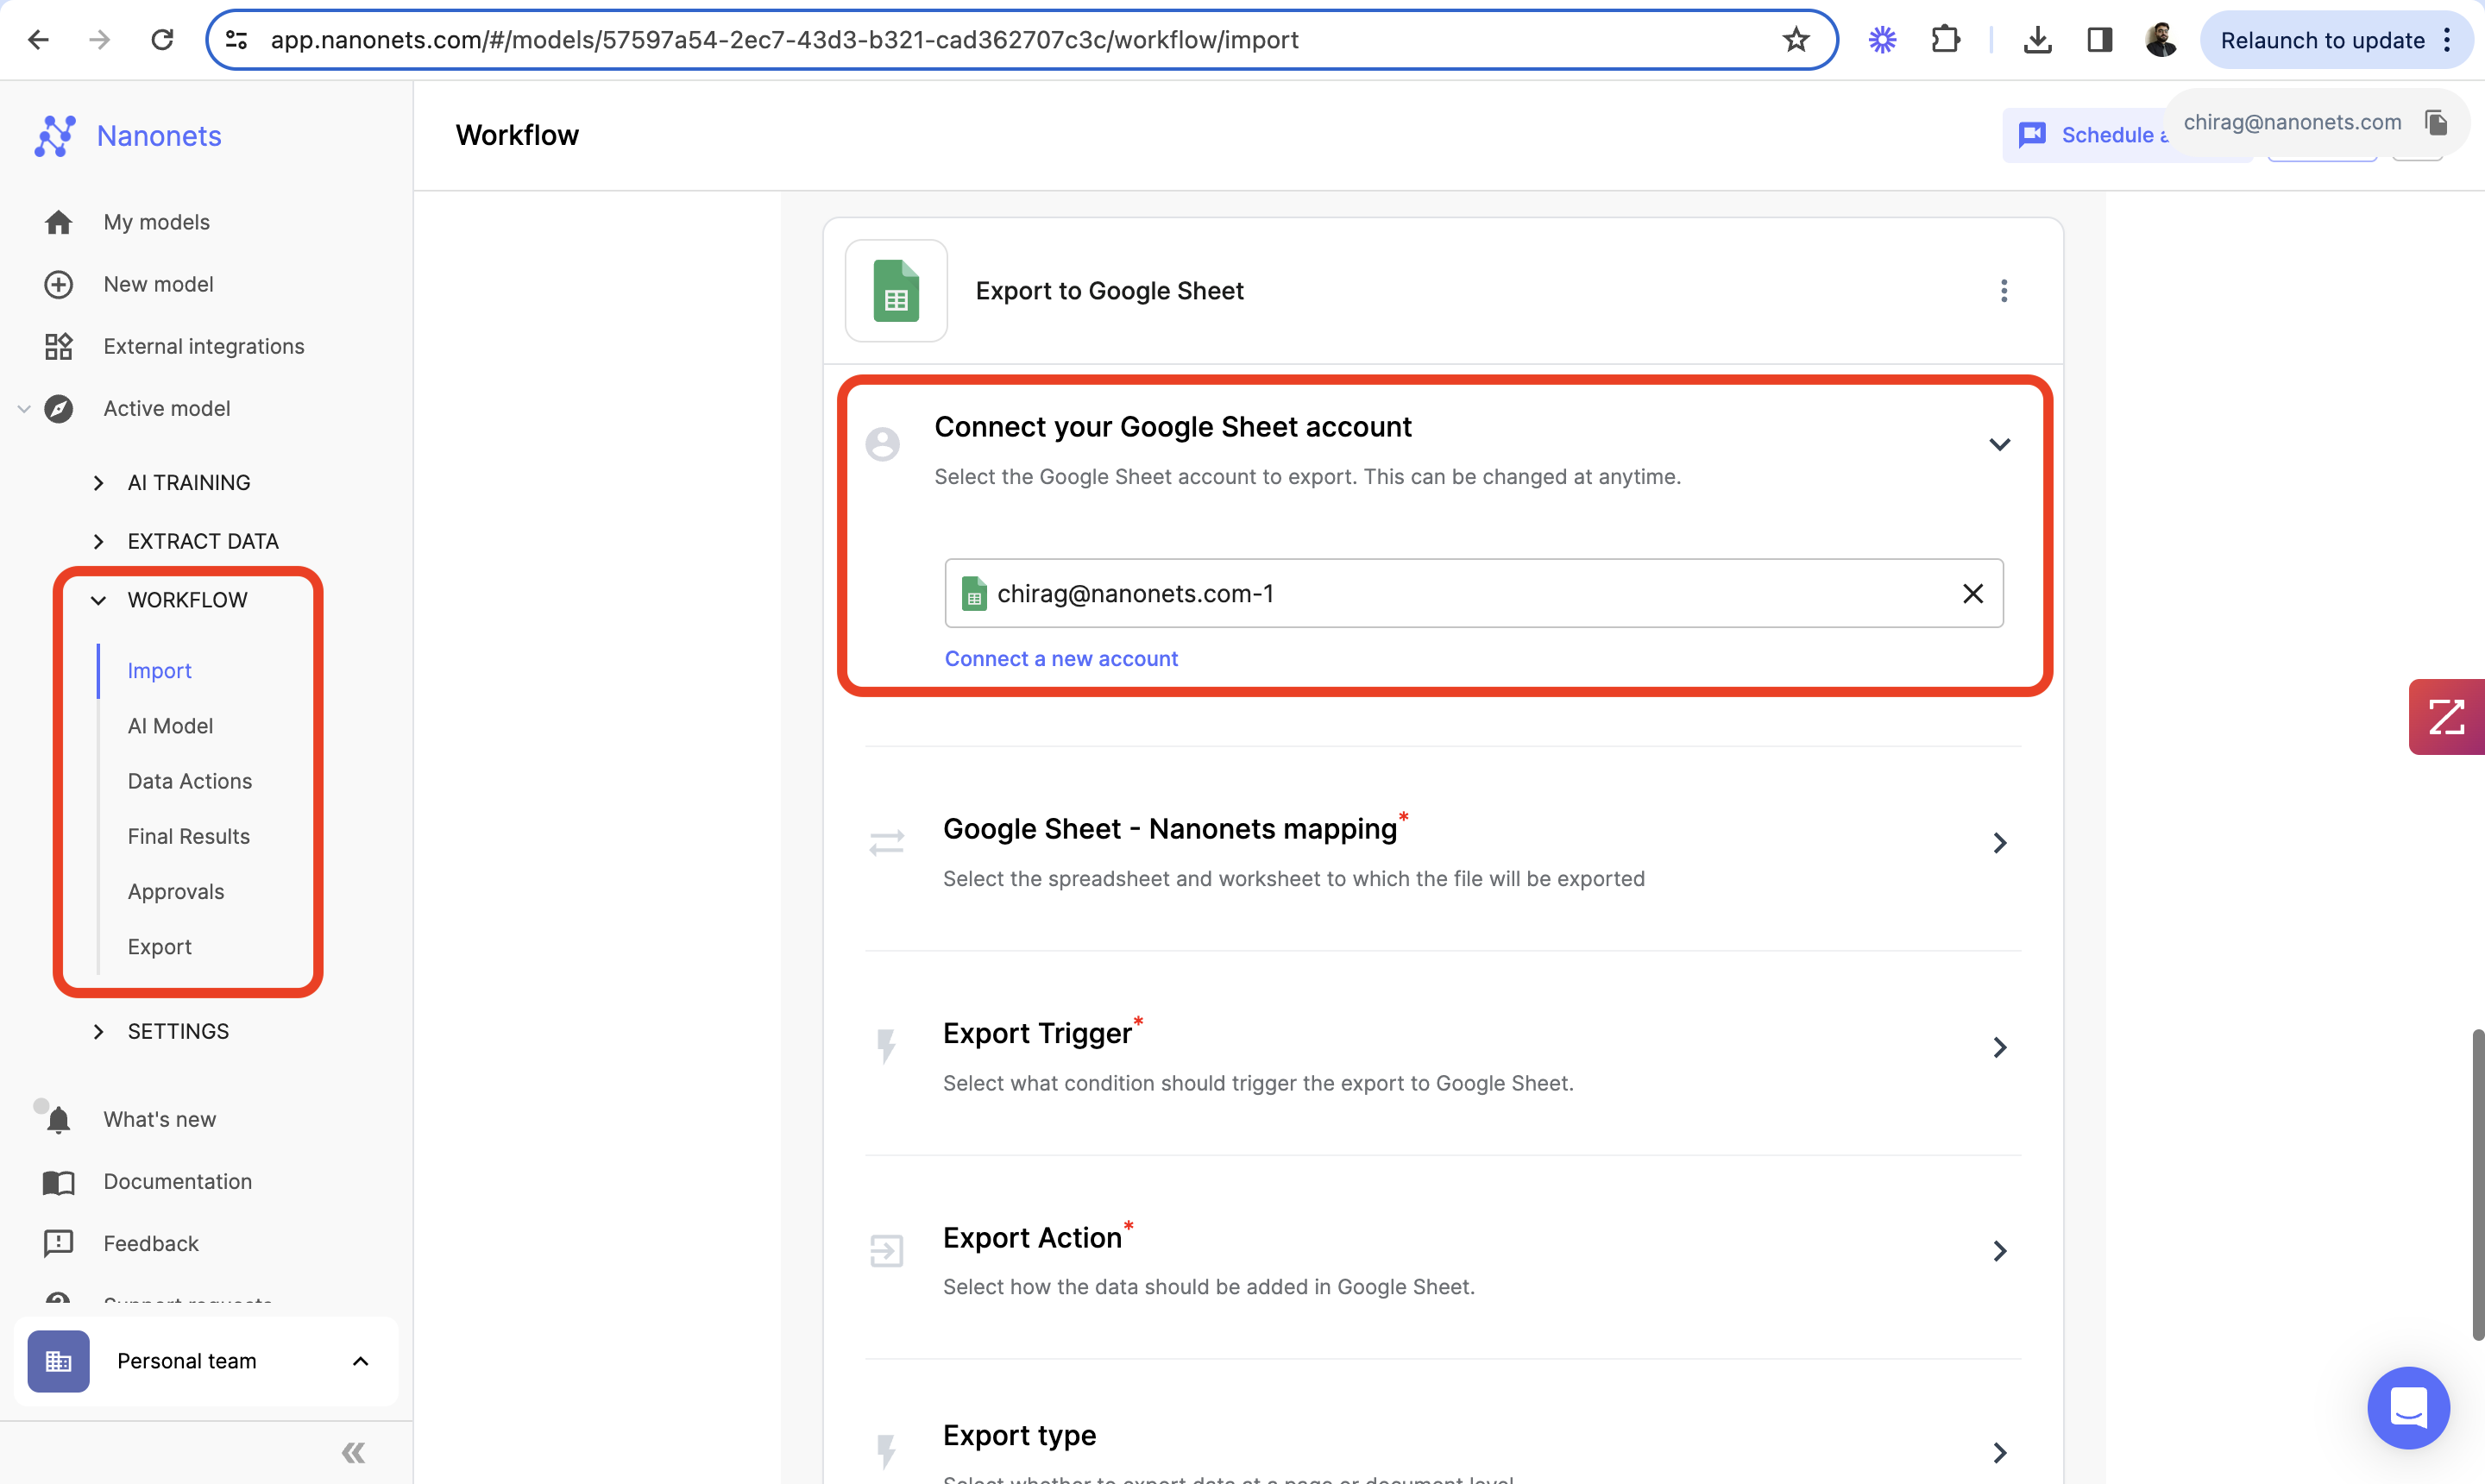
Connect Google Sheets:
- Click on the "Connect Google Sheets" button. This will prompt you to sign in using your Google Account and authorise Nanonets to access your Google account.
- A pop-up window will appear asking for permission to access your Google Sheets. Select the Google account you want to use and grant the necessary permissions. This step is crucial for Nanonets to be able to create and update spreadsheets on your behalf.
-
Choose Google Sheets Destination:
- Once authorised, Nanonets will typically ask you to “choose” from an existing sheet or “create” a new Google Sheets document where the data will be exported.
-
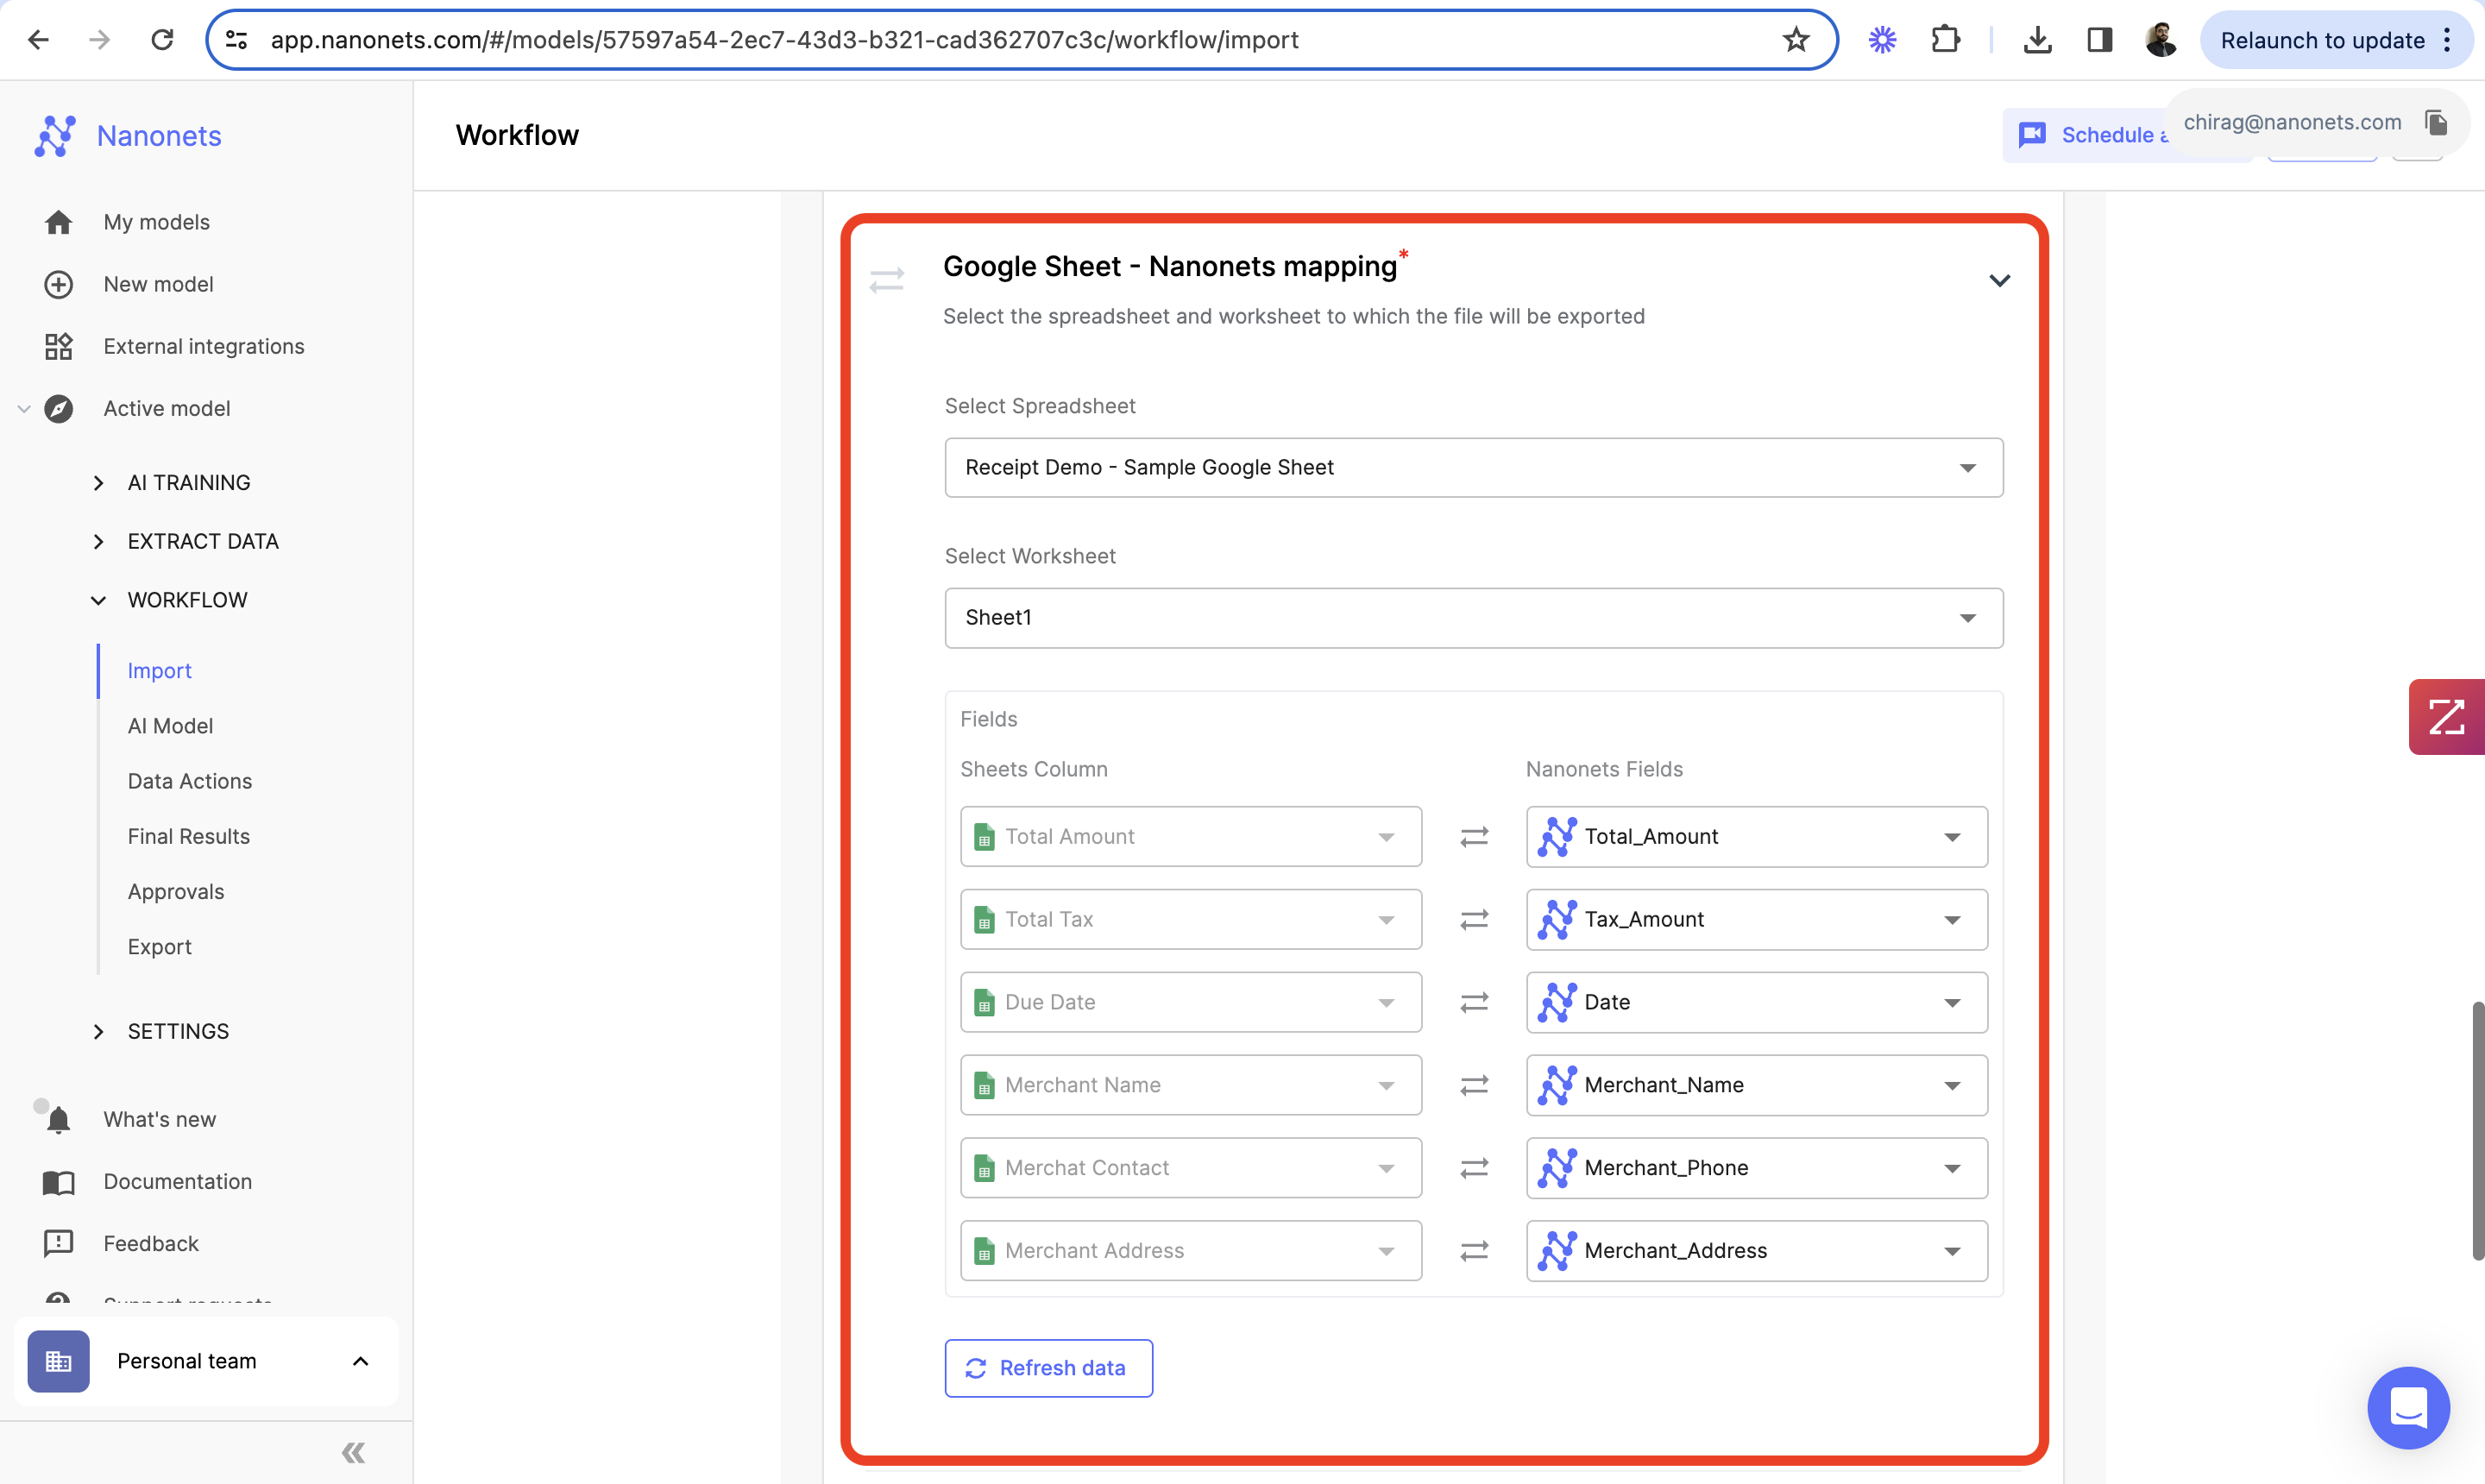
Mapping Extracted Data to Google Sheets:
- The next step is to map the extracted fields from Nanonets (right) to the fields in Google Sheets (left). This allows you to homogenise the order in which the data gets exported to your Google Sheets.
-
Configure and Save Additional Settings:
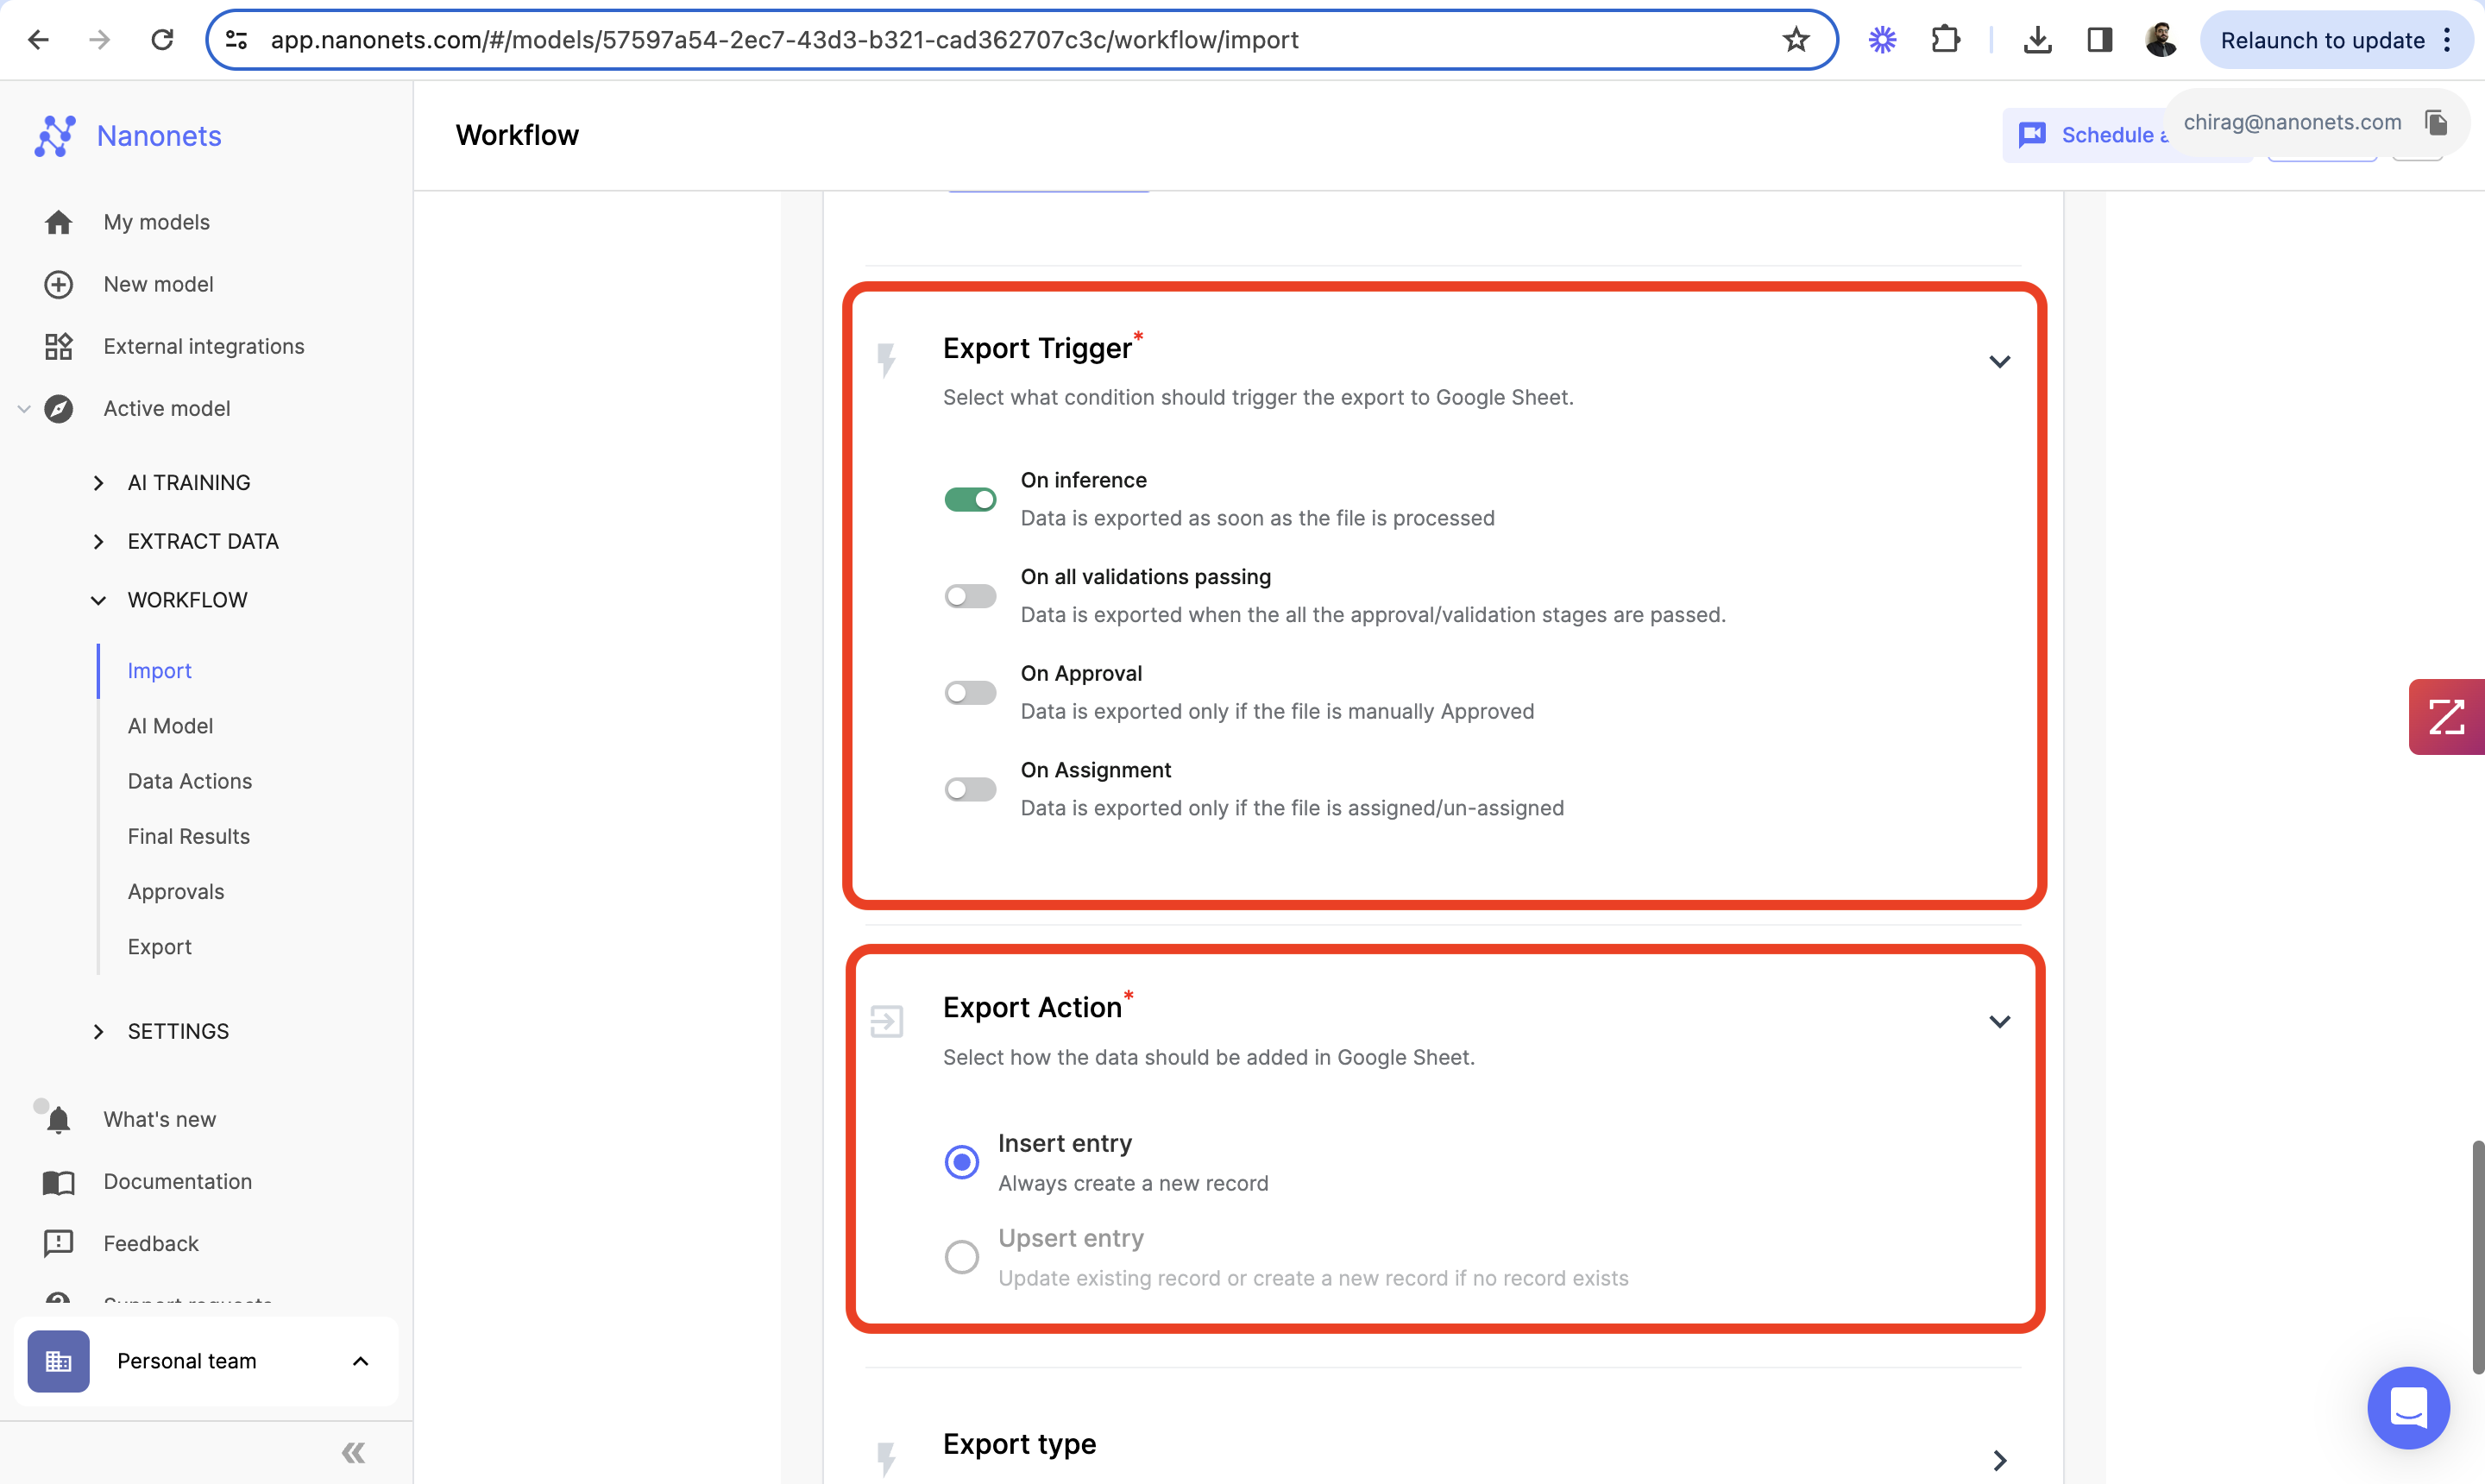
- Export Trigger: This setting will allow you to choose when the extracted data gets exported. On Inference (as soon as the data gets extracted), On all validations passing (as soon as all validations/approvals are passed), On Approval (on manual approval), On assignment (as soon as the file gets assigned / un-assigned to someone from your team). Select the setting that best describes your need.
- Export Action: This describes how the entry for a particular file is created. The available option is Insert Entry, which creates a new record every time a file is exported. Although the Upsert Entry option is visible, it is disabled because Google Sheets does not support the functionality.
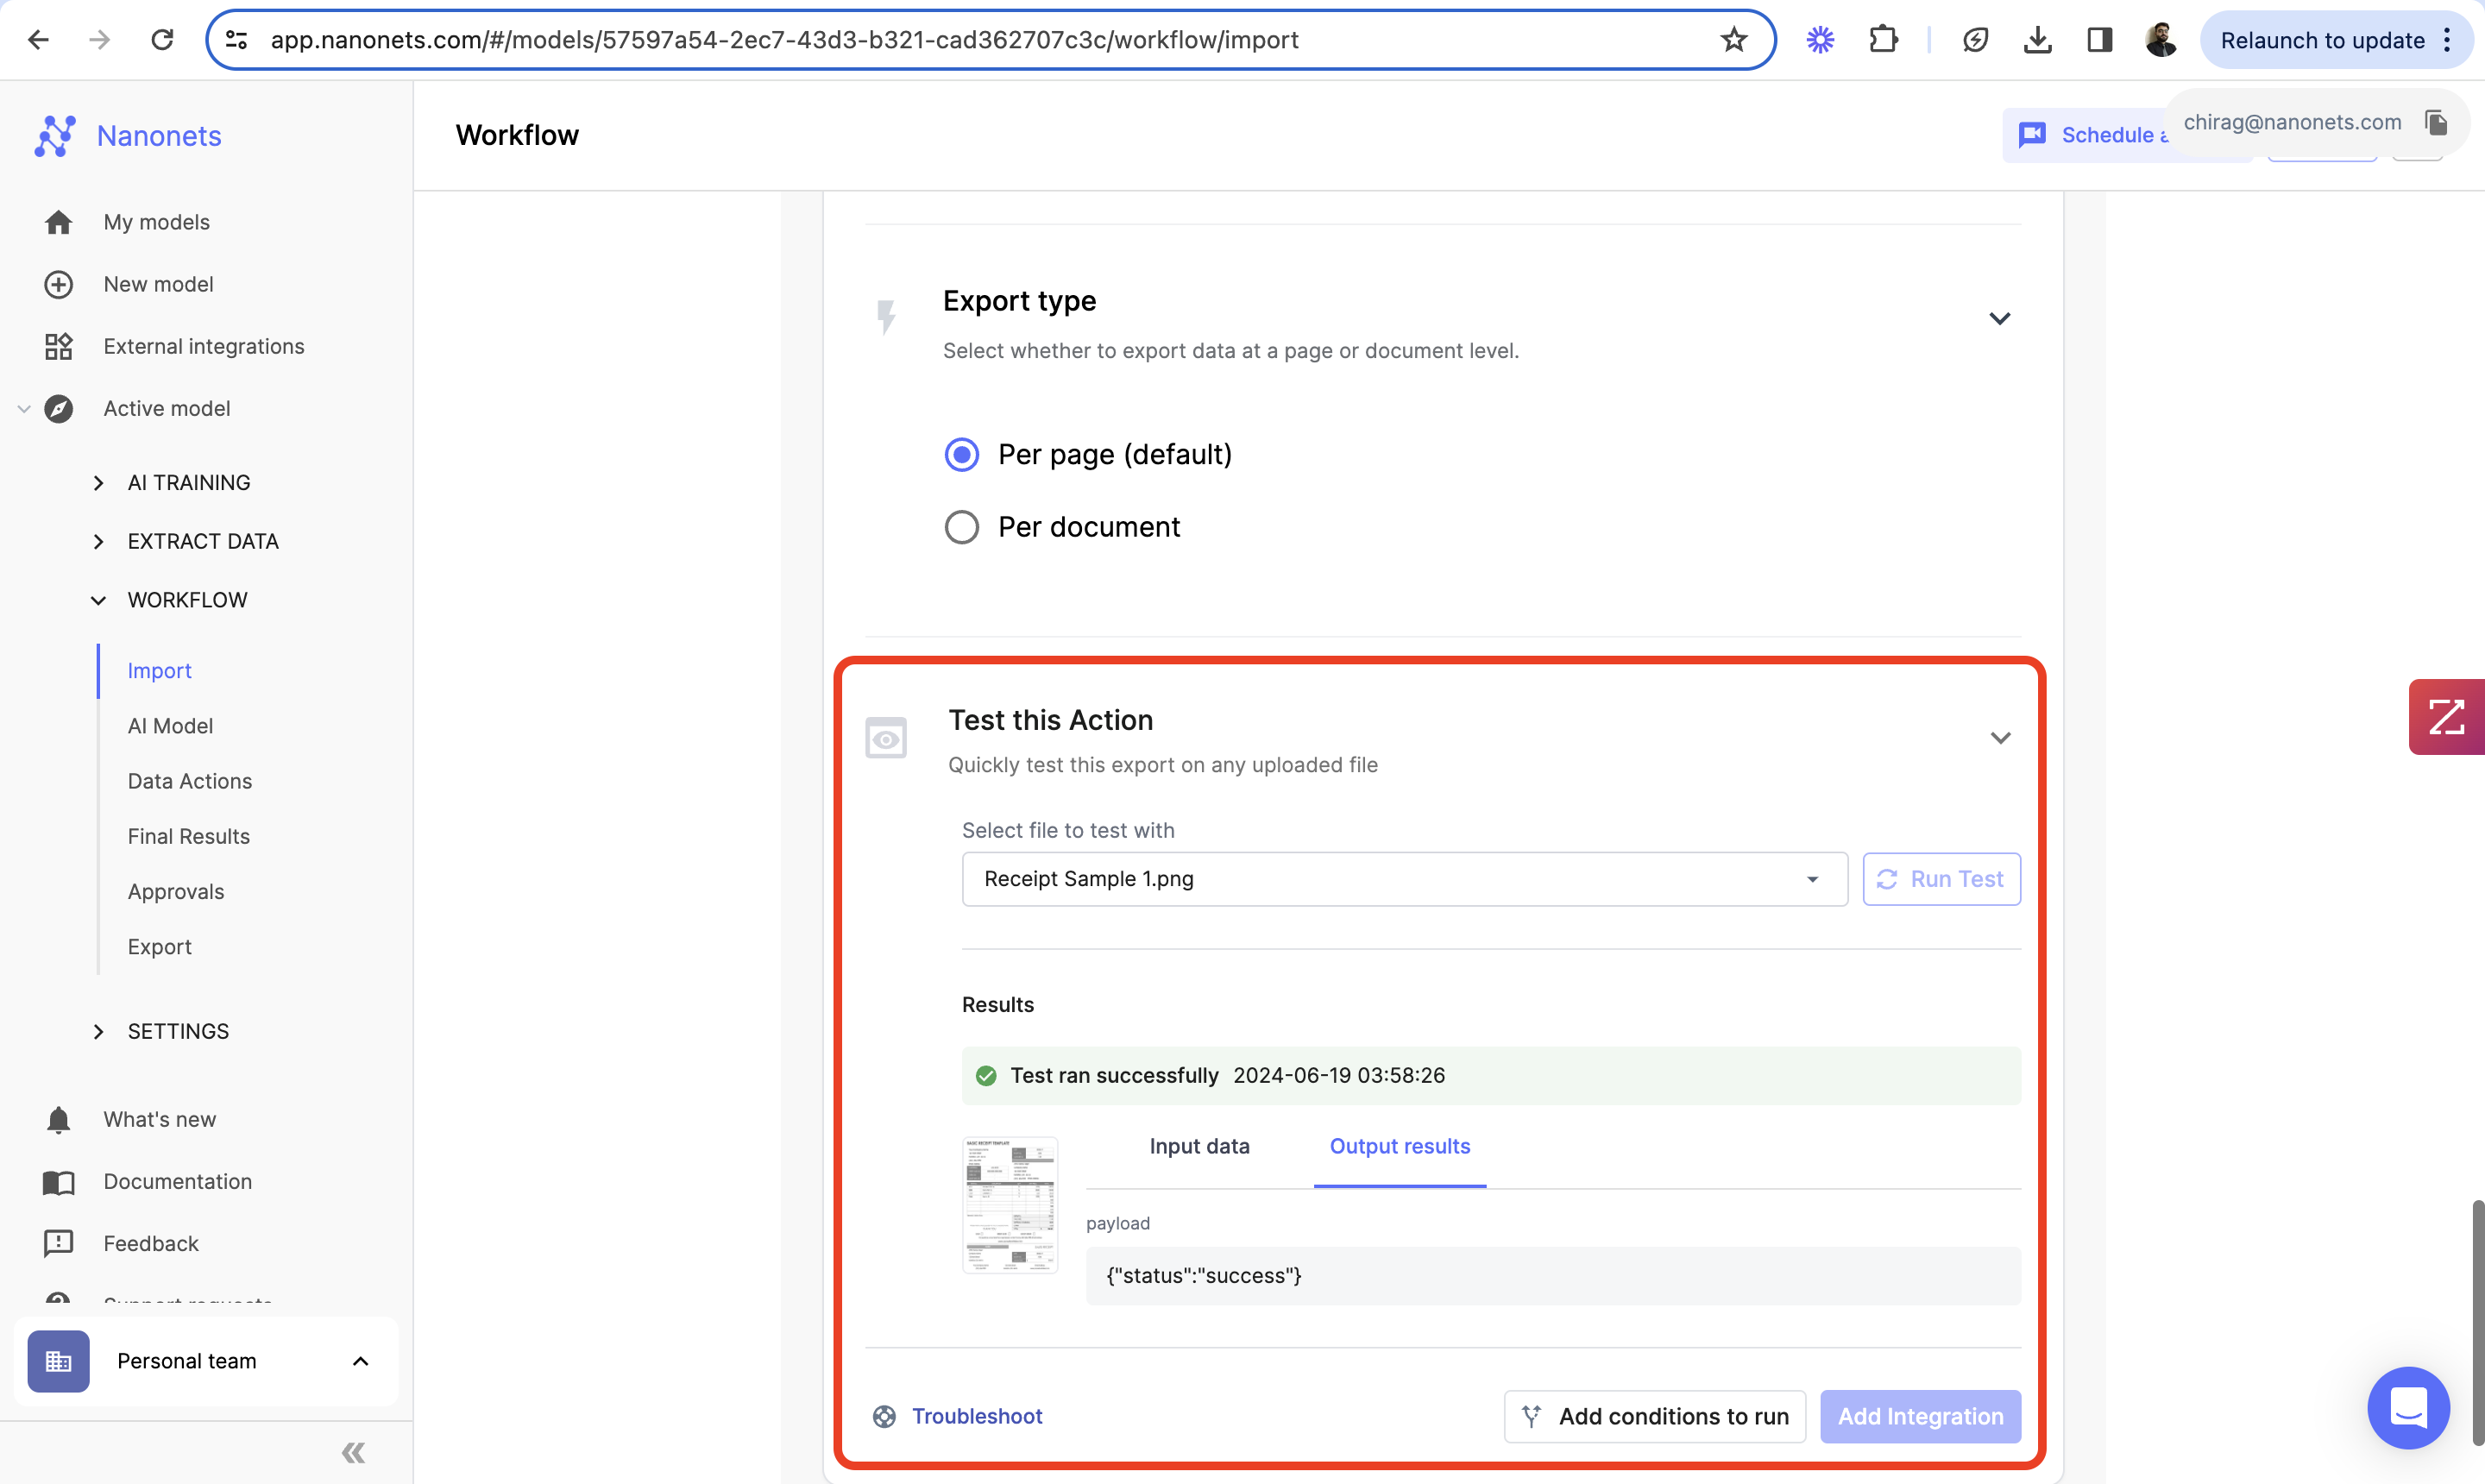
- Export Type: This describes how the export takes place. There are two options, per page (default setting and recommended for multi-page PDFs) and per document (all the data extracted from the document is appended as entries to the google sheet).
- Once you have chosen all settings satisfactorily, you need to save them and test if everything is working fine.
- Test the Integration (Optional):
- There is an option to test the integration to ensure everything is set up correctly. This step can help verify that predictions or results are being correctly exported to Google Sheets.
- Once you have run the test, click on “Add Integration”. Once successfully done, you will see a small green tick-mark next to Export to Google Sheets even if you collapse this section.
- Monitor and Manage:
- Once set up, you can monitor the Google Sheets document to see updates from Nanonets. Make sure the exported data is accurate and in the format you expect.
By following these steps, you should be able to successfully set up the export to Google Sheets option within Nanonets UI and start utilising this feature for automating tedious data entry workflows.
Updated about 1 year ago
Did this page help you?